CANISTER(w/ Canister Pump Module) INSTALLATION
PROCEDURE
-
INSTALL LEAK DETECTION PUMP SUB-ASSEMBLY
-
Engage the 2 claws to install a new leak detection pump sub-assembly to the charcoal canister sub-assembly.
Note
-
Do not allow foreign matter such as grease, oil or water to adhere to the O-rings.
-
Ensure that the claws are engaged properly.
-
-
-
INSTALL CHARCOAL CANISTER BASE BRACKET
-
Engage the claw to install the charcoal canister base bracket.
-
-
INSTALL CANISTER (CHARCOAL CANISTER ASSEMBLY)
-
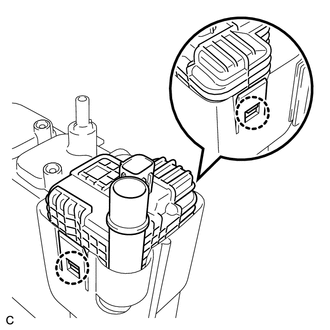
Engage the clip to install the canister (charcoal canister assembly).
-
Install the 3 nuts to the canister (charcoal canister assembly).
- Torque:
- 5.5 N*m { 56 kgf*cm, 49 in.*lbf }
-
Connect the purge line hose to the canister (charcoal canister assembly) and slide the clip to secure it.
-
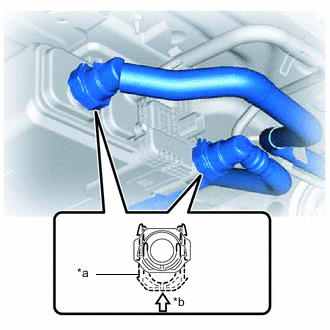
*a Retainer *b Push Push in the vent line hose and air line tube to the canister (charcoal canister assembly) and push in the retainer to engage the lock claws.
Note
-
Check that there are no scratches or foreign matter around the connecting parts of the tube connector and pipe (canister (charcoal canister assembly)) before performing this work.
-
After connecting the vent line hose and air line tube, check that the vent line hose and air line tube are securely connected by pulling on the tube connector and leak detection pump sub-assembly.
-
-
Connect the leak detection pump sub-assembly connector.
-
Connect the wire harness with the 3 clamps.
-
-
INSTALL NO. 1 FLOOR UNDER COVER ASSEMBLY
-
Install the No. 1 floor under cover assembly with the 4 clips and 5 grommets.
-