CANISTER(w/ Canister Pump Module) REMOVAL
PROCEDURE
-
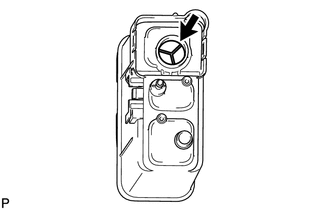
REMOVE NO. 1 FLOOR UNDER COVER ASSEMBLY
-
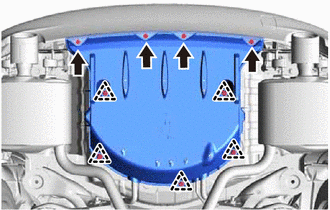
Disconnect the 5 grommets and remove the 4 clips and No. 1 floor under cover assembly.
-
-
REMOVE CANISTER (CHARCOAL CANISTER ASSEMBLY)
-
Disconnect the wire harness from the 3 clamps.
-
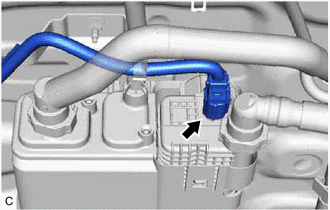
Disconnect the leak detection pump sub-assembly connector.
-
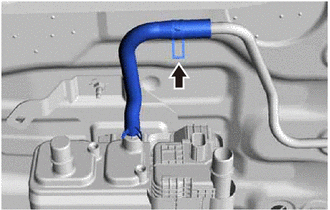
Disconnect the vent line hose and air line tube from the canister (charcoal canister assembly).
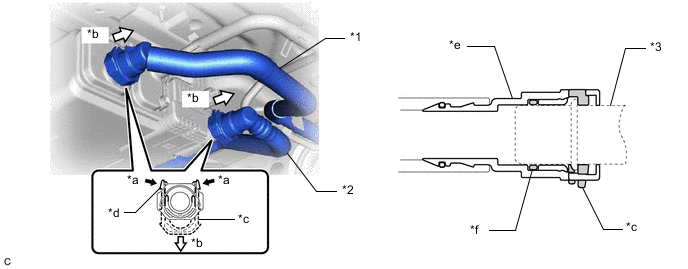
*1 Vent Line Hose *2 Air Line Tube *3 Pipe (Canister (Charcoal Canister Assembly)) - - *a Pinch *b Pull *c Retainer *d Tab *e Tube Connector *f O-Ring Note
-
Remove any dirt or foreign matter on the tube connector before performing this work.
-
Do not allow any scratches or foreign matter to get on the parts when disconnecting them as the tube connector has an O-ring that seals the pipe.
-
Perform this work by hand. Do not use any tools.
-
Do not forcibly bend, twist or turn the vent line hose and air line tube.
-
Protect the disconnected parts by covering them with plastic bags after disconnecting the vent line hose and air line tube.
-
If the tube connector and pipe are stuck, push and pull to release them.
Tech Tips
Do not remove the retainer
-
Pinch the tabs of the retainer to disengage the lock claws and pull it down as shown in the illustration.
-
Pull off the vent line hose and air line tube.
-
-
Slide the clip and disconnect the purge line hose from the purge line pipe.
-
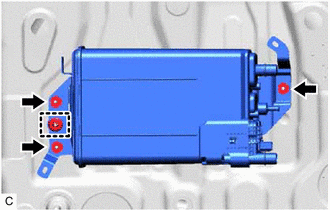
Remove the 3 nuts.
-
Disengage the clip from the body to remove the canister (charcoal canister assembly).
-
-
REMOVE CHARCOAL CANISTER BASE BRACKET
-
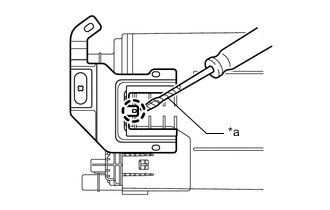
*a Protective Tape Using a screwdriver, disengage the claw and remove the charcoal canister base bracket.
Tech Tips
Tape the screwdriver tip before use.
-
-
REMOVE LEAK DETECTION PUMP SUB-ASSEMBLY
-
Before removing the leak detection pump sub-assembly, clean the charcoal canister sub-assembly by blowing air into it to ensure that the charcoal canister sub-assembly is free of foreign matter.
Note
-
Make sure to clean the charcoal canister sub-assembly using air only.
-
Do not use gasoline, thinners or solvents.
-
-
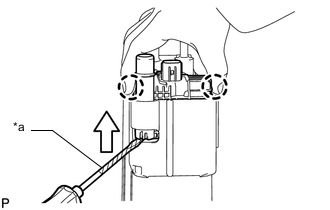
*a Protective Tape While disengaging the 2 claws as shown in the illustration, push the leak detection pump sub-assembly upwards using a screwdriver to remove it.
Tech Tips
Tape the screwdriver tip before use.
-
Check if the charcoal canister sub-assembly contains foreign matter such as mud or water.
-
Visually check that the inside of the charcoal canister sub-assembly is free of foreign matter.
-
Hold the charcoal canister sub-assembly upside down to make sure that it is free of foreign matter.
If the charcoal canister sub-assembly contains foreign matter, replace the canister (charcoal canister assembly).
-
-