CYLINDER HEAD DISASSEMBLY

PROCEDURE
-
REMOVE INTAKE VALVE
-
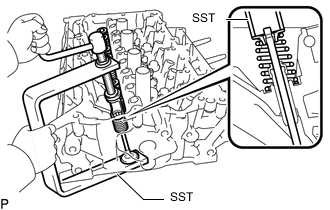
Using SST and wooden blocks, compress the compression spring and remove the valve spring retainer locks.
- SST
- 09202-70020
- 09202-00021
-
Remove the valve spring retainer, compression spring and intake valve.
Tech Tips
Arrange the removed parts in the correct order.
-
-
REMOVE EXHAUST VALVE
CAUTION:
-
The exhaust valve is filled with sodium. Sodium is a strong alkali which may produce a dangerous chemical reaction. Therefore, be very careful when handling and disposing of it.
-
Do not disassemble the exhaust valve for the following reasons: 1) If sodium enters your eyes, vision loss may occur. 2) If sodium contacts your skin, burns may occur. 3) If sodium is exposed to a flame and starts a fire due to the chemical reaction that takes place, burns may occur.
-
If the exhaust valve is damaged, remove the valve and perform the proper procedures to dispose of the sodium. (disposal preparation and actual disposal)
-
When removing a damaged exhaust valve, always wear rubber gloves and safety glasses.
-
Do not cut the exhaust valve to take out the sodium.
Tech Tips
-
The sodium inside the exhaust valve is safe as long as the sodium is not exposed to air.
-
Exhaust valves filled with sodium can be identified by confirming the "NA" identification mark.
-
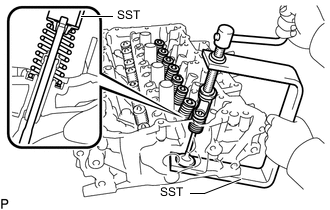
Using SST and wooden blocks, compress the compression spring and remove the valve spring retainer locks.
- SST
- 09202-70020
- 09202-00021
-
Remove the valve spring retainer, compression spring and exhaust valve.
Tech Tips
Arrange the removed parts in the correct order.
-
-
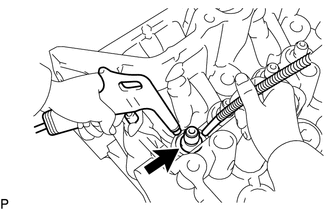
REMOVE VALVE STEM OIL SEAL
-
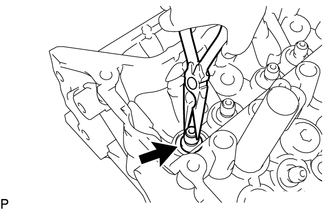
Using needle-nose pliers, remove the valve stem oil seals.
-
-
REMOVE VALVE SPRING SEAT
-
Using compressed air and a magnet hand, remove the valve spring seat by blowing air onto it.
-
-
REMOVE NO. 1 STRAIGHT SCREW PLUG
Note
If coolant leaks from a No. 1 straight screw plug or the plug is corroded, replace it.
-
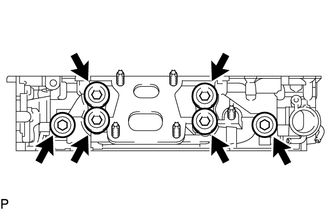
Using a 14 mm straight hexagon wrench, remove the 6 No. 1 straight screw plugs and 6 gaskets.
-
-
REMOVE STUD BOLT
Note
If a stud bolt is deformed or its threads are damaged, replace it.
-
DISPOSE OF EXHAUST VALVE
CAUTION:
-
The exhaust valve is filled with sodium. Sodium is a strong alkali which may produce a dangerous chemical reaction. Therefore, be very careful when handling and disposing of it.
-
Do not disassemble the exhaust valve for the following reasons: 1) If sodium enters your eyes, vision loss may occur. 2) If sodium contacts your skin, burns may occur. 3) If sodium is exposed to a flame and starts a fire due to the chemical reaction that takes place, burns may occur.
-
If the exhaust valve is damaged, remove the valve and perform the proper procedures to dispose of the sodium. (disposal preparation and actual disposal)
-
When removing a damaged exhaust valve, always wear rubber gloves and safety glasses.
-
Do not cut the exhaust valve to take out the sodium.
Note
If it is clearly stated that the industrial waste disposal method is dissolution, carry out the process below.
Tech Tips
-
The sodium inside the exhaust valve is safe as long as the sodium is not exposed to air.
-
Exhaust valves filled with sodium can be identified by confirming the "NA" identification mark.
-
Waste disposal preparation
CAUTION:
Always carry out the following when performing the disposal procedure.
-
Have a fire extinguisher close by.
-
Wear safety glasses.
-
Wear rubber gloves.
-
-
Waste disposal
-
Put on rubber gloves and remove the damaged exhaust valve from the cylinder head sub-assembly.
-
Add 10 L of water or more to a large receptacle (a bucket, oil can, etc.) in a well ventilated area.
-
Hold the damaged exhaust valve upright with pliers or large pair of tweezers and submerge it into the water.
CAUTION:
-
Fully submerge the damaged exhaust valve in water.
-
Do not allow any sparks or other flames near the receptacle as hydrogen gas is generated by the chemical reaction.
-
Stay 2 or 3 m or more away from the receptacle as a strong chemical reaction occurs.
-
-
-