МОНОЛИТНЫЙ КАТАЛИТИЧЕСКИЙ НЕЙТРАЛИЗАТОР СНЯТИЕ
PROCEDURE
-
REMOVE AIR FUEL RATIO SENSOR
-
for Sensor 1:
-
for Sensor 2:
-
-
REMOVE EXHAUST GAS TEMPERATURE SENSOR
-
for Sensor 1:
-
for Sensor 2:
-
-
REMOVE DIFFERENTIAL PRESSURE SENSOR
-
REMOVE WINDSHIELD WIPER MOTOR ASSEMBLY
-
REMOVE NO. 3 COWL TOP PANEL INSULATOR
-
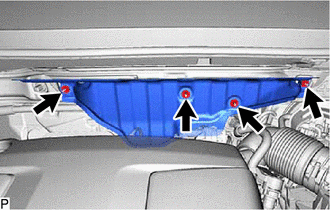
Remove the 4 nuts and No. 3 cowl top panel insulator.
-
-
REMOVE OUTER COWL TOP PANEL
-
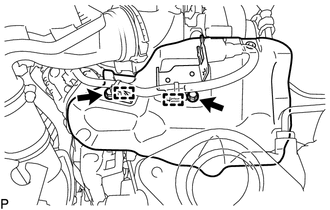
Detach the clamp and disconnect the wire harness from the outer cowl top panel sub-assembly.
-
Remove the 13 bolts and outer cowl top panel sub-assembly.
-
-
REMOVE HEATER AND ACCESSORY ASSEMBLY (w/ Combustion Type Power Heater)
-
REMOVE NO. 1 ENGINE UNDER COVER
-
REMOVE FRONT FLOOR COVER
-
REMOVE NO. 1 FUEL TANK PROTECTOR
-
REMOVE NO. 2 ENGINE UNDER COVER
-
REMOVE FRONT EXHAUST PIPE ASSEMBLY
-
Remove the 4 bolts and 4 compression springs and disconnect the front exhaust pipe assembly from the exhaust manifold converter sub-assembly and tail exhaust pipe assembly.
-
Remove the front exhaust pipe assembly from the 2 exhaust pipe supports.
-
Remove the 2 gaskets from the exhaust manifold converter sub-assembly and front exhaust pipe assembly.
-
-
REMOVE NO. 1 EXHAUST MANIFOLD HEAT INSULATOR
-
Detach the 2 clamps and disconnect the engine wire.
-
Remove the 2 bolts and No. 1 exhaust manifold heat insulator.
-
-
REMOVE EXHAUST MANIFOLD CONVERTER SUB-ASSEMBLY
-
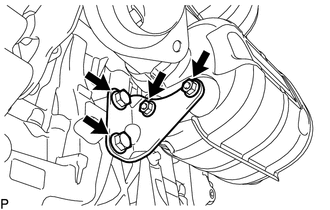
Remove the 2 bolts, 2 nuts and manifold stay.
-
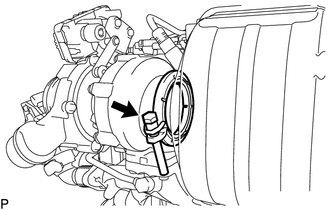
Loosen the V-band clamp.
-
Remove the 3 nuts, 3 bolts, V-band clamp, gasket, engine bracket and exhaust manifold converter sub-assembly.
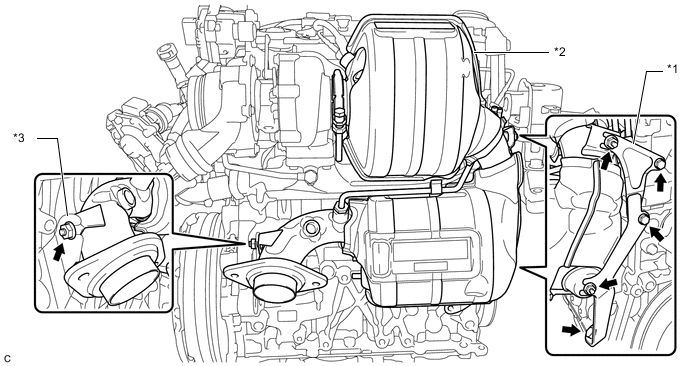
*1 Engine Bracket *2 Exhaust Manifold Converter Sub-assembly *3 No. 2 Manifold Stay - -
-