ТОПЛИВНЫЙ ФИЛЬТР ЗАМЕНА
CAUTION / NOTICE / HINT
Tech Tips
-
When replacing the fuel filter element, use TOYOTA genuine parts.
-
When replacing the fuel filter element, clean the fuel filter case and remove dirt completely.
PROCEDURE
-
REMOVE COWL TOP VENTILATOR LOUVER SUB-ASSEMBLY (for RHD)
-
REMOVE COWL TOP VENTILATOR LOUVER (for LHD)
-
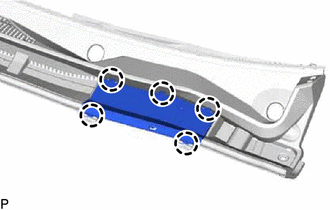
Detach the 5 clows to remove the cowl top ventilator louver.
-
-
REMOVE AIR CLEANER CAP SUB-ASSEMBLY WITH AIR CLEANER HOSE ASSEMBLY
-
REMOVE AIR CLEANER CASE SUB-ASSEMBLY
-
REMOVE NO. 1 FUEL FILTER PROTECTOR
-
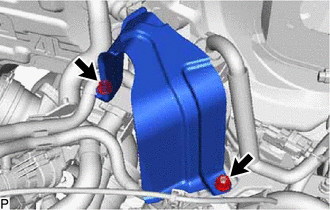
Rmove the 2 nuts and No. 1 fuel filter protector.
-
-
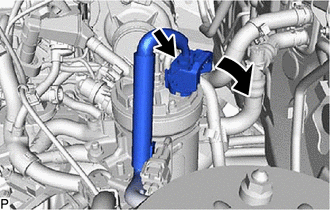
REMOVE FUEL FILTER ELEMENT
-
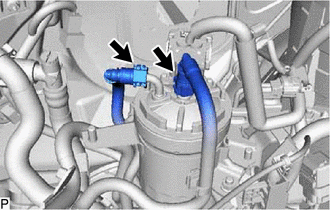
Disconnect the No. 1 fuel hose and No. 3 fuel hose from the fuel filter assemly.
-
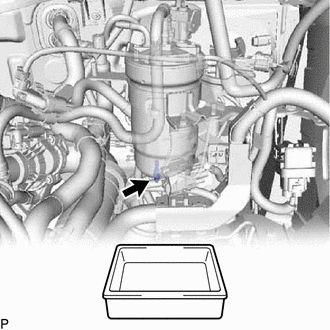
Put a container under the fuel filter assembly.
-
Loosen the drain cock to drain fuel.
-
Tighten the drain cock.
-
Disengage the lock, pull down the lever and disconnect the fuel heater connector.
-
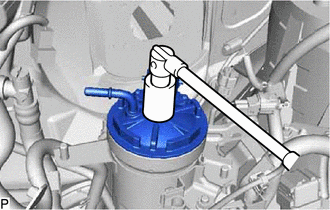
Using a 24 mm deep socket wrench, remove the fuel filter cap from the fuel filter case.
-
Remove the fuel filter element from the fuel filter case.
-
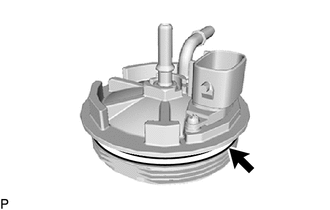
Remove the O-ring from the fuel filter cap.
-
-
INSTALL FUEL FILTER ELEMENT
-
Clean the fuel filter case and remove dirt completely.
-
Install a new O-ring to the fuel filter cap.
-
Install the fuel filter element to the fuel filter case.
-
Using a 24 mm deep socket wrench, install the fuel filter cap to the fuel filter case.
- Torque:
- 25 N*m { 255 kgf*cm, 18 ft.*lbf }
-
Connect the fuel heater connector and lock with the lever.
-
Connect the No. 1 fuel hose and No. 3 fuel hose to the fuel filter assemly.
-
-
INSTALL NO. 1 FUEL FILTER PROTECTOR
-
Install the No. 1 fuel filter protector with the 2 nuts.
- Torque:
- 17.5 N*m { 178 kgf*cm, 13 ft.*lbf }
-
-
INSTALL AIR CLEANER CASE SUB-ASSEMBLY
-
INSTALL AIR CLEANER CAP SUB-ASSEMBLY WITH AIR CLEANER HOSE ASSEMBLY
-
INSTALL COWL TOP VENTILATOR LOUVER (for LHD)
-
Attach the 5 claws to install the cowl top ventilator louver.
-
-
INSTALL COWL TOP VENTILATOR LOUVER SUB-ASSEMBLY (for RHD)
-
INSPECT FOR FUEL LEAK