ВЫПУСКНОЙ КОЛЛЕКТОР СНЯТИЕ

PROCEDURE
-
PRECAUTION (for RHD)
Note
After turning the engine switch off, waiting time maybe required before disconnecting the cable from the negative (-) battery terminal. Therefore, make sure to read the disconnecting the cable from the negative (-) battery terminal notice before proceeding with work.
-
DISCONNECT CABLE FROM NEGATIVE BATTERY TERMINAL (for RHD)
Note
When disconnecting the cable, some systems need to be initialized after the cable is reconnected.
-
DISCONNECT NO. 1 ENGINE ROOM RELAY BLOCK AND NO. 1 JUNCTION BLOCK ASSEMBLY (for RHD)
-
Remove the No. 1 engine room relay block and No. 1 junction block assembly cover.
-
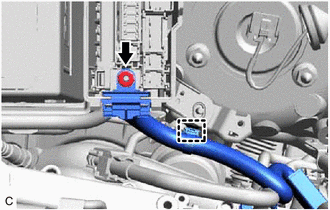
Remove the nut and disconnect the No. 4 engine wire holder from the No. 1 engine room relay block and No. 1 junction block assembly.
-
Disconnect the wire harness clamp from the body.
-
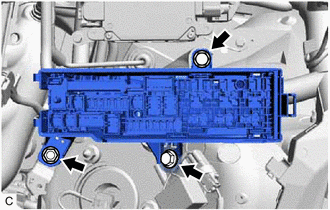
Remove the 2 bolts and nut, separate the No. 1 engine room relay block and No. 1 junction block assembly from the body.
-
-
REMOVE AIR FUEL RATIO SENSOR
-
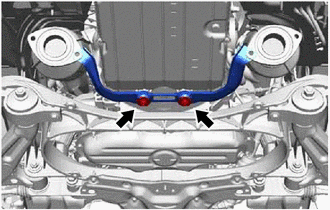
REMOVE FRONT SUSPENSION MEMBER BRACE
-
REMOVE REAR NO. 2 FLOOR BOARD SUB-ASSEMBLY
-
REMOVE REAR NO. 1 FLOOR BOARD SUB-ASSEMBLY
-
REMOVE FRONT CENTER FLOOR BRACE
-
DISCONNECT HEATED OXYGEN SENSOR
-
REMOVE FRONT EXHAUST PIPE ASSEMBLY (TWC: Rear Catalyst)
-
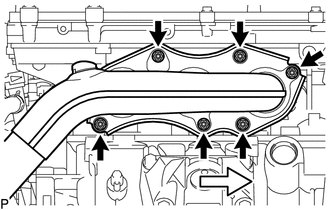
REMOVE NO. 1 EXHAUST PIPE SUPPORT BRACKET SUB-ASSEMBLY
-
Remove the 2 bolts and No. 1 exhaust pipe support bracket sub-assembly from the automatic transmission with transfer assembly.
-
-
REMOVE NO. 2 ENGINE OIL LEVEL DIPSTICK GUIDE
-
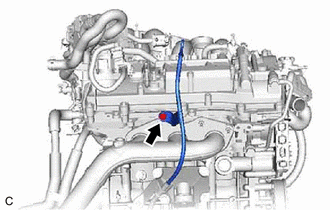
Remove the engine oil level dipstick.
-
Remove the bolt and No. 2 engine oil level dipstick guide from the cylinder block.
-
Remove the O-ring from the No. 2 engine oil level dipstick guide.
-
-
REMOVE EXHAUST MANIFOLD SUB-ASSEMBLY RH (TWC: Front Catalyst)
-


Front Using a 12 mm deep socket wrench, remove the 6 nuts and exhaust manifold sub-assembly RH (TWC: Front Catalyst).
-
Remove the gasket from the cylinder head sub-assembly.
-
-
REMOVE EXHAUST MANIFOLD SUB-ASSEMBLY LH (TWC: Front Catalyst)
-
Front Using a 12 mm deep socket wrench, remove the 6 nuts and exhaust manifold sub-assembly LH (TWC: Front Catalyst).
-
Remove the gasket from the cylinder head sub-assembly.
-