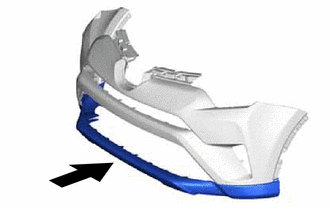
FRONT BUMPER REASSEMBLY
CAUTION / NOTICE / HINT
PROCEDURE
-
INSTALL FRONT BUMPER MOULDING
-
Install the front bumper guard with the 11 clips.
-
-
INSTALL FRONT BUMPER GUARD
-
Install the front bumper guard as shown in the illustration.
-
Install the 2 clips.
-
-
INSTALL FRONT BUMPER GUARD PAD LH
-
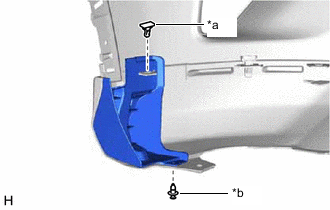
*a Clip A *b Clip B Install the front bumper guard pad LH with the clip labeled B.
-
Install the clip labeled A.
-
-
INSTALL FRONT BUMPER GUARD PAD RH
Tech Tips
Use the same procedure described for the LH side.
-
INSTALL LOWER RADIATOR GRILLE LH
-
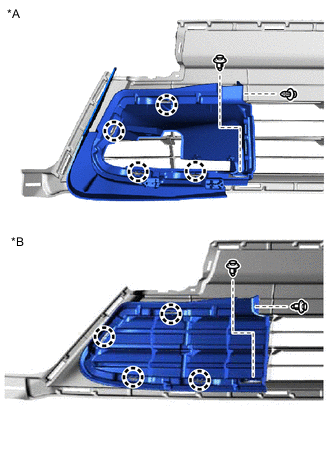
*A for Automatic Transaxle (U660F) *B except Automatic Transaxle (U660F) Attach the 4 claws to install the lower radiator grille LH.
-
Install the 2 clips.
-
for Automatic Transaxle (U660F):
-
Close the lower radiator grille LH with the clip as shown in the illustration.
-
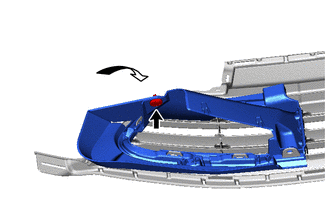
Attach the 2 claws and 2 guides to install the duct.
-
Install the 2 screws.
-
-
-
INSTALL LOWER NO. 2 RADIATOR GRILLE
-
Attach the 22 claws to install the lower No. 2 radiator grille.
-
Install the 2 clips.
-
-
INSTALL FRONT BUMPER ARM HOLE COVER LH
-
Attach the 4 claws and guide to install the front bumper arm hole cover LH.
-
-
INSTALL FRONT BUMPER ARM HOLE COVER RH
Tech Tips
Use the same procedure described for the LH side.
-
INSTALL FRONT BUMPER EXTENSION LH
-
Install the front bumper extension LH with the 5 clips.
-
-
INSTALL FRONT BUMPER EXTENSION RH
Tech Tips
Use the same procedure described for the LH side.
-
INSTALL LOWER NO. 1 RADIATOR GRILLE
-
Attach the 16 claws and 2 guides to install the lower No. 1 radiator grille.
-
-
INSTALL RADIATOR GRILLE SUB-ASSEMBLY
-
INSTALL FRONT BUMPER EXTENTION MOUNTING BRACKET
-
Install the front bumper extension moulding bracket with the 2 screws.
-
-
INSTALL FRONT BUMPER EXTENSION MOULDING LH (w/ Fog Light)
-
Attach the 3 claws to install the front bumper extension moulding LH.
-
-
INSTALL FRONT BUMPER EXTENSION MOULDING RH (w/ Fog Light)
Tech Tips
Use the same procedure described for the LH side.
-
INSTALL FRONT BUMPER HOLE COVER LH
-
Attach the 5 claws to install the front bumper hole cover LH.
-
Install the clip.
-
-
INSTALL FRONT BUMPER HOLE COVER RH
Tech Tips
Use the same procedure described for the LH side.
-
INSTALL NO. 3 ENGINE ROOM WIRE
-
Attach each clamp to install the No. 3 engine room wire.
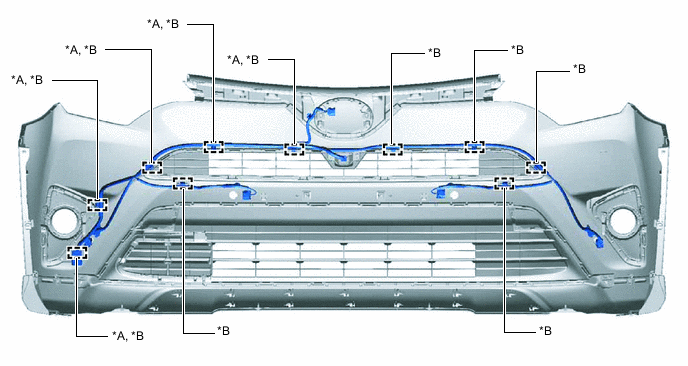
*A w/ Pre-crash Safety System *B w/ TOYOTA Parking Assist-sensor System
-
-
INSTALL FOG LIGHT ASSEMBLY LH (w/ Fog Light)
-
INSTALL FOG LIGHT ASSEMBLY RH (w/ Fog Light)
Tech Tips
Use the same procedure described for the LH side.
-
INSTALL HEADLIGHT WASHER ACTUATOR SUB-ASSEMBLY LH (w/ Headlight Cleaner System)
-
INSTALL HEADLIGHT WASHER ACTUATOR SUB-ASSEMBLY RH (w/ Headlight Cleaner System)
Tech Tips
Use the same procedure described for the LH side.
-
INSTALL HEADLIGHT CLEANER HOSE (w/ Headlight Cleaner System)
-
INSTALL TYPE 1 HEADLIGHT WASHER NOZZLE SUB-ASSEMBLY LH (w/ Headlight Cleaner System)
-
INSTALL TYPE 1 HEADLIGHT WASHER NOZZLE SUB-ASSEMBLY RH (w/ Headlight Cleaner System)
Tech Tips
Use the same procedure described for the LH side.
-
INSTALL FRONT TELEVISION CAMERA ASSEMBLY (w/ Panoramic View Monitor System)
-
INSTALL NO. 1 ULTRASONIC SENSOR (w/ TOYOTA Parking Assist-sensor System)
-
INSTALL ULTRASONIC SENSOR CLIP (w/ TOYOTA Parking Assist-sensor System)
-
INSTALL MILLIMETER WAVE RADAR SENSOR ASSEMBLY (w/ Pre-crash Safety System)