HIGH INTENSITY DISCHARGE HEADLIGHT BULB(for HID Headlight) REMOVAL
CAUTION / NOTICE / HINT
Tech Tips
-
Use the same procedure for the RH and LH sides.
-
The procedure listed below is for the LH side.
PROCEDURE
-
PRECAUTION
Note
After turning the ignition switch off, waiting time may be required before disconnecting the cable from the battery terminal. Therefore, make sure to read the disconnecting the cable from the battery terminal notice before proceeding with work.
-
DISCONNECT CABLE FROM NEGATIVE BATTERY TERMINAL
Note
When disconnecting the cable, some systems need to be initialized after the cable is reconnected.
-
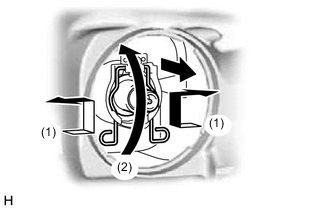
REMOVE HEADLIGHT LIGHT CONTROL ECU SUB-ASSEMBLY
-
for RH Side:
-
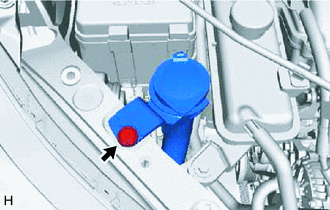
Remove the clip.
-
Move the washer tank as shown in the illustration.
-
-
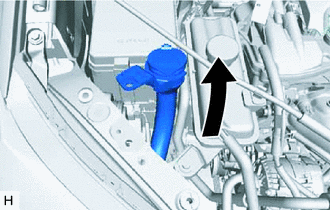
Disconnect the connector.
-
Turn the headlight light control ECU sub-assembly in the direction indicated by the arrow in the illustration to separate the headlight light control ECU sub-assembly from the headlight unit.
Note
-
Do not apply excessive force using a tool.
-
Do not damage the headlight gasket or allow it to become contaminated with foreign matter. If the headlight gasket is damaged or contaminated, water may get into the headlight assembly, resulting in a malfunction of the headlight light control ECU sub-assembly.
-
-
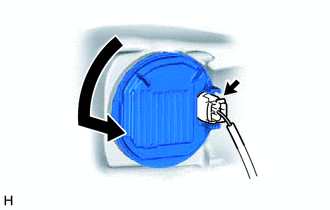
Turn the headlight light control ECU sub-assembly socket in the direction indicated by the arrow in the illustration to remove the headlight light control ECU sub-assembly.
Note
Do not pull the headlight light control ECU sub-assembly with the socket connected.
-
-
REMOVE HEADLIGHT GASKET
-
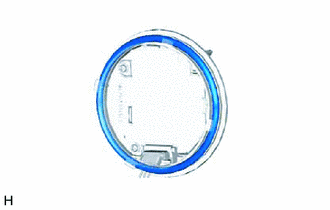
Remove the headlight gasket from the headlight light control ECU sub-assembly.
-
-
REMOVE DISCHARGE HEADLIGHT BULB
-
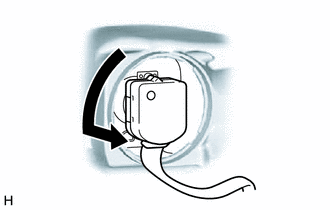
Release the set spring lock in the order shown in the illustration and remove the discharge headlight bulb.
Note
Do not touch the discharge headlight bulb glass.
-