WASHER MOTOR INSTALLATION
PROCEDURE
-
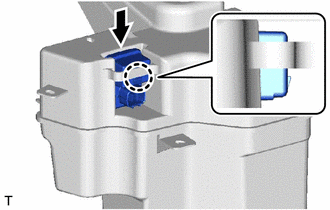
INSTALL HEADLIGHT CLEANER CONTROL RELAY (w/ Headlight Cleaner System)
-
Attach the claw to install the headlight cleaner control relay.
-
-
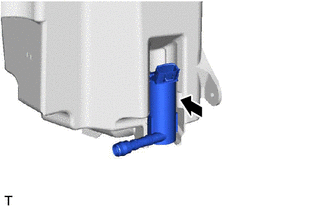
INSTALL HEADLIGHT CLEANER MOTOR AND PUMP ASSEMBLY (w/ Headlight Cleaner System)
-
Install the headlight cleaner motor and pump.
-
-
INSTALL LEVEL WARNING SWITCH ASSEMBLY
-
Install the level warning switch assembly.
-
-
INSTALL WINDSHIELD WASHER JAR ASSEMBLY
-
w/ Headlight Cleaner System:
-
Attach the guide to install the windshield washer jar assembly with the 3 bolts.
- Torque:
- 5.0 N*m { 51 kgf*cm, 44 in.*lbf }
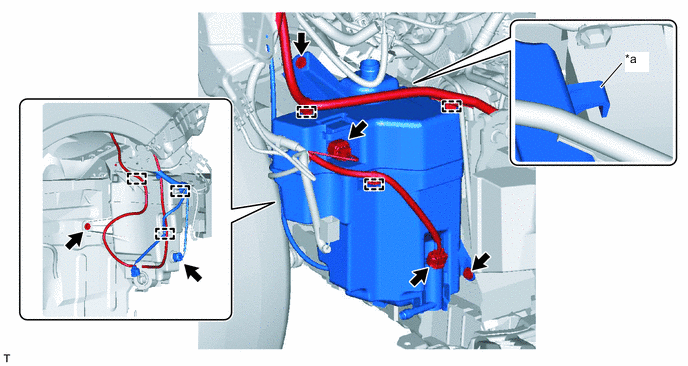
*a Guid - - -
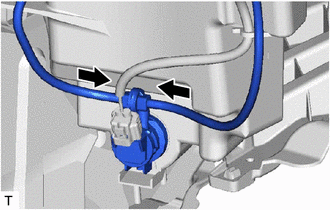
Connect the 3 connectors.
-
Attach the 6 clamps
-
-
w/o Headlight Cleaner System:
-
Attach the guide to install the windshield washer jar assembly with the 3 bolts.
- Torque:
- 5.0 N*m { 51 kgf*cm, 44 in.*lbf }
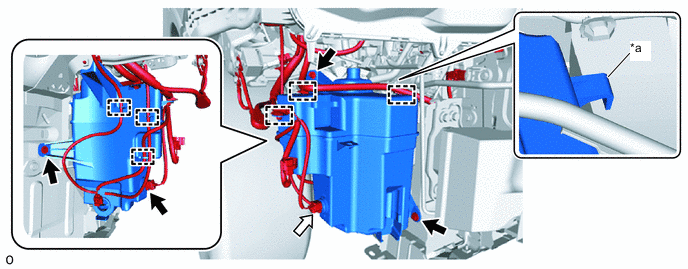
*a Guid - - 
Bolt 
Connector -
Connect the connector.
-
Attach the 6 clamps
-
-
-
INSTALL WASHER INLET SUB-ASSEMBLY
-
Install the washer inlet to the windshield washer jar and pump assembly.
-
Install the clip.
-
-
INSTALL FRONT BUMPER COVER
-
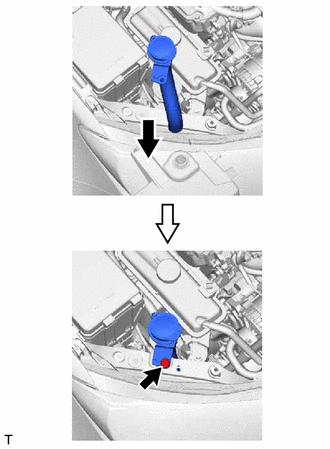
INSTALL WINDSHIELD WASHER MOTOR AND PUMP ASSEMBLY
-
Install the windshield washer motor and pump assembly to the packing of the windshield washer jar assembly.
-
Connect the connector.
-
-
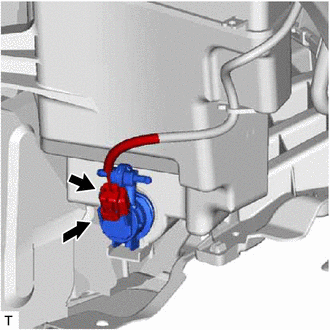
FILL UP WINDSHIELD WASHER JAR AND PUMP ASSEMBLY WITH WASHER FLUID
-
Connect the 2 washer hoses to the windshield washer motor and pump, and fill the washer jar with washer fluid.
-
-
INSTALL FRONT FENDER LINER RH
-
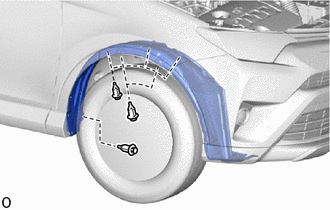
Install the front fender liner RH with the 6 clips.
-
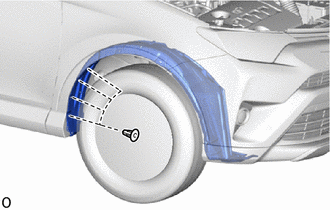
Install the new 4 grommets.
-

Install the 2 screws.
-
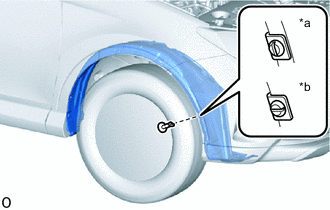
*a Correct *b Incorrect Install the pin hold clip and screw.
Tech Tips
Insert the pin hold clip with the slot aligned vertically. Do not rotate the clip after inserting it. After installation, confirm that the slot is vertical.
-
-
INSTALL FRONT FENDER FRONT SPLASH SHIELD RH