HOOD LOCK CONTROL CABLE ASSEMBLY(for LHD) REMOVAL
PROCEDURE
-
REMOVE WINDSHIELD WIPER MOTOR AND LINK ASSEMBLY
-
REMOVE HOOD TO FRONT FENDER SEAL RH
-

Remove the clip.
-
Detach the 3 clips and remove the hood to front fender seal RH.
-
-
REMOVE HOOD TO FRONT FENDER SEAL LH
Tech Tips
Use the same procedure described for the RH side.
-
REMOVE COWL TOP PANEL OUTER SUB-ASSEMBLY
-
REMOVE FRONT DOOR SCUFF PLATE LH
-
REMOVE COWL SIDE TRIM BOARD LH
-
REMOVE FUSE BOX OPENING COVER
-
REMOVE HOOD LOCK CONTROL LEVER SUB-ASSEMBLY
-
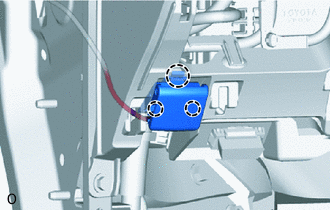
Detach the 3 claws.
-
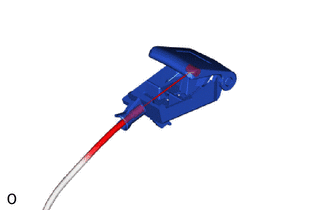
Disconnect the hood lock control cable assembly and remove the hood lock control lever sub-assembly.
-
-
REMOVE HOOD LOCK ASSEMBLY
-

*A w/ Engine Hood Courtesy Switch *B w/o Engine Hood Courtesy Switch w/ Engine Hood Courtesy Switch:
Disconnect the connector.
-
Remove the 3 bolts.
-
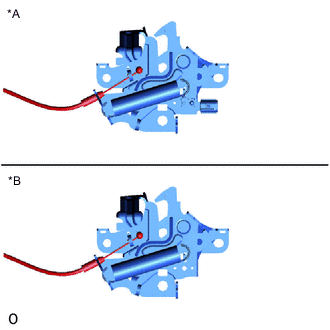
*A w/ Engine Hood Courtesy Switch *B w/o Engine Hood Courtesy Switch Disconnect the hood lock control cable assembly and remove the hood lock assembly.
-
-
REMOVE HOOD LOCK CONTROL CABLE ASSEMBLY
-
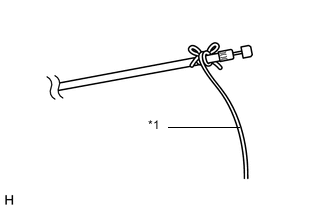
*1 String Tie a string to the end of the hood lock control cable assembly as shown in the illustration.
Tech Tips
Use a length of string long enough to pass through the engine compartment.
-
Detach each clamp, and then pull out the hood lock control cable assembly from the vehicle body.
-
Untie the string from the hood lock control cable assembly.
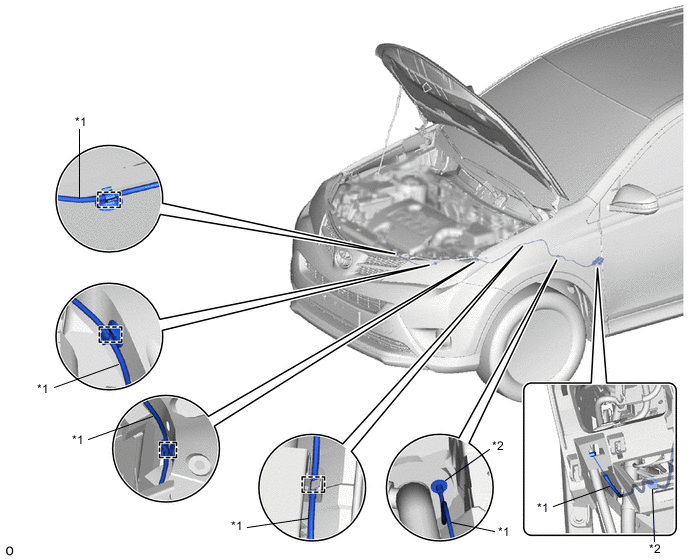
*1 Hood Lock Control Cable *2 Stopper
-