AMPLIFIER ANTENNA INSTALLATION
PROCEDURE
-
INSTALL ANTENNA COVER KIT
-
When reusing the No. 1 amplifier antenna assembly:
Note
New seals have specific front and rear ends. Make sure to install the seal in the correct direction, as incorrect installation may cause water leakage, etc.
-
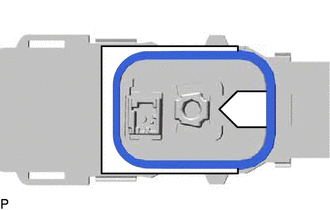
Before removing the peeling paper from the seal, place the seal on the antenna as shown in the illustration and check the front and rear ends.
-
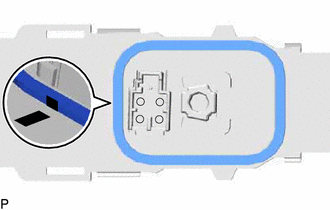
Remove the peeling paper, align the mark on the seal with the mark on the front of the antenna and install the seal to the antenna.
-
-
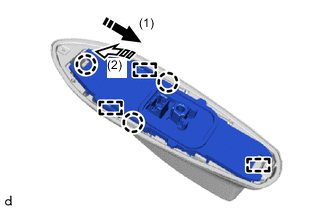
Attach the claws and guides to install the No. 1 amplifier antenna assembly as indicated by the arrows in the order shown in the illustration.
-
-
INSTALL NO. 1 AMPLIFIER ANTENNA ASSEMBLY
-
Temporarily install the No. 1 amplifier antenna assembly to the vehicle.
-
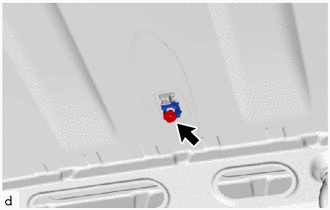
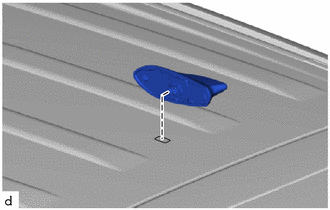
Insert the a new washer and holder to install the No. 1 amplifier antenna with the bolt.
- Torque:
- 9.5 N*m { 97 kgf*cm, 84 in.*lbf }
-
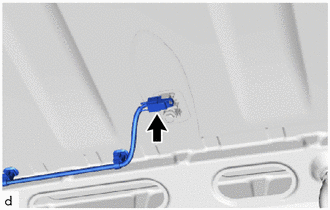
Connect the connector.
-
-
INSTALL ROOF HEADLINING ASSEMBLY
-
CONNECT CABLE TO NEGATIVE BATTERY TERMINAL
Note
When disconnecting the cable, some systems need to be initialized after the cable is reconnected Click here.