REAR SHOCK ABSORBER INSTALLATION
CAUTION / NOTICE / HINT
Tech Tips
-
Use the same procedure for the RH and LH sides.
-
The procedure listed below is for the LH side.
PROCEDURE
-
TEMPORARILY INSTALL REAR SHOCK ABSORBER BRACKET LH
-
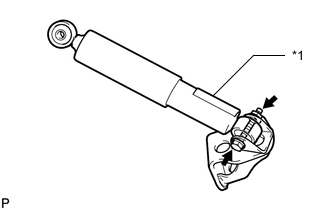
*1 Protector Temporarily install the bracket to the shock absorber with the bolt and nut.
Note
The absorber should be assembled with the protector positioned facing the front side of vehicle.
Tech Tips
The bolts can be installed in either direction, however, make sure that they are both installed in the same direction.
-
-
TEMPORARILY INSTALL REAR SHOCK ABSORBER ASSEMBLY LH
-
Support the rear No. 2 suspension arm assembly LH with a jack using a wooden block to avoid damage.
-
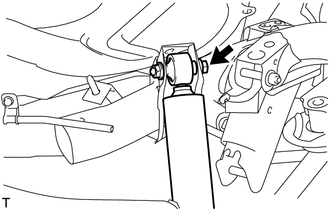
Temporarily install the shock absorber upper side to the suspension member with the bolt and nut.
Tech Tips
The bolts can be installed in either direction, however, make sure that they are both installed in the same direction.
-
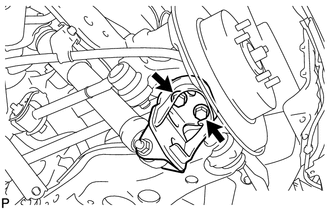
Install the rear No. 1 shock absorber bracket to the rear axle carrier with the 2 bolts.
- Torque:
- 80 N*m { 816 kgf*cm, 59 ft.*lbf }
-
-
STABILIZE SUSPENSION
-

*a Wooden Block *b Jack 
Jack Point Jack up the rear No. 2 suspension arm assembly, placing a wooden block underneath to avoid damage. Apply load to the suspension so that the rear No. 2 suspension arm assembly is positioned as shown in the illustration.
Standard Length (A) 4.4 mm (0.1732 in.) Note
Do not jack up the rear No. 2 suspension arm assembly too high as the vehicle may fall.
Tech Tips
-
If the rear No. 2 suspension arm assembly cannot be positioned as shown in the illustration even when the rear No. 2 suspension arm assembly is jacked up, apply additional load by placing a weight in the luggage compartment.
-
Use the same procedure for the RH and LH sides.
-
-
-
TIGHTEN REAR SHOCK ABSORBER ASSEMBLY LH
-
Tighten the bolt on the rear shock absorber (upper side).
- Torque:
- 80 N*m { 816 kgf*cm, 59 ft.*lbf }
Note
Since a stopper nut is used, tighten the bolt.
-
Tighten the bolt on the rear shock absorber (lower side).
- Torque:
- 80 N*m { 816 kgf*cm, 59 ft.*lbf }
Note
Since a stopper nut is used, tighten the bolt.
-
-
INSTALL REAR WHEEL
- Torque:
- 103 N*m { 1050 kgf*cm, 76 ft.*lbf }
-
INSPECT AND ADJUST REAR WHEEL ALIGNMENT