MANUAL TRANSAXLE ASSEMBLY REMOVAL
PROCEDURE
-
REMOVE ENGINE ASSEMBLY WITH MANUAL TRANSAXLE
for 1AD-FTV:
for 2AD-FTV:
-
REMOVE STARTER ASSEMBLY
-
REMOVE FRONT ENGINE MOUNTING BRACKET
-
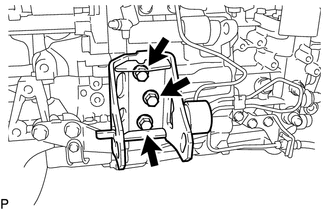
Remove the 3 bolts and front engine mounting bracket.
-
-
REMOVE REAR ENGINE MOUNTING BRACKET
-
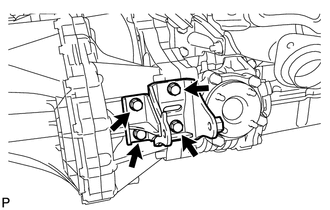
Remove the 4 bolts and rear engine mounting bracket.
-
-
REMOVE ENGINE MOUNTING BRACKET LH
Tech Tips
Perform this procedure only when replacement of the engine mounting bracket LH is necessary.
-
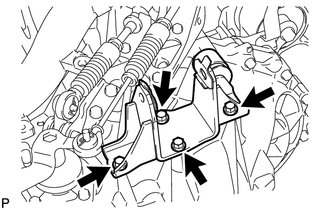
Remove the 4 bolts and engine mounting bracket LH from the manual transaxle assembly.
-
-
REMOVE OIL PAN INSULATOR
-
REMOVE STIFFENER PLATE LH
-
REMOVE STIFFENER PLATE RH
-
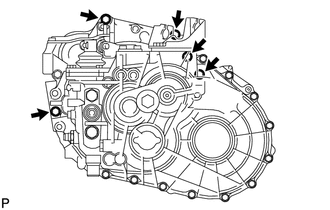
REMOVE MANUAL TRANSAXLE ASSEMBLY
-
Remove the 5 bolts.
-
Separate and remove the manual transaxle assembly from the engine.
-
-
REMOVE TRANSFER ASSEMBLY
-
REMOVE TRANSFER AND TRANSAXLE SETTING STUD BOLT
-
Transfer Side:
-
Remove the 2 transfer and transaxle setting stud bolts.
Tech Tips
It is not necessary to remove the transfer and transaxle setting stud bolts unless they are being replaced.
-