SHIFT AND SELECT LEVER SHAFT REASSEMBLY

PROCEDURE
-
INSTALL CONTROL SHAFT COVER OIL SEAL
-
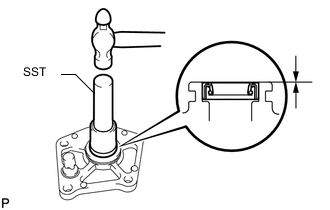
Using SST and a hammer, install a new control shaft cover oil seal to the control shaft cover.
- SST
- 09307-12010
Standard depth 0 to 0.5 mm (0 to 0.0196 in.) -
Coat the lip of the control shaft cover oil seal with MP grease.
-
-
INSTALL SHIFT LEVER DAMPER
-
Clean the threads of the bolt and shift lever damper hole.
-
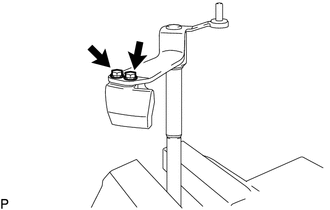
Apply a few drops of adhesive to 2 or 3 threads of the 2 bolts.
Adhesive Toyota Genuine Adhesive 1344, Three Bond 1344 or equivalent -
Install the shift lever damper to the shift and select lever shaft with the 2 bolts.
- Torque:
- 18.6 N*m { 190 kgf*cm, 14 ft.*lbf }
-
-
INSTALL PIN
-
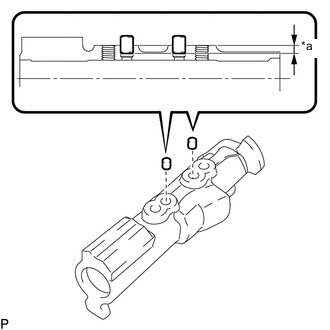
*a Standard depth Install the 2 pins to the inner No. 1 shift lever.
Standard depth 3.5 to 4.5 mm (0.138 to 0.177 in.)
-
-
INSTALL SHIFT GATE PLATE
-
Install the shift gate plate with the 2 bolts.
- Torque:
- 8.5 N*m { 87 kgf*cm, 75 in.*lbf }
-
-
INSTALL SHIFT AND SELECT LEVER SHAFT
-
Coat the shift and select lever boot lip with MP grease.
-
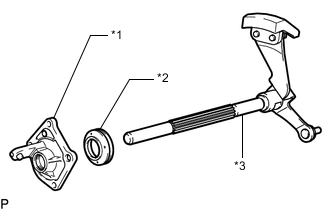
*1 Control Shaft Cover *2 Shift and Select Lever Boot *3 Shift and Select Lever Shaft Install the shift and select lever boot and control shaft cover to the select lever shaft.
-
-
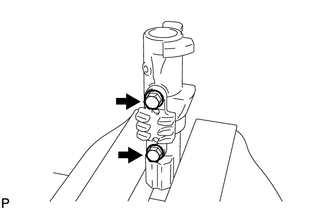
INSTALL INNER NO. 1 SHIFT LEVER
-
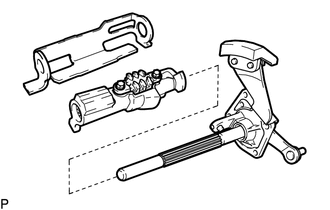
Install the inner No. 1 shift lever and shift interlock plate to the shift and select lever shaft.
-
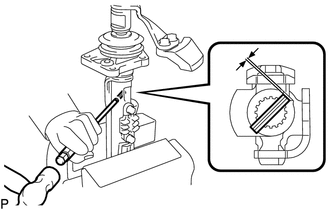
Using a 5 mm pin punch and hammer, tap a new slotted spring pin into the inner No. 1 shift lever.
Standard depth 0.4 to 1.4 mm (0.0158 to 0.0551 in.)
-