TRANSMISSION CONTROL CABLE REMOVAL
PROCEDURE
-
DISCONNECT NO. 1 AIR TUBE
-
REMOVE NO. 2 AIR HOSE
-
REMOVE REAR CONSOLE BOX SUB-ASSEMBLY
-
DISCONNECT TRANSAXLE CONTROL CABLE ASSEMBLY
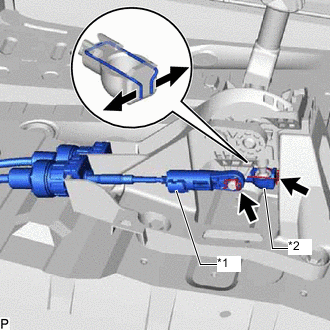
*1 Select Control Cable *2 Shift Control Cable
-
Remove the clip and disconnect the cable end of the select control cable from the floor shift shift lever assembly.
-
Push the ends of the clip apart, and then disconnect the shift control cable from the floor shift shift lever assembly.
-

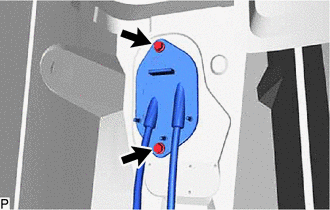
*1 Cable Lock *2 Lock Nut Using a screwdriver, pull out the cable locks of the shift control cable and select control cable.
-
Rotate the nut clockwise approximately 180° and, while holding the nut in that position, disconnect the shift control cable and select control cable from the floor shift shift lever assembly.
Note
Do not over-rotate the cable lock as it will come off the internal spring and the transaxle control cable assembly will not be reusable.
-
Remove the shift control cable from the floor shift shift lever assembly while holding the lock nut.
-
-
REMOVE TRANSAXLE CONTROL CABLE ASSEMBLY
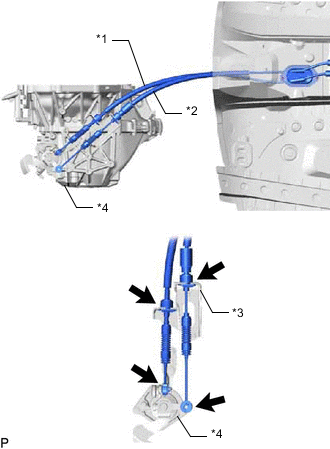
*1 Select Control Cable *2 Shift Control Cable *3 Control Cable Bracket *4 Manual Transaxle Assembly
-
Remove the 2 clips and disconnect the 2 transaxle control cable assemblies from the manual transaxle assembly.
-
Remove the 2 clips and disconnect the 2 transaxle control cable assemblies from the control cable bracket.
-
Remove the 2 bolts from the retainer.
-
Pull out the transaxle control cable assembly from the floor.
-