CLUTCH UNIT(for 3ZR-FE, 3ZR-FAE) REMOVAL

CAUTION / NOTICE / HINT
Note
When the transaxle is removed, be sure to use a new clutch release with bearing cylinder and new installation bolts. Removal of the transaxle allows the compressed clutch release with bearing cylinder to return to its original position, and dust could damage the seal of the clutch release with bearing cylinder, possibly causing clutch fluid leaks.
PROCEDURE
-
REMOVE MANUAL TRANSAXLE ASSEMBLY
for EB61:
for EB61F:
-
REMOVE CLUTCH TUBE
-
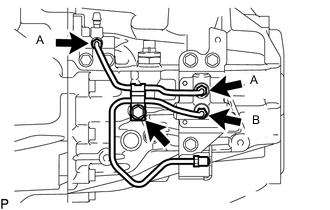
Using a 10 mm union nut wrench, loosen the bleeder to accumulator tube labeled A and accumulator to flexible hose tube labeled B.
-
Remove the bolt, clamp, bleeder to accumulator tube and accumulator to flexible hose tube.
-
-
REMOVE CLUTCH RELEASE BLEEDER SUB-ASSEMBLY
-
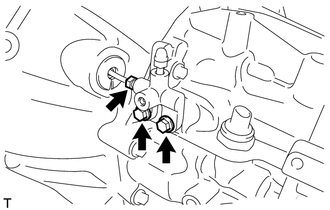
Using a union nut wrench, disconnect the clutch release bleeder sub-assembly from the clutch release cylinder to flexible hose tube.
-
Remove the 2 bolts and clutch release bleeder sub-assembly from the manual transaxle assembly.
-
-
REMOVE CLUTCH RELEASE WITH BEARING CYLINDER ASSEMBLY
-
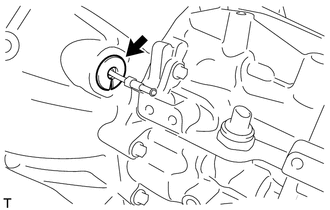
Remove the clutch tube boot from the manual transaxle assembly.
-
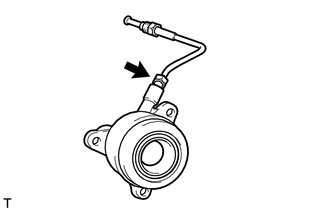
Using a union nut wrench, remove the clutch release cylinder to flexible hose tube from the clutch release with bearing cylinder assembly.
-
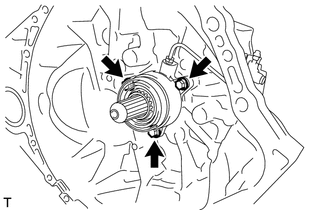
Remove the 3 bolts and clutch release with bearing cylinder assembly together with the clutch release cylinder to flexible hose tube.
-
-
REMOVE CLUTCH COVER ASSEMBLY
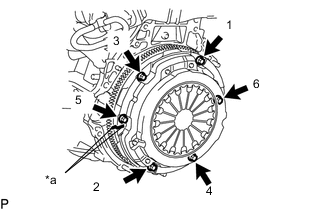
*a Matchmark
-
Put matchmarks on the clutch cover assembly and flywheel sub-assembly.
-
Loosen each set bolt one turn at a time in the order shown in the illustration until the spring tension is released.
-
Remove the set bolts and pull off the clutch cover assembly.
Note
Do not drop the clutch disc assembly.
-
-
REMOVE CLUTCH DISC ASSEMBLY