RADIATOR REMOVAL
PROCEDURE
-
DISCHARGE REFRIGERANT FROM REFRIGERATION SYSTEM
-
REMOVE HEADLIGHT
-
for LED Headlight:
-
for Halogen Headlight:
-
-
REMOVE NO. 1 ENGINE UNDER COVER
-
REMOVE FRONT LOWER BUMPER ABSORBER
-
Remove the 4 screws and front lower bumper absorber.
-
-
REMOVE RADIATOR LOWER AIR GUIDE PLATE
-
Detach the 2 claws and remove the radiator lower air guide plate.
-
-
DRAIN ENGINE COOLANT
-
REMOVE BATTERY CLAMP SUB-ASSEMBLY
-
REMOVE HOOD LOCK CONTROL CABLE COVER (w/ Cover)
-
REMOVE HOOD LOCK ASSEMBLY
-
for LHD:
-
for RHD:
-
-
DISCONNECT HOOD LOCK CONTROL CABLE ASSEMBLY
-
Detach the clamp to disconnect the hood lock control cable assembly from the upper radiator support.
-
-
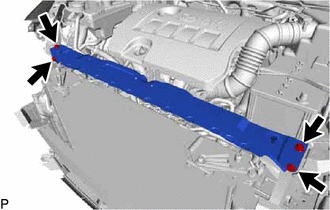
REMOVE FRONT BUMPER UPPER REINFORCEMENT SUB-ASSEMBLY
-
Disconnect the horn connector.
-
Remove the 3 bolts and front bumper upper reinforcement sub-assembly.
-
-
REMOVE RADIATOR UPPER AIR GUIDE PLATE
-
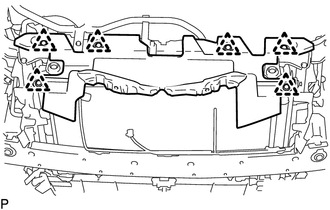
Remove the 6 clips and radiator upper air guide plate.
-
-
DISCONNECT DISCHARGE HOSE SUB-ASSEMBLY
-
DISCONNECT LIQUID PIPE SUB-ASSEMBLY
-
DISCONNECT WIRE HARNESS
-
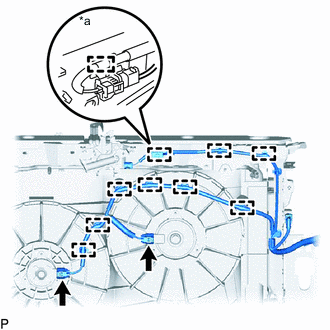
*a w/o Hood Courtesy Switch Disconnect the 2 cooling fan motor connectors.
-
Detach the 9 wire harness clamps to disconnect the wire harness.
-
-
REMOVE NO. 1 RADIATOR SUPPORT
-
Remove the 2 bolts and 2 No. 1 radiator supports.
-
-
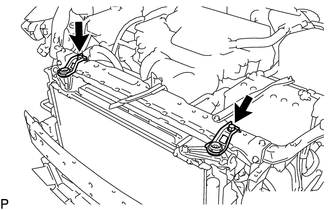
REMOVE UPPER RADIATOR SUPPORT
-
Remove the 4 bolts and upper radiator support.
-
-
REMOVE RADIATOR HOSE HOSE CLAMP
-

Push for Manual Transaxle:
-
Remove the radiator hose hose clamp.
-
-
*a Push for Automatic Transaxle:
-
Disconnect the No. 8 and No. 9 water by-pass hose from each radiator hose hose clamp.
-
Remove the 2 radiator hose hose clamps.
-
-
-
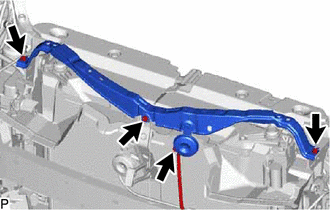
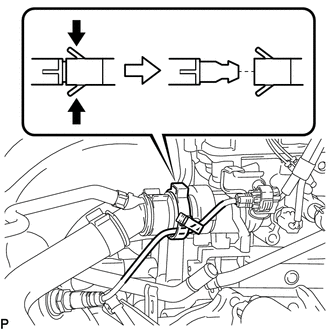
DISCONNECT RADIATOR HOSE SUB-ASSEMBLY
-
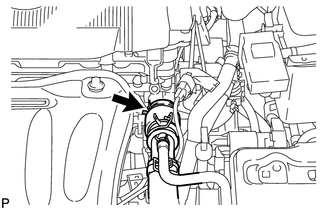
Slide the hose clamp and disconnect the radiator hose sub-assembly from the cylinder head sub-assembly.
-
-
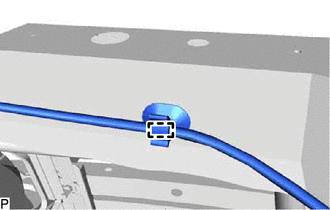
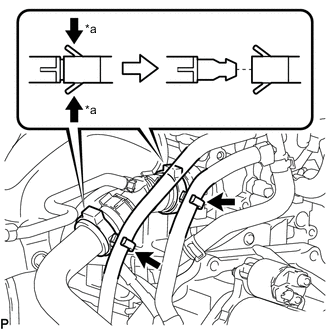
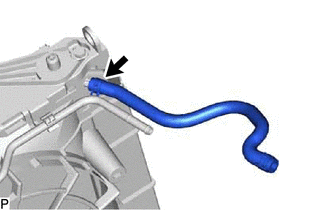
DISCONNECT NO. 2 RADIATOR HOSE
-
DISCONNECT NO. 1 WATER BY-PASS HOSE

-
Slide the hose clamp and disconnect the No. 1 water by-pass hose from the water by-pass pipe.
-
-
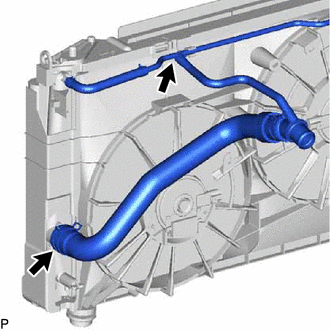
DISCONNECT NO. 2 WATER BY-PASS HOSE
-
Slide the hose clamp and disconnect the No. 2 water by-pass hose from the radiator assembly.
-
-
REMOVE RADIATOR ASSEMBLY
-
Remove the radiator assembly together with the fan shroud.
Tech Tips
After removing the radiator assembly, make sure that both lower radiator supports are attached to the fan shroud.
-
-
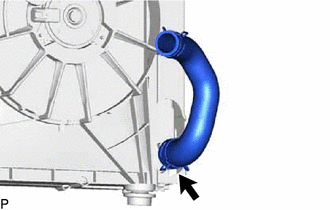
REMOVE RADIATOR HOSE SUB-ASSEMBLY
-
Slide the 2 hose clamps and remove the radiator hose sub-assembly from the radiator assembly and water by-pass pipe.
-
-
REMOVE NO. 2 RADIATOR HOSE
-
Slide the hose clamp and remove the No. 2 radiator hose from the radiator assembly.
-
-
REMOVE WATER BY-PASS PIPE
-
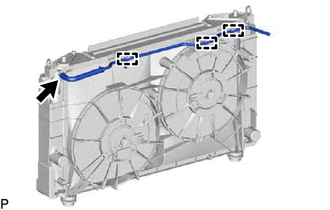
Detach the 3 clamps, slide the hose clamp and remove the water by-pass pipe from the radiator assembly.
-
-
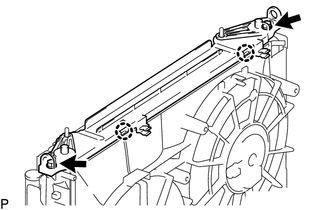
REMOVE LOWER RADIATOR SUPPORT
-
Remove the 2 lower radiator supports from the fan shroud.
-
-
REMOVE NO. 2 FAN SHROUD
-
Remove the 2 bolts.
-
Detach the 2 claws and remove the No. 2 fan shroud.
-
-
REMOVE COOLER CONDENSER ASSEMBLY
-
Detach the 2 guides and remove the condenser assembly.
-
-
REMOVE FAN SHROUD
-
Remove the 2 bolts and fan shroud.
-