WATER PUMP REMOVAL
PROCEDURE
-
REMOVE NO. 1 ENGINE UNDER COVER
-
REMOVE REAR ENGINE UNDER COVER RH
-
REMOVE NO. 1 ENGINE COVER
-
DRAIN ENGINE COOLANT
-
REMOVE RADIATOR RESERVOIR ASSEMBLY
-
REMOVE FRONT SUSPENSION MEMBER REINFORCEMENT RH
-
REMOVE FAN AND GENERATOR V BELT
-
REMOVE OIL PAN INSULATOR
-
REMOVE ENGINE MOUNTING INSULATOR SUB-ASSEMBLY RH
-
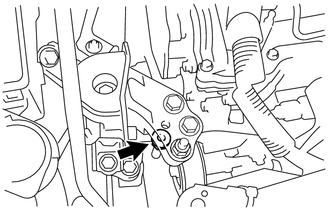
Remove the nut.
-
Loosen the 4 bolts and 2 nuts from the front engine mounting insulator and rear engine mounting insulator.
Tech Tips
Loosen the bolts and nuts approximately 10 turns. Do not remove them.
-
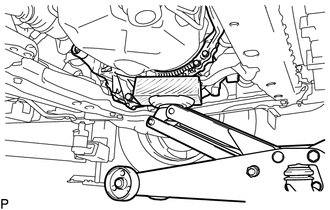
Place a wooden block between a jack and the engine.
Note
Make sure to set a jack as shown in the illustration. Do not place the jack on the oil pan sub-assembly.
-
Jack up the engine slightly.
-
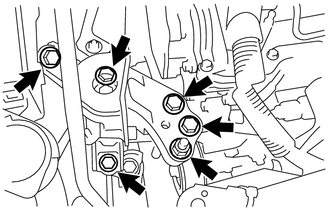
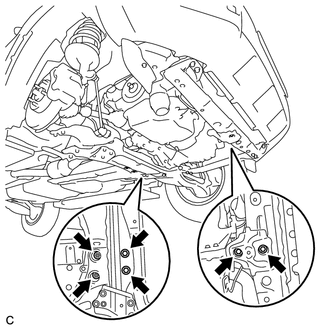
Remove the 5 bolts, nut and engine mounting insulator sub-assembly RH.
Tech Tips
Jacking up the engine slightly makes the engine mounting insulator sub-assembly RH easier to remove.
-
-
REMOVE ENGINE MOUNTING SPACER
-
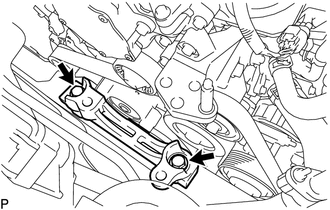
Remove the 2 bolts and engine mounting spacer.
-
-
REMOVE IDLER PULLEY COVER PLATE
-
REMOVE NO. 1 IDLER PULLEY SUB-ASSEMBLY
-
REMOVE NO. 2 IDLER PULLEY SUB-ASSEMBLY
-
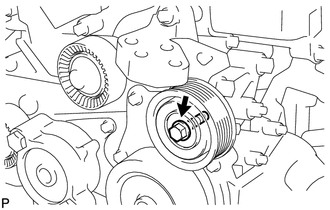
Remove the pulley bolt, No. 2 idler pulley cover plate and No. 2 idler pulley sub-assembly.
-
-
REMOVE ENGINE WATER PUMP ASSEMBLY
-
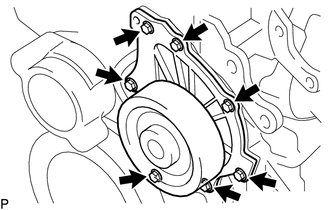
Remove the 7 bolts, engine water pump assembly and gasket.
-