INTAKE MANIFOLD REMOVAL
PROCEDURE
-
REMOVE FUEL DELIVERY PIPE
-
DRAIN ENGINE COOLANT
-
REMOVE THROTTLE WITH MOTOR BODY ASSEMBLY
-
REMOVE WINDSHIELD WIPER MOTOR ASSEMBLY
-
REMOVE OUTER COWL TOP PANEL SUB-ASSEMBLY
-
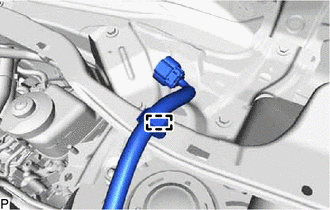
Detach the clamp and disconnect the wire harness from the outer cowl top panel sub-assembly.
-
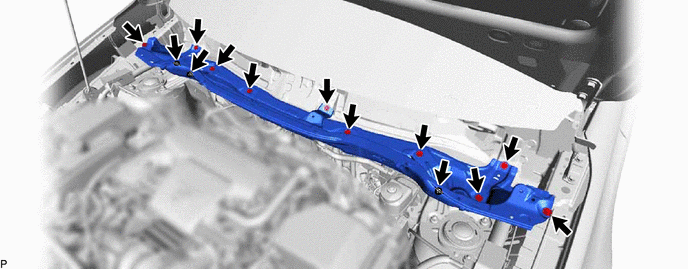
Remove the 13 bolts and outer cowl top panel sub-assembly.
-
-
REMOVE NO. 1 HOSE TO HOSE TUBE
-
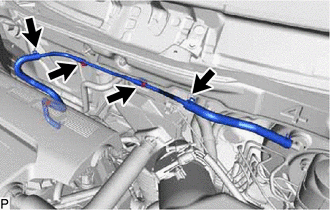
Slide the 2 clamps and disconnect the 2 hoses from the No. 1 hose to hose tube.
-
Remove the 2 nuts and No. 1 hose to hose tube.
-
-
DISCONNECT HEATER HOSE
-
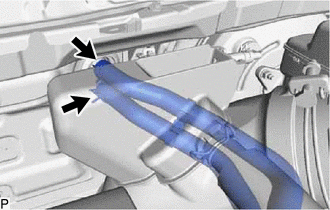
Slide the clamp and disconnect the inlet heater water hose from the heater radiator unit.
-
Slide the clamp and disconnect the outlet heater water hose from the heater radiator unit.
-
-
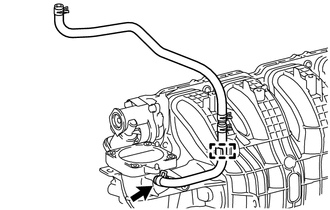
DISCONNECT WIRE HARNESS
-
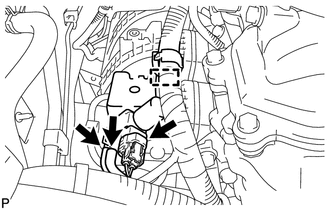
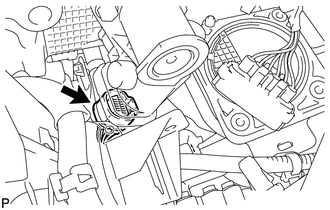
Disconnect the connector, detach the clamp and disconnect the 2 vacuum hoses, and then remove the vacuum switching valve.
-
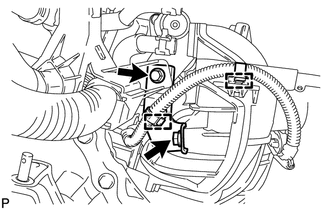
Detach the 2 clamps.
-
Remove the 2 bolts and wiring harness clamp bracket.
-
Remove the bolt and disconnect the bracket.
-
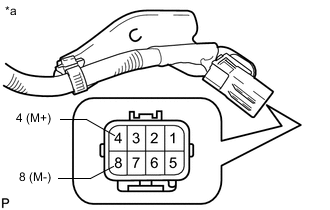
*a Component without harness connected
(Tumble Control Valve)
for TCV:
Apply battery voltage to the terminals of the connector to close the tumble control valves.
Standard Tester Connection Specified Condition Positive (+) battery voltage applied to terminal 8 (M-), and negative (-) battery voltage applied to terminal 4 (M+) Open → Closed Note
-
If this procedure is not performed, the valves may be damaged when the intake manifold is removed.
-
Apply battery voltage for 1 to 3 seconds.
-
If battery voltage is applied for more than 3 seconds, the actuator may be damaged.
-
Do not allow the lead wires to contact the other terminals.
-
-
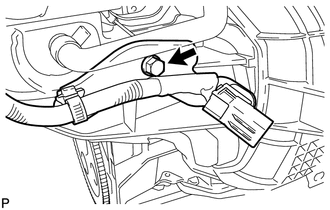
for TCV:
Disconnect the intake air control valve actuator connector.
-
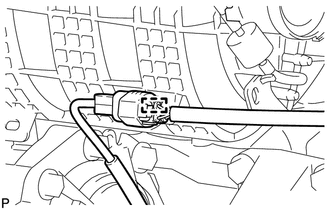
Detach the clamp and disconnect the wire harness.
-
-
DISCONNECT NO. 2 PCV HOSE
-

Slide the clamp and disconnect the No. 2 PCV hose from the intake manifold.
-
-
REMOVE INTAKE MANIFOLD
-
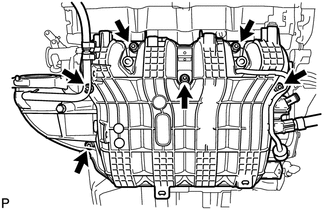
Remove the 6 bolts and intake manifold.
Note
The valves may be damaged if they are not closed before removing the intake manifold.
-
Remove the gasket from the intake manifold.
-
Remove the 2 vacuum hoses from the intake manifold.
-
-
REMOVE UNION TO CONNECTOR TUBE HOSE
-

Slide the clamp and remove the union to connector tube hose from the intake manifold.
-
-
REMOVE CHECK VALVE
-
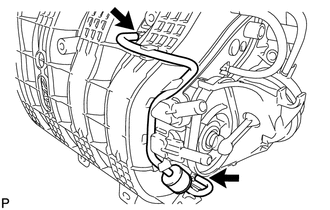
Disconnect the 2 vacuum hoses from the intake manifold and remove the check valve.
-
Remove the 2 vacuum hoses from the check valve.
-
-
REMOVE PURGE LINE HOSE
-
Disconnect the purge line hose from the clamp.
-
Slide the clamp and remove the purge line hose from the intake manifold.
-
-
REMOVE INTAKE AIR CONTROL VALVE ACTUATOR (for TCV)