FUEL TANK(w/ Canister Pump Module) REMOVAL
PROCEDURE
-
DISCHARGE FUEL SYSTEM PRESSURE
-
PRECAUTION
Note
After turning the ignition switch off, waiting time may be required before disconnecting the cable from the battery terminal. Therefore, make sure to read the disconnecting the cable from the battery terminal notice before proceeding with work.
-
DISCONNECT CABLE FROM NEGATIVE BATTERY TERMINAL
Note
When disconnecting the cable, some systems need to be initialized after the cable is reconnected.
-
DRAIN FUEL
-
DISCONNECT PARKING BRAKE CABLE
-
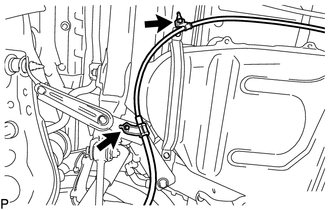
Remove the 2 bolts and disconnect the parking brake cable.
-
-
REMOVE FRONT FLOOR COVER
-
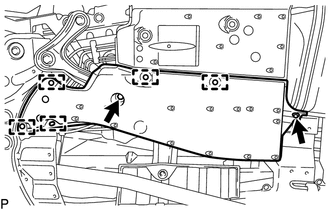
Remove the bolt and nut.
-
Detach the 5 clips and remove the front floor cover.
-
-
REMOVE NO. 1 FUEL TANK PROTECTOR
-
REMOVE NO. 1 FLOOR UNDER COVER
-
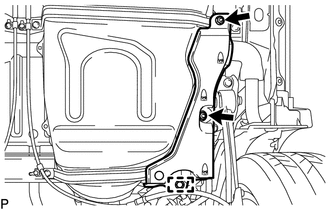
Detach the clip and remove the 2 nuts and No. 1 floor under cover.
-
-
DISCONNECT FUEL TANK MAIN TUBE SUB-ASSEMBLY
-
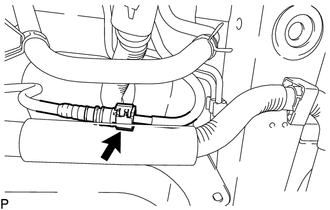
Disconnect the fuel tank main tube sub-assembly from the fuel pipe.
-
-
DISCONNECT FUEL TANK TO CANISTER TUBE SUB-ASSEMBLY
-
Disconnect the fuel tank to canister tube sub-assembly.
-
-
REMOVE FUEL HOSE PROTECTOR
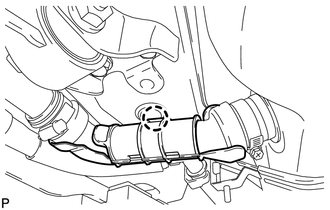
-
Detach the claw and remove the fuel hose protector from the fuel tank to filler pipe hose.
-
-
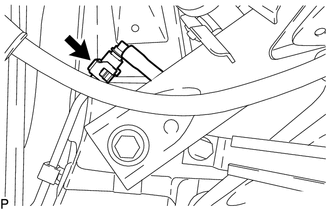
DISCONNECT FUEL TANK TO FILLER PIPE HOSE
-
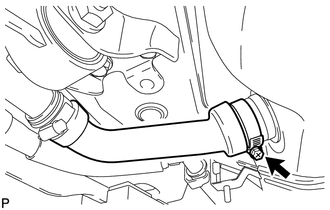
Loosen the hose clamp and disconnect the fuel tank to filler pipe hose from the fuel tank.
-
-
DISCONNECT FUEL TANK VENT HOSE SUB-ASSEMBLY
-
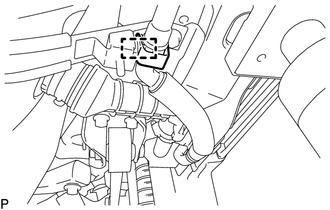
Detach the hose clamp and fuel tank vent hose sub-assembly.
-
-
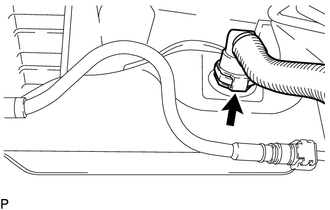
DISCONNECT BREATHER TUBE SUB-ASSEMBLY
-
Disconnect the breather tube sub-assembly from the fuel tank filler pipe.
-
-
REMOVE FUEL TANK ASSEMBLY
-
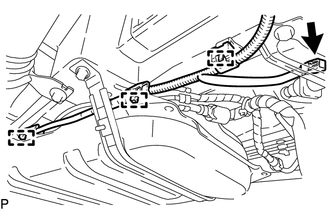
Disconnect the connector and detach the 3 wire harness clamps.
-
Using an engine lifter and attachments, support the fuel tank assembly.
-
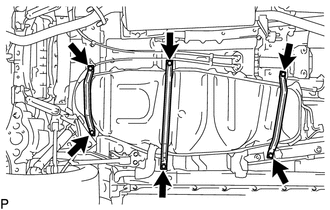
Remove the 2 bolts and No. 1 fuel tank band sub-assembly.
-
Remove the 2 bolts and No. 1 fuel tank band sub-assembly LH.
-
Remove the 2 bolts and No. 2 fuel tank band sub-assembly.
-
Slightly lower the engine lifter.
Note
Be careful not to cut the wiring.
-
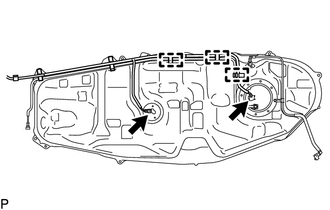
Disconnect the fuel pump connector and sender gauge connector.
Note
-
Before this procedure, check the connector for dirt, mud or other contamination.
-
Do not use any tools in this procedure.
-
-
Detach the wire harness from the 3 clamps and remove the fuel tank assembly.
-
-
DISCONNECT FUEL TANK MAIN TUBE SUB-ASSEMBLY
-
REMOVE FUEL TANK VENT TUBE SET PLATE
-
REMOVE FUEL SUCTION TUBE ASSEMBLY WITH PUMP
-
REMOVE FUEL SENDER GAUGE ASSEMBLY
-
REMOVE FUEL TANK MAIN TUBE SUB-ASSEMBLY
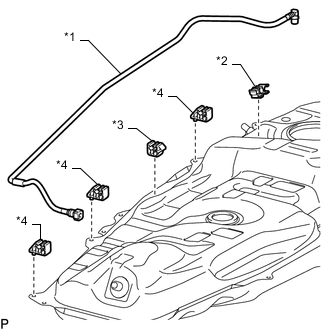
*1 Fuel Tank Main Tube Sub-assembly *2 No. 3 Fuel Tube Clamp *3 No. 5 Fuel Tube Clamp *4 Fuel Tube Grommet
-
Detach the 5 clamps and remove the fuel tank main tube sub-assembly.
-
-
REMOVE NO. 3 FUEL TUBE CLAMP
-
Remove the No. 3 fuel tube clamp from the fuel tank assembly.
-
-
REMOVE NO. 5 FUEL TUBE CLAMP
-
Remove the No. 5 fuel tube clamp from the fuel tank assembly.
-
-
REMOVE FUEL TUBE GROMMET
-
Remove the 3 fuel tube grommets from the fuel tank assembly.
-
-
REMOVE BREATHER TUBE SUB-ASSEMBLY
-
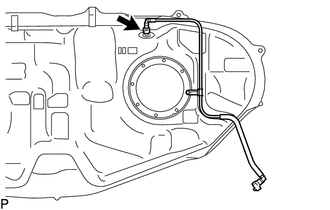
Disconnect the quick connector and remove the breather tube sub-assembly from the fuel tank assembly.
-
-
REMOVE NO. 3 FUEL TANK PROTECTOR
-
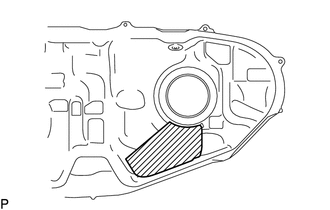
Remove the No. 3 fuel tank protector from the fuel tank assembly.
-