FUEL TANK REMOVAL
PROCEDURE
-
REMOVE FRONT FLOOR COVER
-
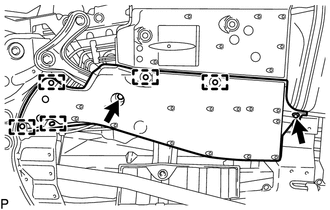
Remove the bolt and nut.
-
Detach the 5 clips and remove the front floor cover.
-
-
REMOVE NO. 1 FUEL TANK PROTECTOR
-

Detach the 3 clips and remove the nut and No. 1 fuel tank protector.
-
-
REMOVE NO. 1 FLOOR UNDER COVER
-
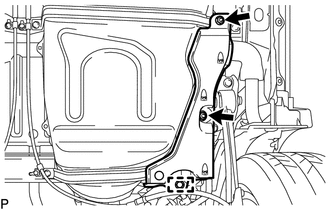
Detach the clip and remove the 2 nuts and No. 1 floor under cover.
-
-
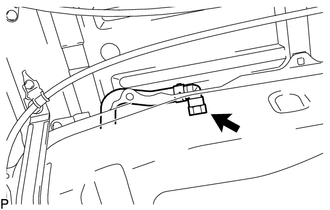
DISCONNECT NO. 2 PARKING BRAKE CABLE ASSEMBLY
-
Remove the 2 bolts and disconnect the No. 2 parking brake cable assembly.
-
-
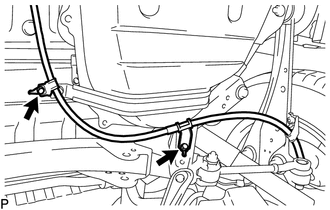
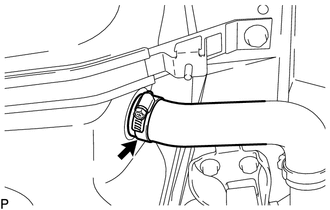
DISCONNECT FUEL TANK RETURN TUBE
-
Slide the clamp and disconnect the fuel tank return tube from the fuel pipe.
-
-
DISCONNECT FUEL TANK MAIN TUBE SUB-ASSEMBLY
-
Disconnect the fuel tank main tube sub-assembly from the fuel pipe.
-
-
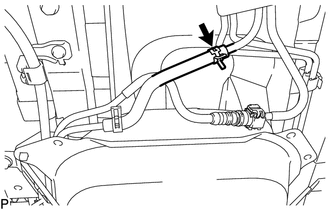
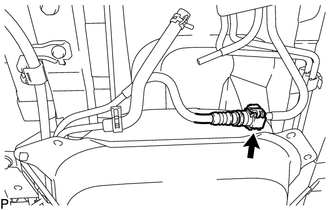
DISCONNECT FUEL TANK TO FILLER PIPE HOSE
-
Disconnect the fuel tank to filler pipe hose from the fuel tank assembly.
-
-
DISCONNECT FUEL TANK BREATHER HOSE
-
Disconnect the fuel tank breather hose from the fuel tank assembly.
-
-
REMOVE FUEL TANK ASSEMBLY
-
Set an engine lifter underneath the fuel tank assembly.
-
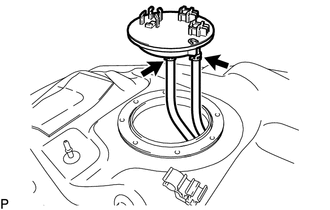
Disconnect the wire harness from the 2 fuel tube grommets.
-
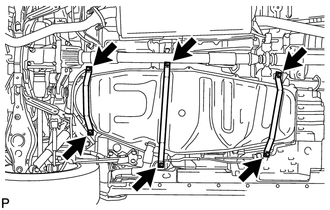
Remove the 2 bolts and No. 1 fuel tank band sub-assembly.
-
Remove the 2 bolts and No. 1 fuel tank band sub-assembly LH.
-
Remove the 2 bolts and No. 2 fuel tank band sub-assembly.
-
Slightly lower the engine lifter.
Note
Be careful not to cut the wire harness.
-
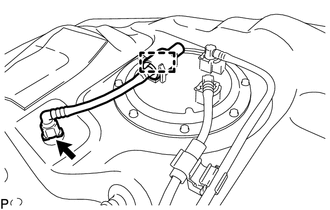
Disconnect the fuel sender gauge connector and remove the fuel tank assembly.
Note
-
Before this procedure, check the connector for dirt, mud or other contamination.
-
Do not use any tools in this procedure.
-
-
-
REMOVE FUEL EMISSION HOSE
-
Detach the clamp and remove the fuel emission hose.
-
-
DISCONNECT FUEL TANK MAIN TUBE SUB-ASSEMBLY
-
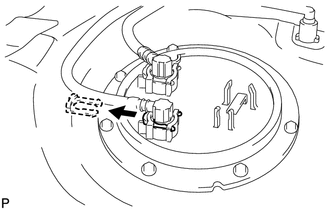
Remove the tube joint clip and pull out the fuel tank main tube sub-assembly.
Note
-
Before removing a tube joint clip, check for foreign matter around the tube joint clip. Clean if necessary.
-
Do not use any tools in this procedure.
-
Do not forcefully bend or twist the fuel tank main tube sub-assembly.
-
Put the fuel tank main tube sub-assembly in a plastic bag to prevent damage and contamination.
-
If the fuel tank vent tube assembly and fuel tank main tube sub-assembly are stuck together, pinch the fuel tank main tube sub-assembly and turn it carefully to disconnect it.
-
Be careful not the damage any tube joint clip. If a tube joint clip is damaged, replace it.
-
-
-
DISCONNECT FUEL TANK RETURN TUBE
-
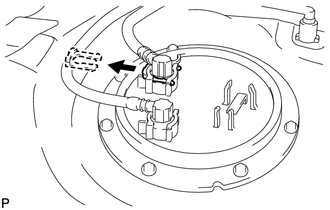
Remove the tube joint clip and pull out the fuel tank return tube.
Note
-
Before removing a tube joint clip, check for foreign matter around the tube joint clip. Clean if necessary.
-
Do not use any tools in this procedure.
-
Do not forcefully bend or twist the fuel tank return tube.
-
Put the fuel tank return tube in a plastic bag to prevent damage and contamination.
-
If the fuel tank vent tube assembly and fuel tank return tube are stuck together, pinch the fuel tank return tube and turn it carefully to disconnect it.
-
Be careful not the damage any tube joint clip. If a tube joint clip is damaged, replace it.
-
-
-
REMOVE FUEL TANK VENT TUBE SET PLATE
-
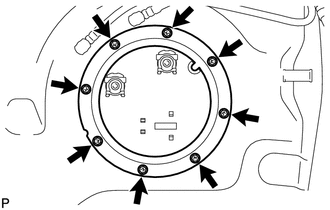
Remove the 8 bolts and fuel tank vent tube set plate.
-
-
REMOVE FUEL TANK VENT TUBE ASSEMBLY
-
Slide the 2 clamps, disconnect the 2 fuel hoses and remove the fuel tank vent tube assembly.
Note
Do not damage the fuel tank vent tube assembly.
-
Remove the gasket from the fuel tank vent tube assembly.
-
-
REMOVE FUEL TANK MAIN TUBE SUB-ASSEMBLY
-
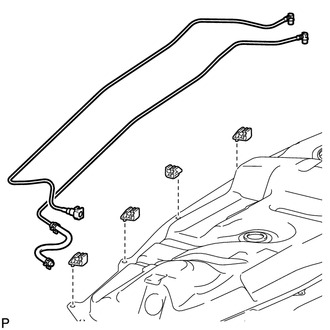
Remove the fuel tank main tube sub-assembly from the No. 5 fuel tube clamp and 3 fuel tube grommets.
-
-
REMOVE FUEL TANK RETURN TUBE
-
Remove the fuel return tube from the No. 5 fuel tube clamp and 3 fuel tube grommets.
-
-
REMOVE NO. 5 FUEL TUBE CLAMP
-
Remove the No. 5 fuel tube clamp from the fuel tank assembly.
-
-
REMOVE FUEL TUBE GROMMET
-
Remove the 3 fuel tube grommets from the fuel tank assembly.
-
-
REMOVE FUEL SENDER GAUGE ASSEMBLY