ПЕРЕДНИЙ САЛЬНИК КОЛЕНЧАТОГО ВАЛА (для моделей без контроллера свечей накаливания) СНЯТИЕ

PROCEDURE
-
REMOVE FRONT WHEEL RH
-
REMOVE NO. 1 ENGINE UNDER COVER
-
REMOVE REAR ENGINE UNDER COVER RH
-
REMOVE NO. 1 ENGINE COVER (w/ No. 1 Engine Cover)
-
REMOVE V-RIBBED BELT
-
REMOVE FRONT SUSPENSION MEMBER REINFORCEMENT RH
-
REMOVE FRONT ENGINE MOUNTING BRACKET LOWER REINFORCEMENT (w/ Reinforcement)
-
SEPARATE FRONT EXHAUST PIPE ASSEMBLY
-
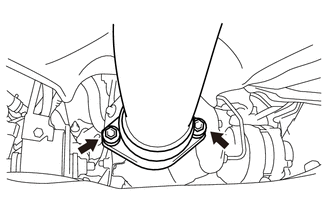
Remove the 2 bolts, 2 compression springs and separate the front exhaust pipe assembly from the No. 2 exhaust manifold converter sub-assembly.
-
Remove the gasket from the No. 2 exhaust manifold converter sub-assembly.
-
-
REMOVE RADIATOR RESERVE TANK ASSEMBLY
-
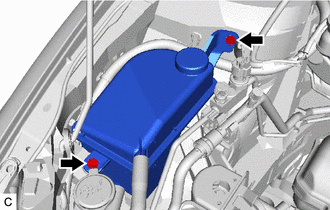
Remove the 2 bolts and separate the radiator reserve tank assembly.
-
-
REMOVE ENGINE MOUNTING INSULATOR SUB-ASSEMBLY RH
-
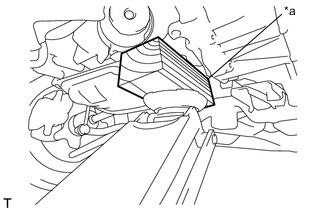
*a Wooden Block Support the engine with a jack and a wooden block.
Note
To prevent the No. 2 oil pan sub-assembly from deforming, do not place the wooden block under the No. 2 oil pan sub-assembly of the engine assembly.
-
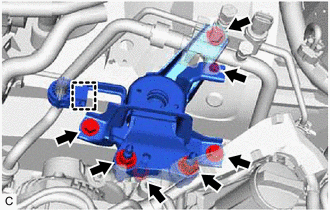
Remove the bolt and separate the cooler pipe clamp bracket from the engine mounting insulator sub-assembly RH.
-
Disconnect the cooler pipe clamp from the engine mounting insulator sub-assembly RH.
-
Remove the 3 bolts, 3 nuts and engine mounting insulator sub-assembly RH.
-
-
REMOVE CRANKSHAFT DAMPER SUB-ASSEMBLY
-
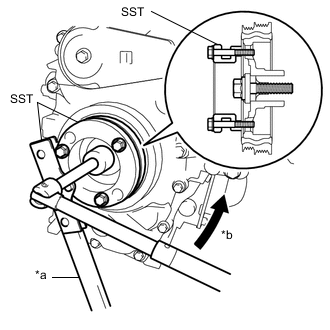
*a Hold *b Turn Using SST, hold the crankshaft damper and loosen the bolt.
- SST
- 09213-58014
- 09330-00021
-

*a Hold *b Turn Using SST, remove the crankshaft pulley bolt and the crankshaft damper sub-assembly.
- SST
- 09950-30012 ( 09951-03010, 09953-03010, 09956-03020 )
Note
Make sure that the engine does not contact the body or other components.
Tech Tips
Operate the jack to lower the engine to the position where the crankshaft damper sub-assembly can be removed.
-
-
REMOVE TIMING CHAIN COVER OIL SEAL
-
Using a knife, cut off the timing chain cover oil seal lip.
-
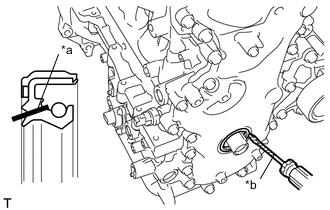
*a Cut Position *b Protective Tape Using a screwdriver with its tip wrapped with protective tape, remove the timing chain cover oil seal.
Note
After the removal, check the crankshaft for damage. If it is damaged, smooth the surface with 400-grit sandpaper.
-