ДАТЧИК ПОЛОЖЕНИЯ РАСПРЕДВАЛА УСТАНОВКА
PROCEDURE
-
INSTALL NO. 1 CRANK POSITION SENSOR (w/ Stop And Start System)
-
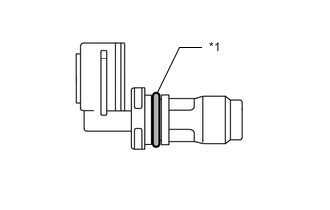
*1 O-ring Apply a light coat of engine oil to the O-ring of the No. 1 crank position sensor.
Note
If reusing the No. 1 crank position sensor, be sure to inspect the O-ring.
-
Install the No. 1 crank position sensor onto the timing chain cover sub-assembly with the bolt.
- Torque:
- 7.0 N*m { 71 kgf*cm, 62 in.*lbf }
Note
-
If a component has been dropped or subjected to a strong impact, replace it.
-
Make sure that the O-ring is not damaged or does not jump out of position during installation.
-
Connect the connector to the No. 1 crank position sensor.
-
-
INSTALL NO. 1 CRANK POSITION SENSOR (w/o Stop And Start System)
-
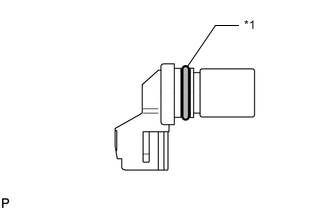
*1 O-ring Apply a light coat of engine oil to the O-ring of the No. 1 crank position sensor.
Note
If reusing the No. 1 crank position sensor, be sure to inspect the O-ring.
-
Install the No. 1 crank position sensor onto the cylinder head cover sub-assembly with the bolt.
- Torque:
- 7.0 N*m { 71 kgf*cm, 62 in.*lbf }
Note
-
If a component has been dropped or subjected to a strong impact, replace it.
-
Make sure that the O-ring is not damaged or does not jump out of position during installation.
-
Connect the connector of the No. 1 crank position sensor.
-
-
INSTALL SENSOR BRACKET (w/o Stop And Start System)
-
Install the sensor bracket to the cylinder head cover sub-assembly with the nut.
- Torque:
- 8.0 N*m { 82 kgf*cm, 71 in.*lbf }
-
-
INSPECT FOR ENGINE OIL LEAK
-
INSTALL NO. 1 ENGINE COVER (w/ No. 1 Engine Cover)