BACK DOOR OUTSIDE GARNISH(for Hatchback) REMOVAL
PROCEDURE
-
REMOVE REAR LIGHT ASSEMBLY LH
-
REMOVE REAR LIGHT ASSEMBLY RH
Tech Tips
Use the same procedure as for the LH side.
-
REMOVE BACK DOOR OPENER SWITCH ASSEMBLY
-
REMOVE BACK DOOR OUTSIDE GARNISH SUB-ASSEMBLY
-
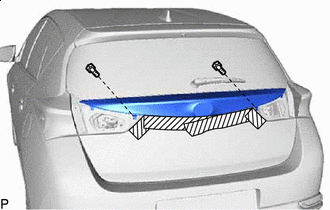

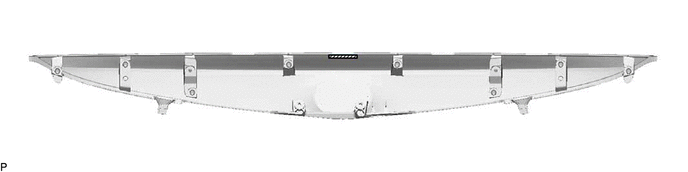
Protective Tape Remove the 2 bolts.
-
Apply protective tape around the back door outside garnish sub-assembly as shown in the illustration.
-
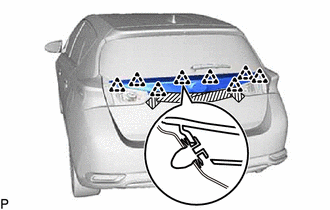
Disengage the 8 clips and remove the back door outside garnish sub-assembly.
-
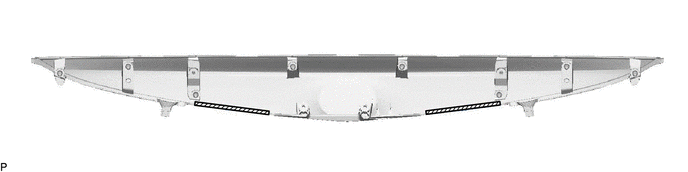
Remove the 8 clips from the back door outside garnish sub-assembly.
-
-
REMOVE NO. 1 BACK DOOR EMBLEM
-
REMOVE NO. 1 BACK DOOR OUTSIDE GARNISH PROTECTOR
-
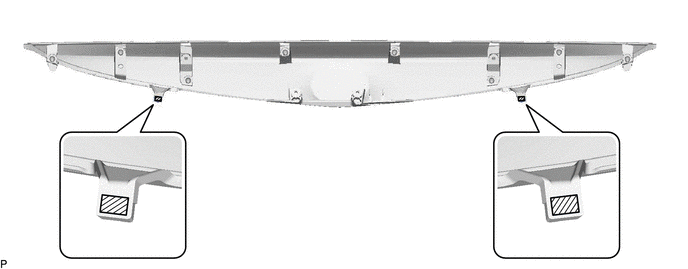
Remove the 2 No. 1 back door outside garnish protectors.
-
-
REMOVE NO. 2 BACK DOOR OUTSIDE GARNISH PROTECTOR
-
Remove the 2 No. 2 back door outside garnish protectors.
-
-
REMOVE BACK DOOR OUTSIDE GARNISH PROTECTOR
-
Remove the back door outside garnish protector.
-