ROOF SUNSHADE REASSEMBLY
PROCEDURE
-
ADJUST FULLY CLOSED POSITION
-
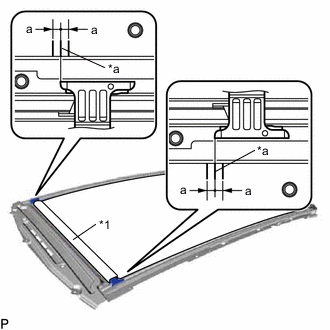
*1 Sunshade Trim Sub-assembly *a Alignment Mark Slide the sunshade trim sub-assembly so that it is aligned with the alignment marks.
Standard Area Measurement a 5.0 mm (0.197 in.) Tech Tips
Make sure that the difference between the alignment mark position on the left and right of the sunshade trim sub-assembly is within 5.0 mm(0.197 in.).
-
-
TEMPORARILY TIGHTEN SLIDING ROOF DRIVE GEAR ASSEMBLY
-
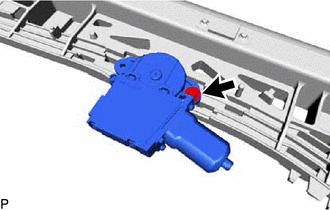
Temporarily install the sliding roof drive gear assembly to the sliding roof housing sub-assembly with the bolt.
-
-
INSTALL NO. 1 DOME LIGHT BRACKET
-
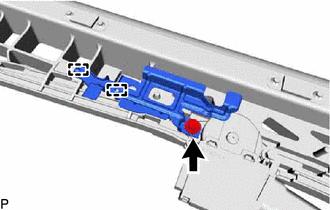
Engage the guide and pin to install the No. 1 dome light bracket.
-
Temporarily install the bolt.
-
-
TIGHTEN SLIDING ROOF DRIVE GEAR ASSEMBLY
-
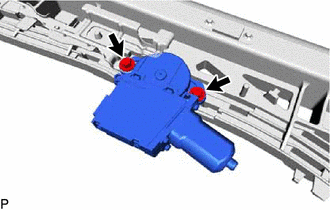
Tighten the 2 bolts to install the sliding roof drive gear assembly.
- Torque:
- 5.4 N*m { 55 kgf*cm, 48 in.*lbf }
-
-
INSTALL CONNECTOR WIRE
-
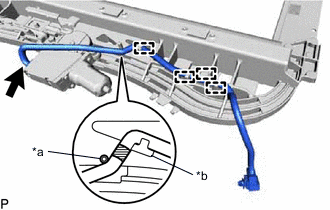
*1 Pin *2 Clamp (A) 
Alignment Tape (white) Connect the connector.
-
Route the connector wire shown in the illustration.
Tech Tips
Make sure that the alignment tape (white) is between the pin and clamp (A).
-
Engage the 4 clamps to install the connector wire.
-