ULTRASONIC SENSOR(for Front Side) REMOVAL
PROCEDURE
-
REMOVE FRONT BUMPER ASSEMBLY
-
REMOVE NO. 1 ULTRASONIC SENSOR
Tech Tips
Use the same procedure for all No. 1 ultrasonic sensors.
-
Disengage the clamp.
-
Disconnect the connector.
-
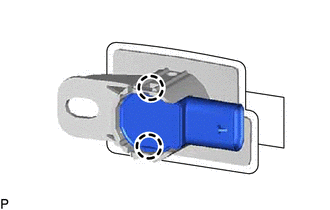
Disengage the 2 claws to remove the No. 1 ultrasonic sensor.
Tech Tips
This illustration is for the LH front or corner. The orientation for the RH front and corner is the opposite of the LH front or corner.
-
-
REMOVE NO. 2 ULTRASONIC SENSOR
Tech Tips
Use the same procedure for all No. 2 ultrasonic sensors.
-
Disconnect the connector.
-
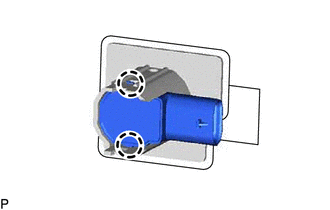
Disengage the 2 claws to remove the No. 2 ultrasonic sensor.
Tech Tips
This illustration is for the LH side. The orientation for the RH side is the opposite of the LH side.
-
-
REMOVE NO. 1 ULTRASONIC SENSOR RETAINER
Tech Tips
Use the same procedure for all No. 1 ultrasonic sensor retainers.
-
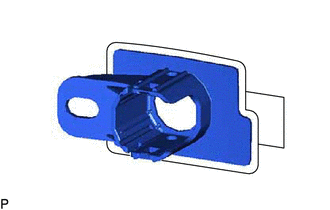
Remove the No. 1 ultrasonic sensor retainer from the front bumper assembly.
Tech Tips
This illustration is for the LH front or corner. The orientation for the RH front and corner is the opposite of the LH front or corner.
-
Remove the old double-sided tape from the front bumper assembly.
-
-
REMOVE NO. 2 ULTRASONIC SENSOR RETAINER
Tech Tips
Use the same procedure for all No. 2 ultrasonic sensor retainers.
-
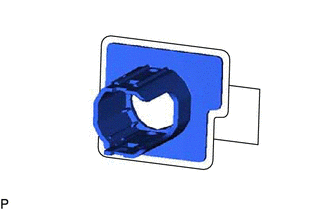
Remove the No. 2 ultrasonic sensor retainer from the front bumper assembly.
Tech Tips
This illustration is for the LH side. The orientation for the RH side is the opposite of the LH side.
-
Remove the old double-sided tape from the front bumper assembly.
-