RADIATOR GRILLE INSTALLATION
PROCEDURE
-
INSTALL RADIATOR GRILLE
-
Engage the 8 claws to install the radiator grille.
-
-
INSTALL UPPER RADIATOR GRILLE MOULDING LH
-
Engage the 4 claws to install the upper radiator grille moulding LH.
-
-
INSTALL UPPER RADIATOR GRILLE MOULDING RH
Tech Tips
Use the same procedure as for the LH side.
-
INSTALL RADIATOR GRILLE (OR FRONT PANEL) EMBLEM
-
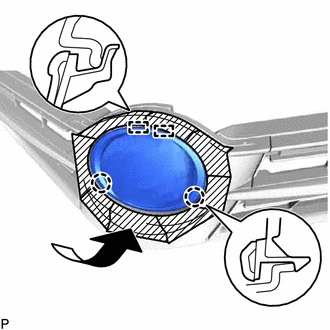
Engage the 2 guides and 2 claws to install the radiator grille (or front panel) emblem as shown in the illustration.
-
-
INSTALL NO. 1 RADIATOR GRILLE SEAL
-
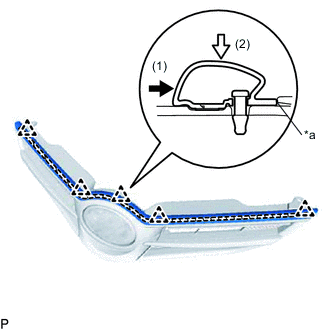
*a No clearance 
Double-sided Tape Clean off any tape adhesive residue with cleaner.
-
Engage the 5 clips and install a new No. 1 radiator grille seal.
-
Press the No. 1 radiator grille seal in the direction indicated by the arrow (1) in the illustration until it contacts the edge of the radiator grille to determine the installation position.
-
Remove the release paper from the No. 1 radiator grille seal.
-
Press the double-sided tape of the No. 1 radiator grille seal in the direction indicated by the arrow (2) in the illustration.
Tech Tips
Press the No. 1 radiator grille seal with a force of 39 N (4 kgf, 8.8 lbf) or more.
-
-
INSTALL RADIATOR GRILLE SUB-ASSEMBLY
-
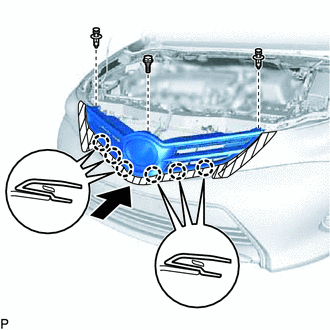
Engage the 6 claws as shown in the illustration.
-
Install the radiator grille sub-assembly with the bolt and 2 clips.
-