RADIATOR GRILLE REMOVAL
PROCEDURE
-
REMOVE RADIATOR GRILLE SUB-ASSEMBLY
-
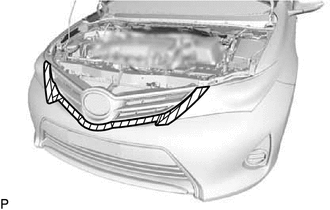

Protective Tape Put protective tape around the radiator grille sub-assembly.
-

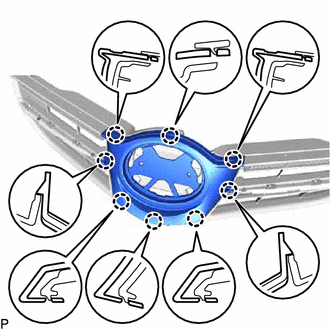
Remove the bolt and 2 clips.
-
Disengage the 6 claws and remove the radiator grille sub-assembly as shown in the illustration.
-
-
REMOVE NO. 1 RADIATOR GRILLE SEAL
-
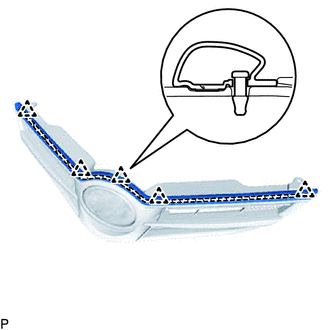
Double-sided Tape Disengage the 5 clips and separate the double-sided tape to remove the No. 1 radiator grille seal.
-
-
REMOVE RADIATOR GRILLE (OR FRONT PANEL) EMBLEM
-
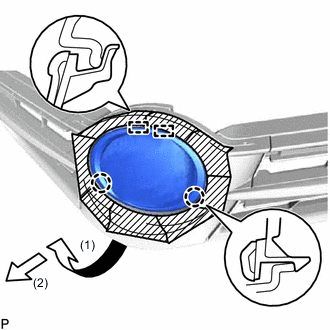
Protective Tape Put protective tape around the radiator grille (or front panel) emblem.
-
Disengage the 2 claws and 2 guides, and remove the radiator grille (or front panel) emblem as shown in the illustration.
-
-
REMOVE UPPER RADIATOR GRILLE MOULDING LH
-
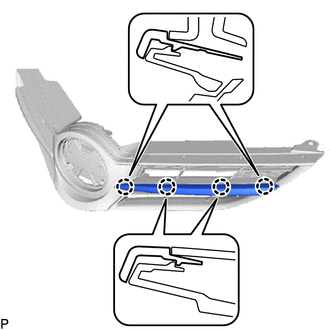
Disengage the 4 claws and remove the upper radiator grille moulding LH.
-
-
REMOVE UPPER RADIATOR GRILLE MOULDING RH
Tech Tips
Use the same procedure as for the LH side.
-
REMOVE RADIATOR GRILLE
-
Disengage the 8 claws and remove the radiator grille.
-