REAR BUMPER(for Wagon) REASSEMBLY
PROCEDURE
-
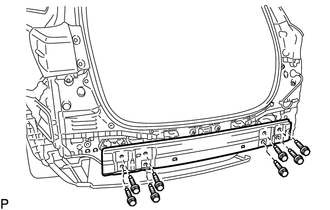
INSTALL REAR BUMPER ARM SUB-ASSEMBLY LH
-
Install the rear bumper arm sub-assembly LH with the 3 bolts.
- Torque:
- 11.5 N*m { 117 kgf*cm, 8 ft.*lbf }
-
-
INSTALL REAR BUMPER ARM SUB-ASSEMBLY RH
Tech Tips
Use the same procedure as for the LH side.
-
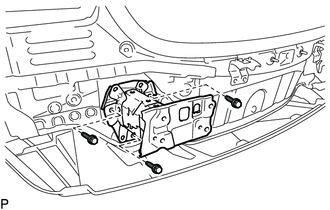
INSTALL NO. 1 REAR BUMPER REINFORCEMENT
-
Install the No. 1 rear bumper reinforcement with the 8 bolts.
- Torque:
- 11.5 N*m { 117 kgf*cm, 8 ft.*lbf }
-
-
INSTALL REAR BUMPER SIDE SEAL LH
-
Install the rear bumper side seal LH with the 3 clips.
-
-
INSTALL REAR BUMPER SIDE SEAL RH
-
Install the rear bumper side seal RH with the 3 clips.
-
-
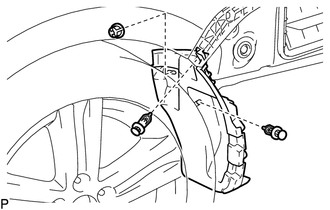
INSTALL UPPER REAR BUMPER RETAINER LH
-
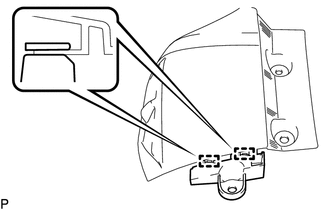
Engage the 2 guides to temporarily install the upper rear bumper retainer LH to the rear combination light assembly LH.
-
Engage the 2 guides as shown in the illustration to temporarily install the upper rear bumper retainer LH and rear combination light assembly LH as a set.
-
Install the upper rear bumper retainer LH with the screw.
-
-
INSTALL UPPER REAR BUMPER RETAINER RH
Tech Tips
Use the same procedure as for the LH side.
-
INSTALL REAR COMBINATION LIGHT ASSEMBLY LH
-
INSTALL REAR COMBINATION LIGHT ASSEMBLY RH
Tech Tips
Use the same procedure as for the LH side.
-
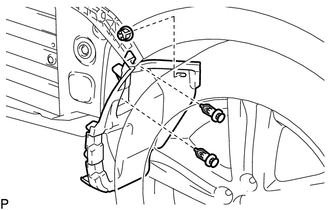
INSTALL REAR BUMPER SIDE RETAINER LH
-
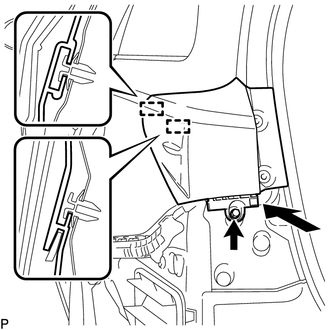
Engage the guide and 4 claws.
-
Install the rear bumper side retainer LH with the 3 screws.
-
-
INSTALL REAR BUMPER SIDE RETAINER RH
Tech Tips
Use the same procedure as for the LH side.
-
INSTALL NO. 2 REAR BUMPER MOULDING
-

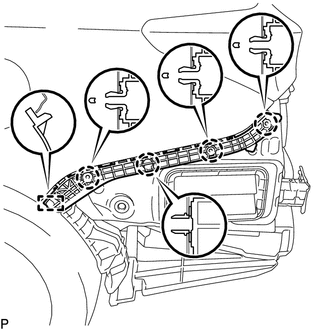
Engage the 10 claws.
-
Install the No. 2 rear bumper moulding to the rear bumper guard with the 2 screws.
-
Engage the guide and 10 claws.
-
Install the rear bumper guard with No. 2 rear bumper moulding with the 2 clips.
-
-
INSTALL REFLEX REFLECTOR ASSEMBLY LH
-
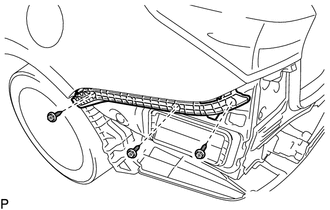
Engage the guide.
-
Engage the claw.
-
Install the reflex reflector assembly LH with the screw.
-
Engage the 6 claws to install the rear bumper extension LH.
-
-
INSTALL REFLEX REFLECTOR ASSEMBLY RH
Tech Tips
Use the same procedure as for the LH side.
-
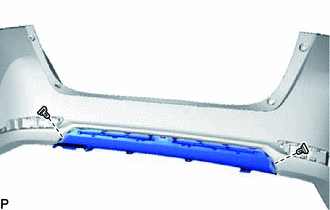
INSTALL REAR BUMPER PAD LH
-
Clean the rear bumper assembly.
-
Remove any remaining double-sided tape from the rear bumper assembly.
-
Wipe off any tape adhesive residue with cleaner.
-
-
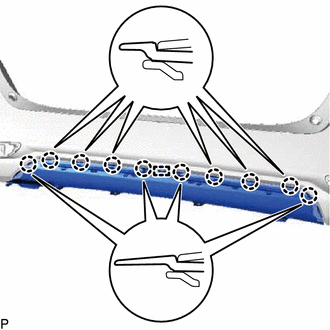
Remove the release paper from a new rear bumper pad LH.
Tech Tips
After removing the release paper, keep the exposed adhesive free from foreign matter.
-
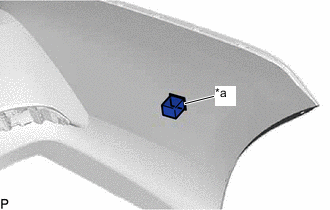
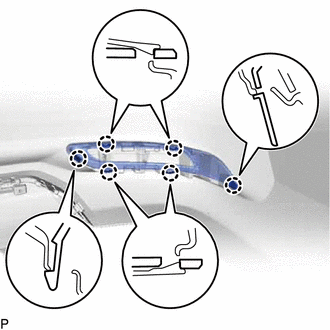
*a Line Install the rear bumper pad LH as shown in the illustration.
Tech Tips
Install the rear bumper pad LH along the line marked on the rear bumper assembly.
-
-
INSTALL REAR BUMPER PAD RH
Tech Tips
Use the same procedure as for the LH side.
-
INSTALL NO. 1 ULTRASONIC SENSOR (w/ TOYOTA Parking Assist-sensor System)
-
INSTALL NO. 3 ULTRASONIC SENSOR RETAINER (w/ TOYOTA Parking Assist-sensor System)
-
INSTALL NO. 3 ULTRASONIC SENSOR (w/ TOYOTA Parking Assist-sensor System)
-
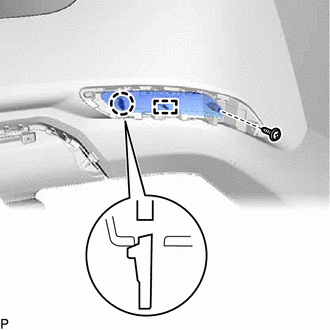
INSTALL NO. 2 LUGGAGE ROOM WIRE (w/ TOYOTA Parking Assist-sensor System)
-
Engage the 4 clamps.

*a Line - - 
Adhesive Tape - - -
Connect the 4 connectors.
-
Install the No. 2 luggage room wire to the rear bumper assembly with adhesive tape as shown in the illustration.
Note
-
Apply the tape securely in place.
-
Do not touch the adhesive surface when applying the tape to prevent adhesion failure.
-
-