EGR COOLER REMOVAL
PROCEDURE
-
REMOVE WINDSHIELD WIPER MOTOR AND LINK ASSEMBLY
-
REMOVE WATER GUARD PLATE LH (for LHD)
-
REMOVE WATER GUARD PLATE LH (for RHD)
-
REMOVE NO. 2 HEATER AIR DUCT SPLASH SHIELD SEAL (for LHD)
-
REMOVE NO. 2 HEATER AIR DUCT SPLASH SHIELD SEAL (for RHD)
-
REMOVE OUTER COWL TOP PANEL (for LHD)
-
REMOVE OUTER COWL TOP PANEL (for RHD)
-
DRAIN ENGINE COOLANT (for Engine)
-
REMOVE NO. 2 CYLINDER HEAD COVER
-
REMOVE AIR CLEANER CAP SUB-ASSEMBLY
-
REMOVE INLET AIR CLEANER ASSEMBLY
-
REMOVE AIR CLEANER CASE SUB-ASSEMBLY
-
REMOVE EGR PIPE ASSEMBLY
-
REMOVE EGR COOLER SUB-ASSEMBLY
-
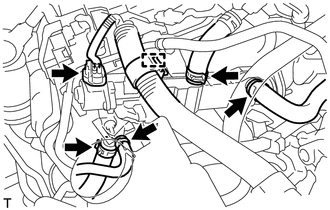
Disconnect the connector and wire harness clamp.
-
Slide the 4 clips and disconnect the 4 water hoses.
-
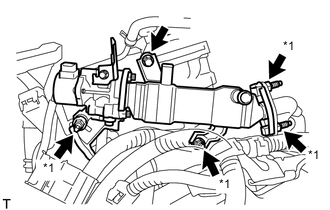
*1 Stud Bolt and Nut Remove the 4 nuts and bolt.
-
Using an E8 "TORX" socket wrench, remove the 4 stud bolts and EGR valve with cooler assembly.
Tech Tips
If a stud bolt is deformed or the threads are damaged, replace it.
-
Remove the EGR cooler gasket.
-
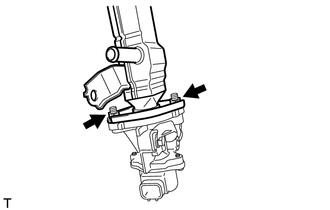
Remove the 2 nuts, EGR cooler sub-assembly and EGR valve gasket.
-