SUB RADIATOR REMOVAL
PROCEDURE
-
REMOVE NO. 1 ENGINE UNDER COVER
-
DRAIN COOLANT (for Inverter)
-
REMOVE HEADLIGHT ASSEMBLY LH
-
REMOVE HEADLIGHT ASSEMBLY RH
Tech Tips
Use the same procedure as for the LH side.
-
REMOVE NO. 1 INVERTER BRACKET
-
REMOVE RADIATOR SUPPORT LH
-
REMOVE RADIATOR SUPPORT RH
-
REMOVE UPPER RADIATOR SUPPORT SUB-ASSEMBLY
-
REMOVE NO. 2 FAN SHROUD
-
REMOVE RADIATOR ASSEMBLY
-
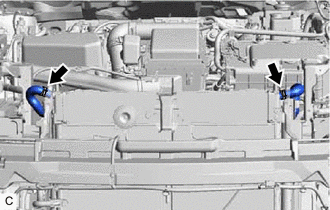
Slide the 2 clips and disconnect the 2 water hoses from the radiator assembly.
Note
Put pieces of cloth into the pipes and in the disconnected hoses or cover the pipes and hoses with plastic bags to prevent entry of foreign matter.
-

Using a 10 mm union nut wrench, remove the 2 bolts (A).
-
Remove the 2 bolts (B) and radiator assembly.
-