SLIDING ROOF HOUSING (for TMMK Made) REMOVAL
-
REMOVE CURTAIN SHIELD AIRBAG ASSEMBLY LH
-
REMOVE CURTAIN SHIELD AIRBAG ASSEMBLY RH
Tech Tips
Use the same procedure as for the LH side.
-
REMOVE SLIDING ROOF SIDE GARNISH LH
-
Disengage the 2 claws and remove the sliding roof side garnish LH.
-
-
REMOVE SLIDING ROOF SIDE GARNISH RH
Tech Tips
Use the same procedure as for the LH side.
-
REMOVE SLIDING ROOF GLASS SUB-ASSEMBLY
-
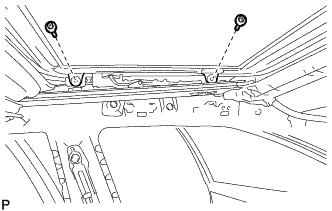
Using a T25 "TORX" socket wrench, remove the 4 screws and sliding roof glass sub-assembly.
Note
To prevent the sliding roof glass and sliding roof drive gear from being displaced, fully close the sliding roof glass (sliding roof drive cable), and then remove the sliding roof glass sub-assembly.
-
-
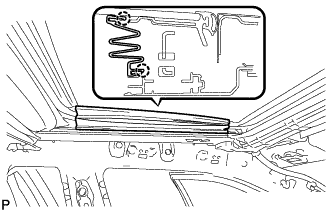
REMOVE SLIDING ROOF WEATHERSTRIP
-
Remove the sliding roof weatherstrip from the sliding roof panel sub-assembly.
-
-
REMOVE REAR NO. 2 SIDE RAIL SPACER LH
-
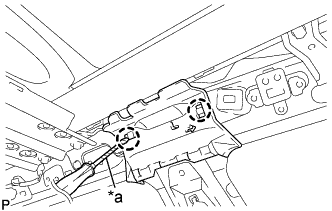
Text in Illustration *a Protective Tape Using a screwdriver, disengage the 2 claws and remove the rear No. 2 side rail spacer LH.
Tech Tips
Tape the screwdriver tip before use.
-
-
REMOVE REAR NO. 2 SIDE RAIL SPACER RH
Tech Tips
Use the same procedure as for the LH side.
-
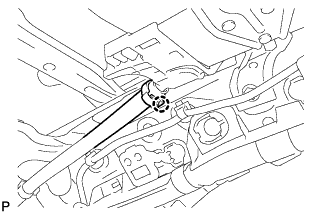
REMOVE SLIDING ROOF HOUSING SUB-ASSEMBLY
-
for Clamp Type:
-
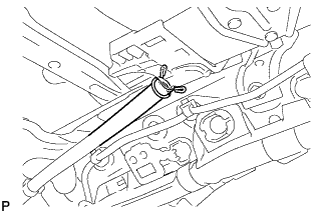
Disengage the claw and disconnect the sliding roof drain hose.
Tech Tips
Use the same procedure for the other 3 sliding roof drain hoses.
-
-
for Clip Type:
-
Expand the clip and disconnect the sliding roof drain hose.
Tech Tips
Use the same procedure for the other 3 sliding roof drain hoses.
-
-
Loosen the 8 bolts of the brackets.
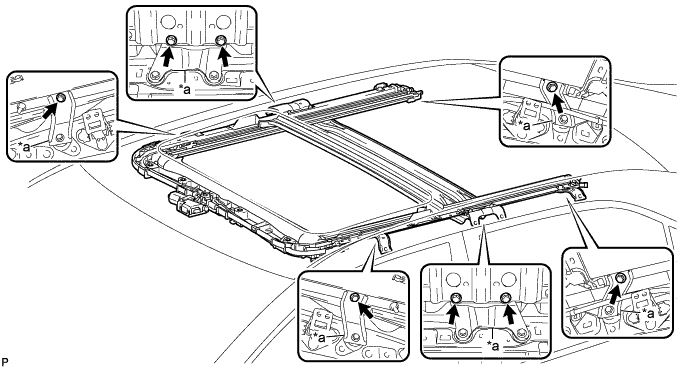
Text in Illustration *a Bracket - - -
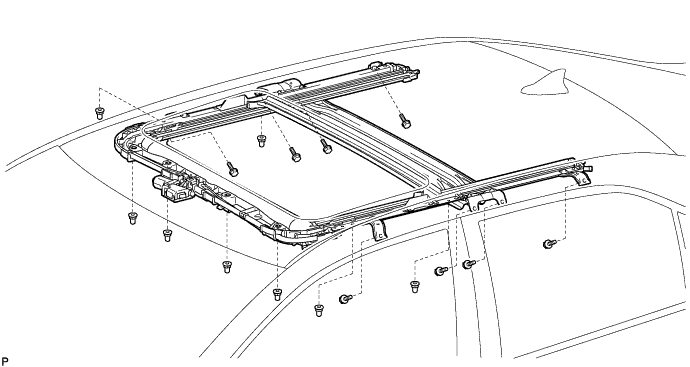
Remove the 8 bolts, 8 nuts and sliding roof housing sub-assembly.
-