COOLER EXPANSION VALVE (for TMMK Made) REMOVAL
-
RECOVER REFRIGERANT FROM AIR CONDITIONING SYSTEM
-
Turn the A/C switch on.
-
Operate the air conditioning with a set temperature of 25°C (77°F) and the blower at low for 10 minutes to circulate the refrigerant. This causes most of the compressor oil from the various components of the air conditioning system to collect in the air conditioning compressor.
-
Turn the ignition switch off.
-
Recover the refrigerant from the air conditioning system using a refrigerant recovery unit.
-
-
REMOVE WINDSHIELD WIPER MOTOR AND LINK ASSEMBLY
-
REMOVE FRONT OUTER COWL TOP PANEL SUB-ASSEMBLY
-
w/ Windshield Deicer System:
-
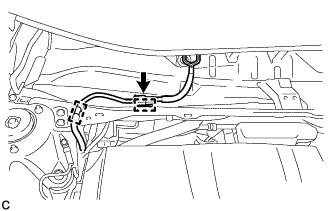
Disengage the 2 clamps.
-
Disconnect the connector and separate the wire harness from the front outer cowl top panel sub-assembly.
-
-
w/ Heated Windshield Defroster System:
-
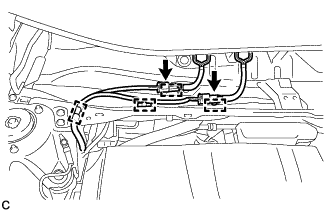
Disengage the 4 clamps.
-
Disconnect the 2 connectors and separate the wire harness from the front outer cowl top panel sub-assembly.
-
-
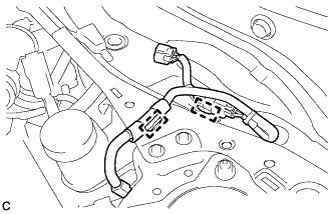
Disengage the 2 clamps and separate the wire harness from the front outer cowl top panel sub-assembly.
-

Remove the 10 bolts and front outer cowl top panel sub-assembly.
-
-
DISCONNECT SUCTION HOSE SUB-ASSEMBLY
-
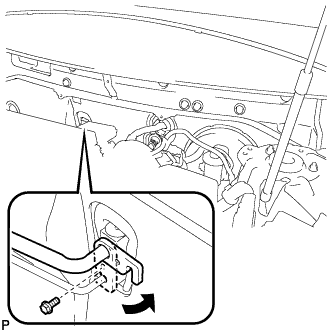
Remove the bolt and rotate the hook connector as shown in the illustration.
-
Disconnect the suction hose sub-assembly.
-
Remove the O-ring from the suction hose sub-assembly.
Note
Seal the openings of the disconnected parts using vinyl tape to prevent entry of moisture and foreign matter.
-
-
DISCONNECT AIR CONDITIONER TUBE AND ACCESSORY ASSEMBLY
-
Disconnect the air conditioner tube and accessory assembly.
-
Remove the O-ring from the air conditioner tube and accessory assembly.
Note
Seal the openings of the disconnected parts using vinyl tape to prevent entry of moisture and foreign matter.
-
-
REMOVE COOLER EXPANSION VALVE
-
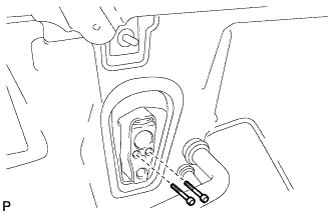
Using a 4 mm hexagon socket wrench, remove the 2 hexagon bolts.
-
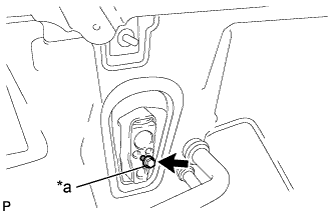
Text in Illustration *a Bolt for Suction Hose Sub-assembly Temporarily install the bolt for the suction hose sub-assembly halfway to the cooler expansion valve.
-
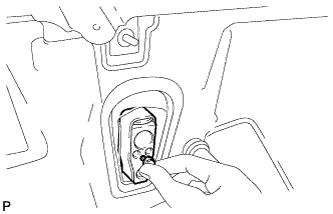
Hold the bolt and pull it to remove the cooler expansion valve as shown in the illustration.
-
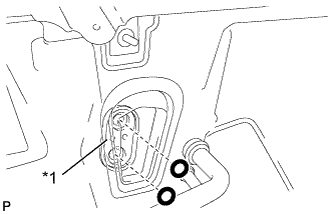
Text in Illustration *1 No. 1 cooler evaporator sub-assembly Remove the 2 O-rings from the No. 1 cooler evaporator sub-assembly.
-