PTC HEATER ASSEMBLY REMOVAL
-
REMOVE FRONT SEAT ASSEMBLY LH (for Manual Seat)
-
REMOVE FRONT SEAT ASSEMBLY LH (for Power Seat)
-
REMOVE FRONT SEAT ASSEMBLY RH (for Manual Seat)
Tech Tips
Use the same procedure as for the LH side.
-
REMOVE FRONT SEAT ASSEMBLY RH (for Power Seat)
Tech Tips
Use the same procedure as for the LH side.
-
REMOVE RADIO RECEIVER ASSEMBLY WITH AIR CONDITIONING CONTROL ASSEMBLY (w/o Navigation System)
-
REMOVE NAVIGATION RECEIVER ASSEMBLY WITH AIR CONDITIONING CONTROL ASSEMBLY (w/ Navigation System)
-
REMOVE SHIFT LEVER SUPPORT
-
REMOVE FLOOR CARPET BRACKET RH
-
Remove the 2 clips.
-
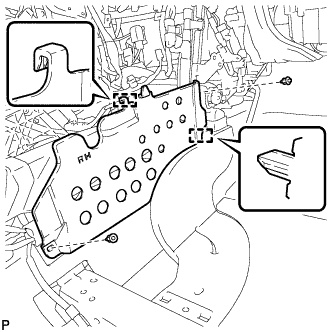
Disengage the 2 guides to remove the floor carpet bracket RH.
-
-
REMOVE NO. 1 AIR DUCT SUB-ASSEMBLY
-
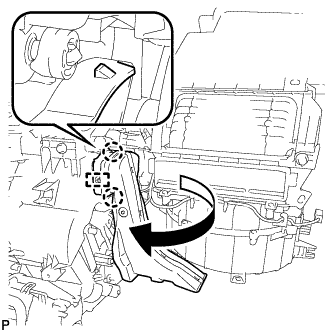
Disengage the 2 claws and guide, and remove the No. 1 air duct sub-assembly as shown in the illustration.
-
-
REMOVE QUICK HEATER ASSEMBLY
-
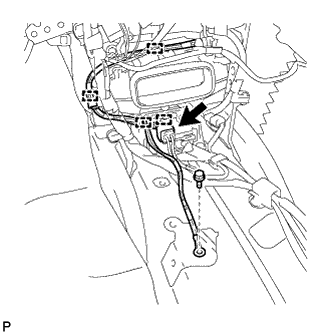
Disconnect the quick heater connector.
-
Remove the bolt.
-
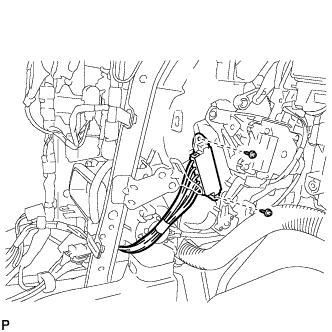
Disengage the 4 clamps.
-
Remove the 2 screws.
-
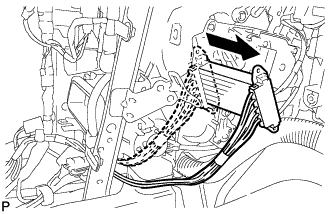
Remove the quick heater assembly as shown in the illustration.
-