CLOCK REMOVAL
-
REMOVE CENTER INSTRUMENT CLUSTER FINISH PANEL SUB-ASSEMBLY
-
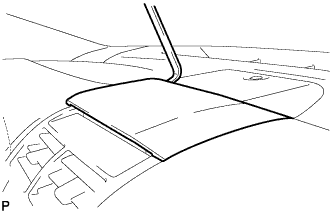
Using a moulding remover, pry up on the center instrument cluster finish panel sub-assembly until there is enough of a gap to make it possible to pull on the panel by hand.
-
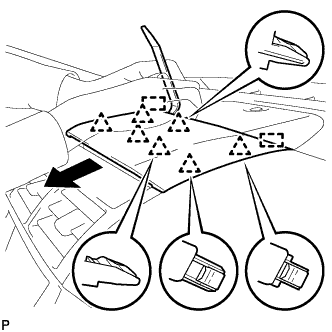
Pull the center instrument cluster finish panel sub-assembly in the direction indicated by the arrow to disengage the 7 clips and 2 guides to remove the center instrument cluster finish panel sub-assembly as shown in the illustration.
-
-
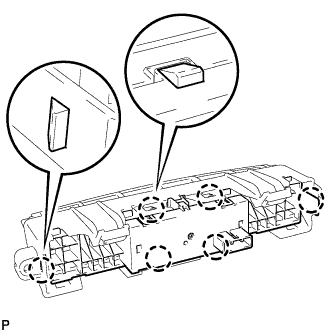
REMOVE NO. 2 INSTRUMENT PANEL REGISTER ASSEMBLY
-
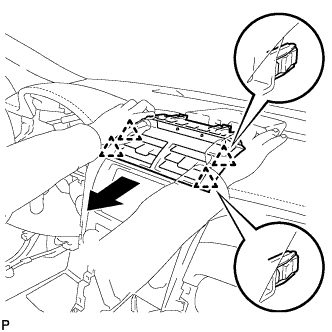
Pull the No. 2 instrument panel register assembly in the direction indicated by the arrow to disengage the 4 clips as shown in the illustration.
-
Disconnect the connector to remove the No. 2 instrument panel register assembly.
-
-
REMOVE CLOCK ASSEMBLY
-
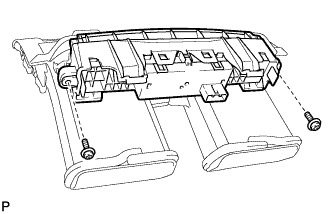
Remove the 2 screws and clock assembly with No. 2 bezel.
-
Disengage the 6 claws and remove the clock assembly.
-