FRONT DOOR COURTESY SWITCH (for TMMK Made) REMOVAL
Tech Tips
-
Use the same procedure for the RH side and LH side.
-
The following procedure is for the LH side.
-
REMOVE FRONT DOOR SCUFF PLATE
-
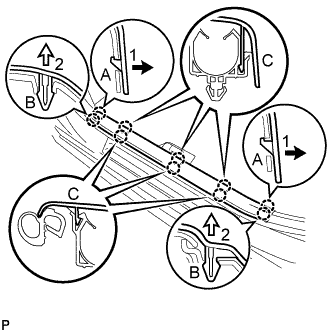
Disengage the 2 claws (A) in the direction indicated by the arrows (1) shown in the illustration.
-
Disengage the 2 claws (B) in the direction indicated by the arrows (2) shown in the illustration.
-
Disengage the 6 claws (C) to remove the front door scuff plate LH.
-
-
DISCONNECT FRONT DOOR OPENING TRIM WEATHERSTRIP
-
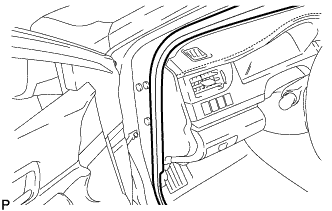
Disconnect the front door opening trim weatherstrip LH.
-
-
REMOVE REAR DOOR SCUFF PLATE
-
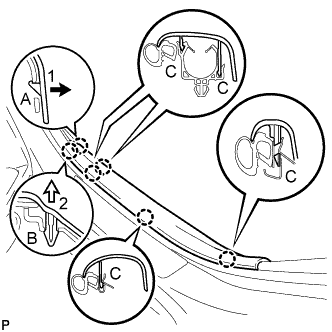
Disengage the claw (A) in the direction indicated by the arrow (1) shown in the illustration.
-
Disengage the claw (B) in the direction indicated by the arrow (2) shown in the illustration.
-
Disengage the 4 claws (C) to remove the rear door scuff plate LH.
Tech Tips
Disengage the claws from the front side of the rear door scuff plate LH.
-
-
DISCONNECT REAR DOOR OPENING TRIM WEATHERSTRIP
-
Disconnect the rear door opening trim weatherstrip.
-
-
REMOVE CENTER PILLAR LOWER GARNISH
-
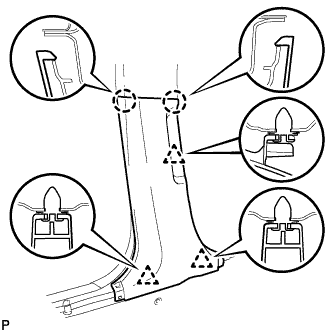
Disengage the 2 claws and 3 clips, and remove the center pillar lower garnish LH.
-
-
REMOVE FRONT DOOR COURTESY LIGHT SWITCH ASSEMBLY
-
Disconnect the connector.
-
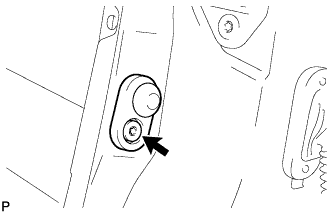
Using a T30 "TORX" socket wrench, remove the screw and front door courtesy light switch assembly.
-