INSTRUMENT PANEL SPEAKER (for TMC, TMMR Made) REMOVAL
-
DISCONNECT FRONT DOOR OPENING TRIM WEATHERSTRIP
-
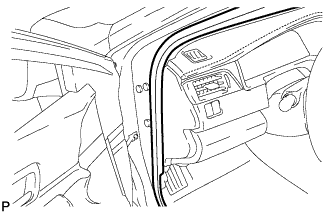
Disconnect the front door opening trim weatherstrip LH.
-
-
REMOVE FRONT PILLAR GARNISH
-

Text in Illustration *1 Front Pillar Garnish Clip Pull the upper part of the garnish toward the inside of the cabin and disengage the garnish from the base of the 2 clips.
Tech Tips
Make the front pillar garnish LH hang down from the front pillar garnish clip.
-
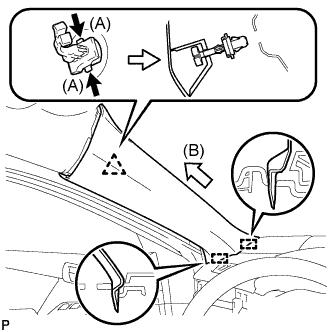
While pushing the tabs on the front pillar garnish clip in the direction indicated by the arrow (A) shown in the illustration, disengage the front pillar garnish clip.
-
Pull the garnish in the direction indicated by the arrow (B) shown in the illustration to disengage the 2 guides and remove the front pillar garnish LH.
-

Text in Illustration *1 Adhesive Tape *2 Protective Cover *3 Curtain Shield Airbag Assembly Protect the curtain shield airbag assembly.
-
Cover the airbag with a piece of cloth or nylon and secure the edges of the cover with tape as shown in the illustration.
Note
Cover the curtain shield airbag with a protective cover as soon as the front pillar garnish is removed.
-
-
-
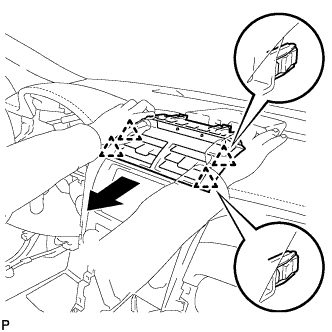
REMOVE INSTRUMENT PANEL SPEAKER PANEL SUB-ASSEMBLY
-
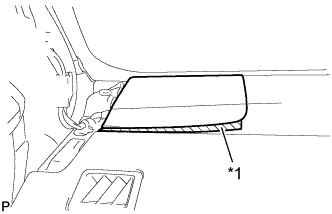
Text in Illustration *1 Protective Tape Apply protective tape to the area shown in the illustration.
-
Using a moulding remover, disengage the 2 clips and 3 claws.
-
Disengage the 2 guides to remove the No. 1 instrument panel speaker panel sub-assembly.
-
-
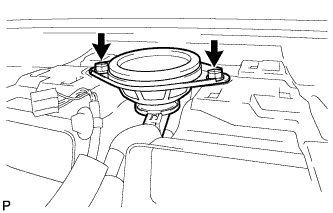
REMOVE FRONT NO. 2 SPEAKER ASSEMBLY
-
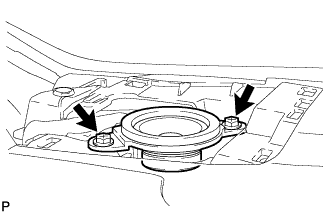
Remove the 2 screws.
-
Lift the front No. 2 speaker assembly and disconnect the connector to remove the speaker.
Note
Do not touch the speaker cone.
-
-
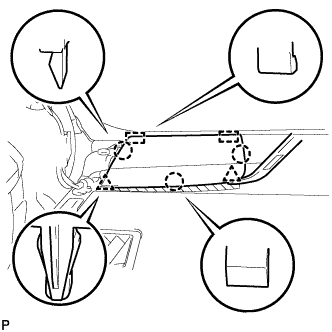
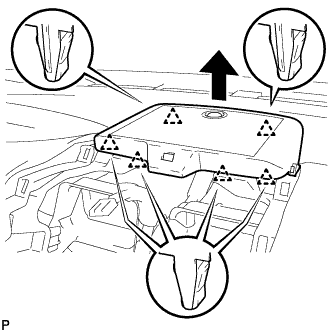
REMOVE CENTER INSTRUMENT CLUSTER FINISH PANEL SUB-ASSEMBLY (for 10 Speakers)
-
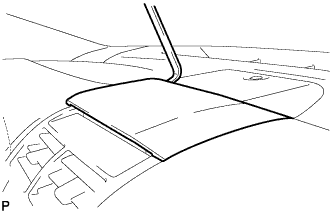
Using a moulding remover, pry up on the center instrument cluster finish panel sub-assembly until there is enough of a gap to make it possible to pull on the panel by hand.
-
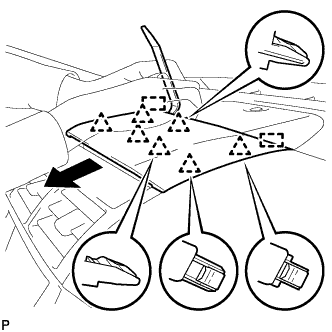
Pull the center instrument cluster finish panel sub-assembly in the direction indicated by the arrow to disengage the 7 clips and 2 guides to remove the center instrument cluster finish panel sub-assembly as shown in the illustration.
-
-
REMOVE NO. 2 INSTRUMENT PANEL REGISTER ASSEMBLY (for 10 Speakers)
-
Pull the No. 2 instrument panel register assembly in the direction indicated by the arrow to disengage the 4 clips as shown in the illustration.
-
Disconnect the connector to remove the No. 2 instrument panel register assembly.
-
-
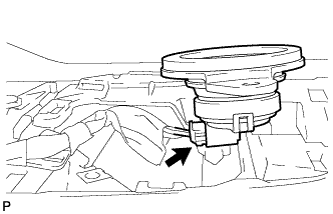
REMOVE NO. 1 SPEAKER OPENING COVER ASSEMBLY (for 10 Speakers)
-
Disengage the 6 clips as shown in the illustration.
-
Disconnect the connector to remove the No. 1 speaker opening cover assembly.
-
-
REMOVE FRONT NO. 3 SPEAKER ASSEMBLY (for 10 Speakers)
-
Remove the 2 screws.
-
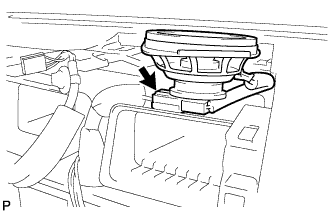
Lift the front No. 3 speaker assembly and disconnect the connector to remove the speaker.
Note
Do not touch the speaker cone.
-