INSTRUMENT PANEL SPEAKER (for TMMK Made) INSTALLATION
Note
-
Use the same procedure for the RH side and LH side.
-
The following procedure is for the LH side.
for Side:
-
INSTALL FRONT NO. 3 SPEAKER ASSEMBLY (for 10 Speakers)
Note
Do not touch the speaker cone.
-
Connect the connector.
-
Install the front No. 3 speaker assembly with the 2 screws.
Tech Tips
Install the screws in the order shown in the illustration.
-
-
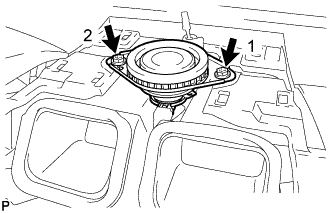
INSTALL NO. 1 SPEAKER OPENING COVER ASSEMBLY (for 10 Speakers)
-
Connect the connector.
-
Engage the clamp.
-
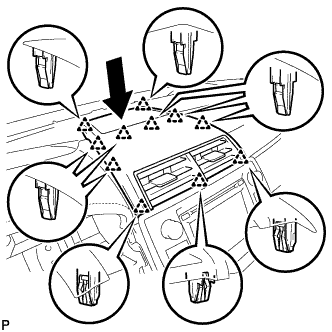
Engage the 11 clips to install the No. 1 speaker opening cover assembly as shown in the illustration.
-
-
INSTALL FRONT NO. 2 SPEAKER ASSEMBLY
Note
Do not touch the speaker cone.
-
Connect the connector.
-
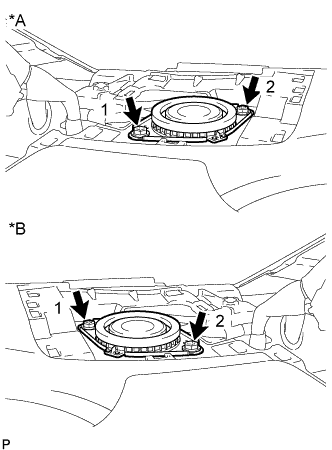
Text in Illustration *A LH Side *B RH Side Install the front No. 2 speaker assembly with the 2 screws.
Tech Tips
Install the screws in the order shown in the illustration.
-
-
INSTALL INSTRUMENT PANEL SPEAKER PANEL SUB-ASSEMBLY
-
Engage the 2 guides.
-
Engage the 3 claws and 2 clips to install the No. 1 instrument panel speaker panel sub-assembly.
-
-
INSTALL FRONT PILLAR GARNISH
-
Remove the protective cover.
-
Install a new clips to the front pillar garnish LH.
-
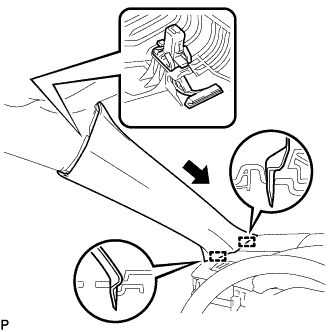
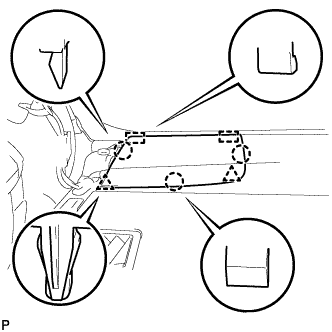
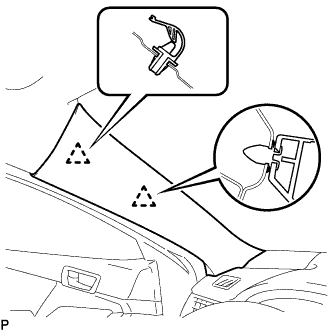
Install a new front pillar garnish clip to front pillar garnish LH.
Tech Tips
Engage the front pillar garnish clip so that it is oriented as shown in the illustration.
-
Engage the 2 guides as shown in the illustration.
-
Engage the front pillar garnish clip and clip to install the front pillar garnish LH.
-
-
INSTALL FRONT DOOR OPENING TRIM WEATHERSTRIP
for LH side: Click here
for RH side: Click here