RADIATOR REMOVAL
-
PRECAUTION
Note
After turning the ignition switch off, waiting time may be required before disconnecting the cable from the negative (-) battery terminal. Therefore, make sure to read the disconnecting the cable from the negative (-) battery terminal notices before proceeding with work Click here.
-
DRAIN ENGINE COOLANT
Note
Do not remove the radiator cap sub-assembly or radiator drain cock plug while the engine and radiator assembly are still hot. Pressurized, hot engine coolant and steam may be released and cause serious burns.
-
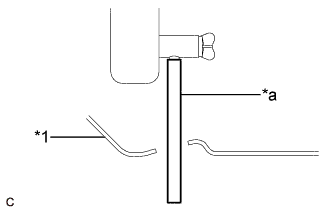
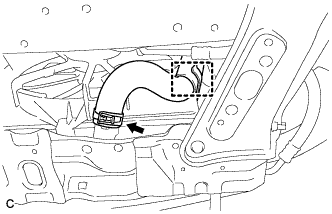
Text in Illustration *1 Engine Under Cover LH *a Hose Connect a hose with an inside diameter of 9 mm (0.354 in.) to the radiator drain cock as shown in the illustration.
-
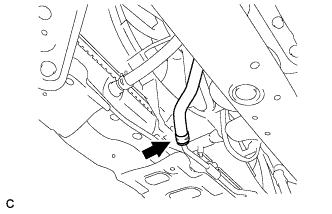
Loosen the radiator drain cock plug.
-
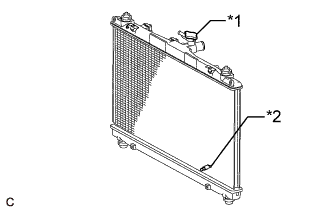
Text in Illustration *1 Radiator Cap Sub-assembly *2 Radiator Drain Cock Plug Remove the radiator cap sub-assembly. Then drain the engine coolant.
Tech Tips
Collect the engine coolant in a container and dispose of it according to the regulations in your area.
-
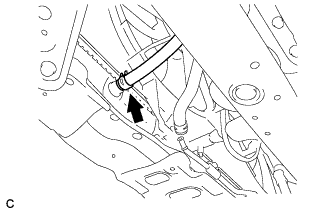
Disconnect the hose from the radiator drain cock.
-
-
REMOVE FRONT WHEEL OPENING EXTENSION PAD RH
-
REMOVE FRONT WHEEL OPENING EXTENSION PAD LH
-
REMOVE ENGINE UNDER COVER RH
-
REMOVE ENGINE UNDER COVER LH
-
DISCONNECT CABLE FROM NEGATIVE BATTERY TERMINAL
Note
When disconnecting the cable, some systems need to be initialized after the cable is reconnected Click here.
-
REMOVE FRONT BUMPER ASSEMBLY
-
REMOVE INLET AIR CLEANER ASSEMBLY
-

Remove the 2 bolts and inlet air cleaner assembly.
-
-
REMOVE RADIATOR RESERVE TANK ASSEMBLY
-
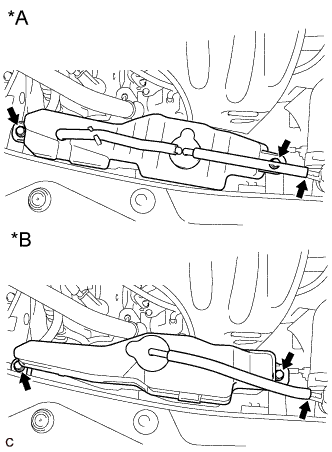
Text in Illustration *A for TMC, TMMR Made *B for TMMK Made Disconnect the radiator reserve tank hose.
-
Remove the 2 bolts and radiator reserve tank assembly.
-
-
DISCONNECT NO. 1 RADIATOR HOSE
-
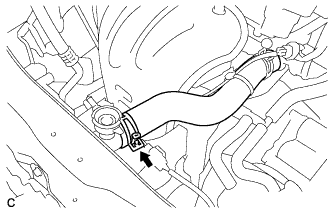
Slide the clip and disconnect the No. 1 radiator hose from the radiator assembly.
-
-
DISCONNECT NO. 2 RADIATOR HOSE
-
Slide the clip and disconnect the No. 2 radiator hose from the radiator assembly.
-
Disengage the clamp and disconnect the No. 2 radiator hose from the fan assembly.
-
-
DISCONNECT INLET NO. 1 OIL COOLER HOSE (w/ Oil Cooler)
-
Slide the clip and disconnect the inlet No. 1 oil cooler hose.
-
-
DISCONNECT OUTLET NO. 1 OIL COOLER HOSE (w/ Oil Cooler)
-
Slide the clip and disconnect the outlet No. 1 oil cooler hose.
-
-
REMOVE HOOD LOCK ASSEMBLY (for TMC, TMMR Made)
for LHD: Click here
for RHD: Click here
-
REMOVE HOOD LOCK ASSEMBLY (for TMMK Made)
-
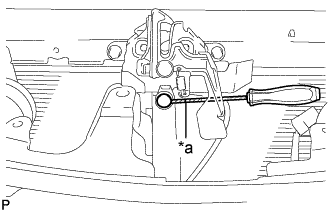
Text in Illustration *a Protective Tape Using a screwdriver, remove the hood lock nut cap.
Tech Tips
Tape the screwdriver tip before use.
-
w/ Engine Hood Courtesy Switch:
-
Disconnect the connector.
-
-
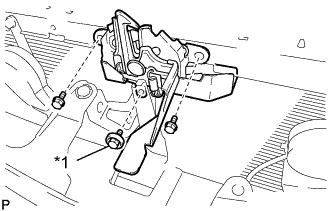
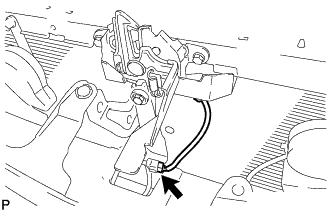
Text in Illustration *1 Hood Lock Bolt Remove the 2 bolts and hood lock bolt.
-
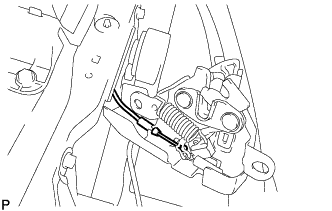
Disconnect the hood lock control cable assembly and remove the hood lock assembly.
-
-
REMOVE UPPER RADIATOR SUPPORT
-
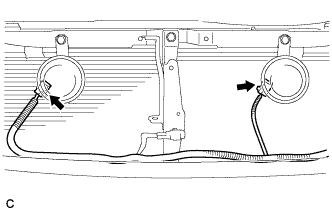
Disconnect the 2 horn connectors.
-
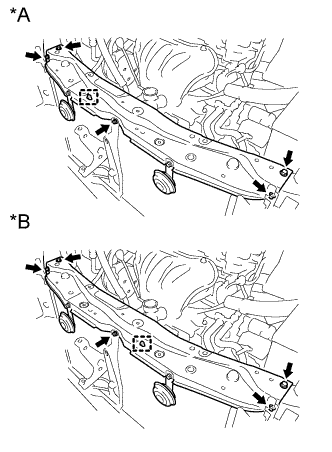
Text in Illustration *A for RHD *B for LHD Disengage the clamp and disconnect the hood lock control cable assembly from the upper radiator support.
-
Remove the 5 bolts and upper radiator support.
-
Remove the 2 radiator support cushions from the radiator assembly.
-
-
REMOVE RADIATOR ASSEMBLY
-
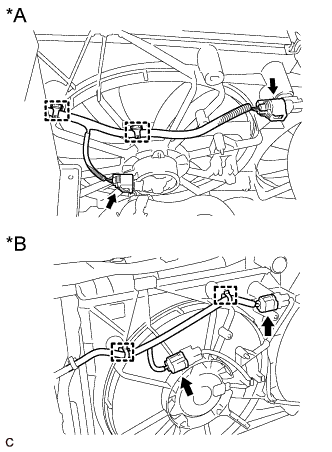
Text in Illustration *A for TMC, TMMR Made *B for TMMK Made Disconnect the cooling fan motor connector and No. 2 cooling fan motor connector.
-
Disengage the 2 clamps.
-
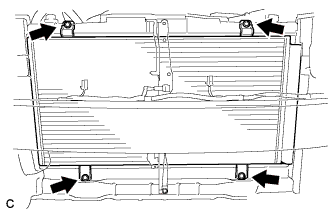
Remove the 4 bolts and separate the condenser assembly from the radiator assembly.
-
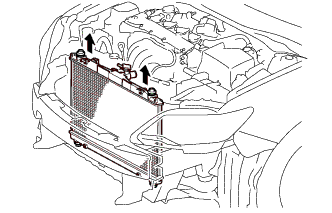
Remove the radiator assembly with the fan assembly from the vehicle.
Note
Do not apply any excessive force to the condenser assembly or pipe when removing the radiator assembly.
-
Remove the 2 lower radiator supports from the radiator assembly.
-
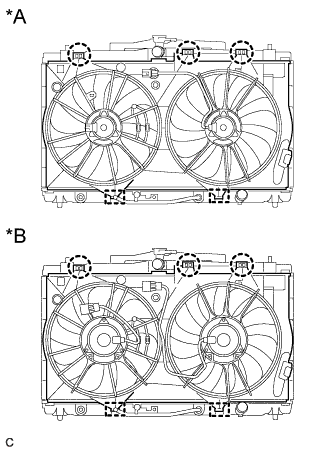
Text in Illustration *A for TMC, TMMR Made *B for TMMK Made Disengage the 3 claws.
-
Disengage the 2 guides and remove the fan assembly from the radiator assembly.
Note
Do not damage the radiator assembly when removing the fan assembly.
-