CAMSHAFT OIL CONTROL VALVE (for Intake Side) REMOVAL

-
REMOVE FRONT FENDER APRON SEAL RH
-
Remove the 2 bolts, clip and front fender apron seal RH.
-
-
REMOVE CAMSHAFT TIMING OIL CONTROL SOLENOID ASSEMBLY
-
SET NO. 1 CYLINDER TO TDC/COMPRESSION
-
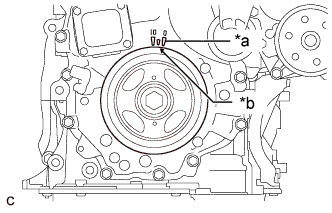
Text in Illustration *a Timing Mark "0" *b Timing Notch (Groove) Turn the crankshaft pulley until its timing notch (groove) is aligned with the timing mark "0" of the timing chain cover sub-assembly.
-
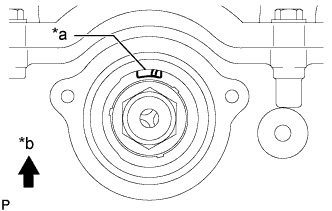
Text in Illustration *a Protrusion *b Top Check that the protrusion of the camshaft timing gear assembly is at the top.
Tech Tips
If the protrusion is not at the top, rotate the crankshaft pulley 360° clockwise and align the timing notch (groove) with the timing mark "0" again.
-
-
REMOVE CAMSHAFT TIMING GEAR BOLT
-
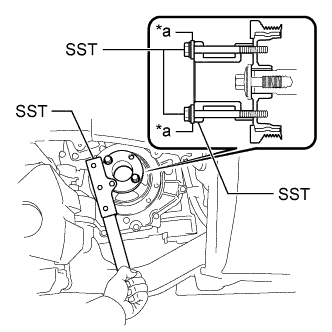
Text in Illustration *a Washers Using SST, hold the crankshaft pulley.
- SST
- 09213-54015 ( 09214-00030 )
- 09213-70011
- 09330-00021
Tech Tips
Insert a few washers (total thickness: approximately 5.0 mm (0.197 in.)) between SST (09213-70011) and SST (09214-00030).
-
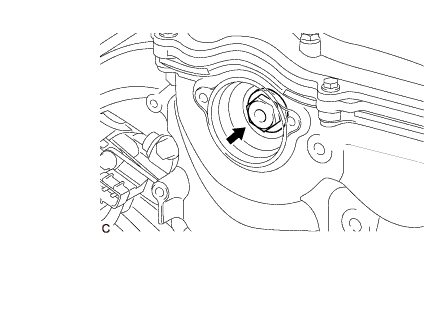
Remove the camshaft timing gear bolt.
Note
If the camshaft timing gear bolt has been struck or dropped, replace it.
-