STARTER DISASSEMBLY
-
REMOVE REPAIR SERVICE STARTER KIT
-
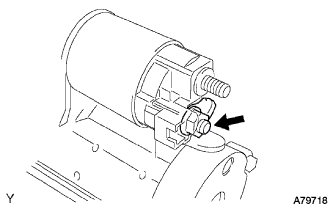
Remove the nut, and disconnect the field coil lead wire from terminal C.
-
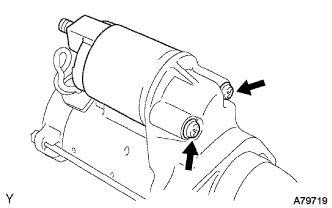
While holding the repair service starter kit to the No. 2 repair service starter kit, remove the 2 screws.
-
Remove the magnet switch from the No. 2 repair service starter kit.
-
Remove the return spring and plunger from the No. 2 repair service starter kit.
-
-
REMOVE STARTER YOKE ASSEMBLY
-
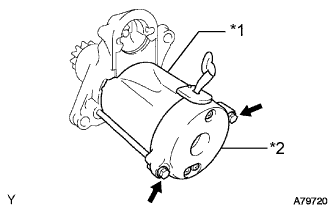
Text in Illustration *1 Starter Yoke Assembly *2 Starter Commutator End Frame Assembly Remove the 2 through bolts and pull out the starter yoke assembly together with the starter commutator end frame assembly.
-
-
REMOVE STARTER COMMUTATOR END FRAME ASSEMBLY
-
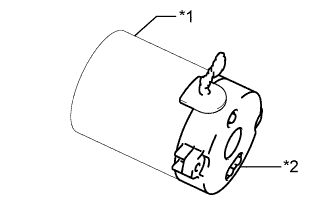
Text in Illustration *1 Starter Yoke Assembly *2 Starter Commutator End Frame Assembly Remove the starter commutator end frame assembly from the starter yoke assembly.
-
-
REMOVE STARTER ARMATURE PLATE
-
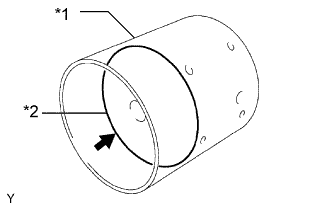
Text in Illustration *1 Starter Yoke Assembly *2 Starter Armature Plate Remove the starter armature plate from the starter yoke assembly.
-
-
REMOVE STARTER COMMUTATOR END FRAME COVER
-
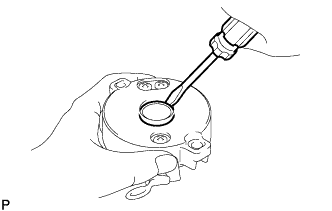
Using a screwdriver, pry out the starter commutator end frame cover from the starter commutator end frame assembly.
-
-
REMOVE STARTER ARMATURE ASSEMBLY
-
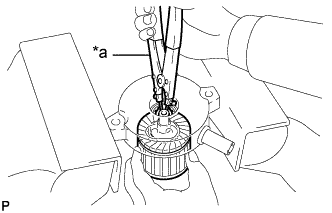
Text in Illustration *a Snap Ring Pliers Secure the starter commutator end frame assembly in a vise between aluminum plates.
Note
Do not overtighten the vise.
-
Using snap ring pliers, remove the snap ring and washer.
Note
Do not drop the starter armature assembly.
-
Remove the starter armature assembly from the starter commutator end frame assembly.
-
-
REMOVE PLANETARY GEAR
-
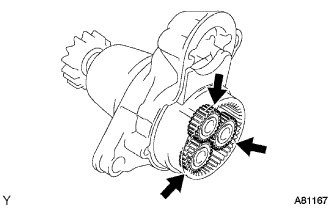
Remove the 3 planetary gears from the No. 2 repair service starter kit.
-