BACK DOOR(for Hatchback) REASSEMBLY
PROCEDURE
-
INSTALL BACK DOOR DAMPER STAY UPPER BRACKET LH
-
INSTALL BACK DOOR DAMPER STAY UPPER BRACKET RH
Tech Tips
Use the same procedure as for the LH side.
-
INSTALL BACK DOOR STAY ASSEMBLY LH
-
INSTALL BACK DOOR STAY ASSEMBLY RH
Tech Tips
Use the same procedure as for the LH side.
-
INSTALL REAR WIPER MOTOR GROMMET (w/ Rear Wiper)
-
INSTALL REAR WIPER MOTOR ASSEMBLY (w/ Rear Wiper)
-
INSTALL REAR WIPER ARM AND BLADE ASSEMBLY (w/ Rear Wiper)
-
INSTALL REAR WIPER ARM HEAD CAP (w/ Rear Wiper)
-
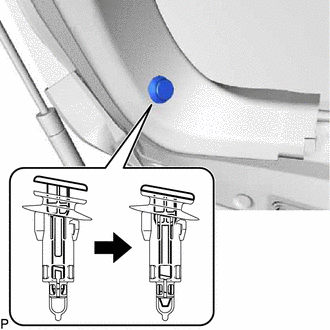
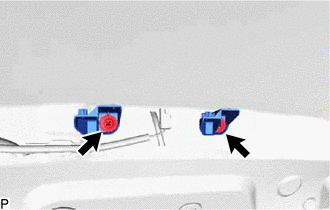
INSTALL BACK DOOR PANEL CUSHION
-
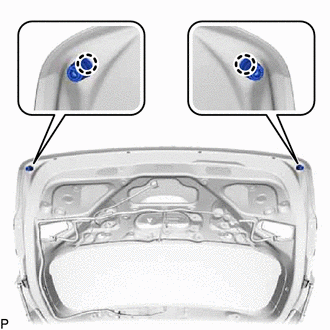
Engage the 2 claws to install the 2 new back door panel cushions.
-
-
INSTALL REAR TELEVISION CAMERA ASSEMBLY (w/ Rear View Monitor System)
-
INSTALL BACK DOOR OUTSIDE GARNISH SUB-ASSEMBLY
-
INSTALL BACK DOOR OPENER SWITCH ASSEMBLY
-
INSTALL REAR LIGHT ASSEMBLY LH
-
INSTALL REAR LIGHT ASSEMBLY RH
Tech Tips
Use the same procedure as for the LH side.
-
INSTALL BACK DOOR LOCK ASSEMBLY
-
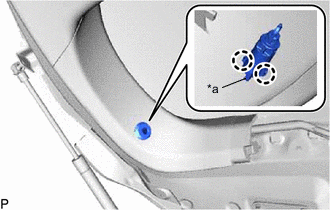
INSTALL BACK DOOR PANEL NO. 2 PROTECTOR (w/ Back Door Panel Protector)
-
Clean the back door panel sub-assembly.
-
Remove the release paper from a new back door panel No. 2 protector.
Tech Tips
After removing the release paper, keep the exposed adhesive free from foreign matter.
-
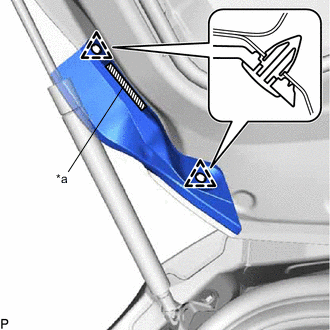
*a Double-sided Tape Engage the 2 clips and install the new back door panel No. 2 protector.
-
-
INSTALL BACK DOOR PANEL NO. 1 PROTECTOR (w/ Back Door Panel Protector)
Tech Tips
Use the same procedure as for the LH side.
-
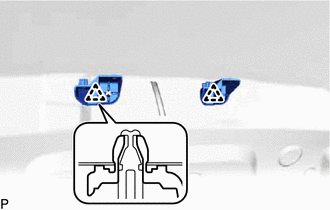
INSTALL BACK DOOR TRIM PANEL ASSEMBLY
-
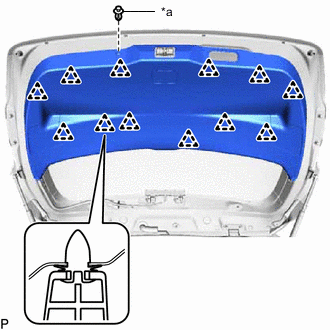
*a Clip <A> Engage the 12 clips to install the back door trim panel assembly.
-
Install the clip <A>.
-
-
INSTALL DOOR PULL HANDLE
-
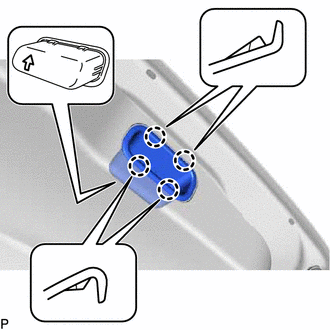
Engage the 4 claws to install the door pull handle.
Tech Tips
With the back door fully open, install the door pull handle so that the arrow on the backside of door pull handle points up.
-
-
INSTALL BACK DOOR SIDE GARNISH LH (w/ Back Door Side Garnish)
-
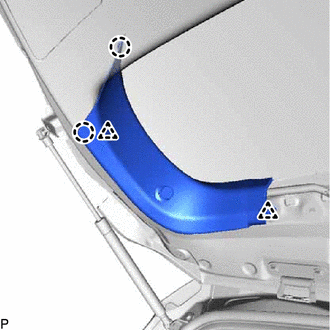
Engage the 2 clips and 2 claws, and install the back door side garnish LH.
-
*a Guide Align the guide with the cutout, engage the 2 claws, and install the package tray trim garnish hook.
-
Engage the pin.
-
-
INSTALL BACK DOOR SIDE GARNISH RH (w/ Back Door Side Garnish)
Tech Tips
Use the same procedure as for the LH side.
-
INSTALL REAR WASHER NOZZLE (w/ Rear Wiper)
-
INSPECT REAR WASHER NOZZLE (w/ Rear Wiper)
-
ADJUST REAR WASHER NOZZLE (w/ Rear Wiper)
-
INSTALL STOP CENTER BRACKET
-
Engage the 2 clips and install the 2 stop center brackets.
-
Install the 2 screws.
-
-
INSTALL CENTER STOP LIGHT ASSEMBLY
-
INSTALL BACK DOOR UPPER TRIM PANEL ASSEMBLY (w/o Back Door Side Garnish)
-
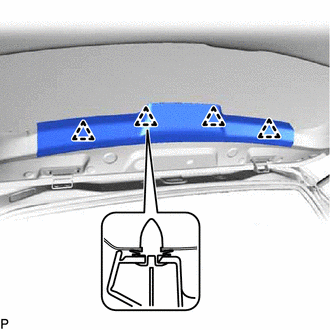
Engage the 4 clips and install the back door upper trim panel assembly.
-
-
INSTALL BACK DOOR UPPER TRIM PANEL ASSEMBLY (w/ Back Door Side Garnish)
-
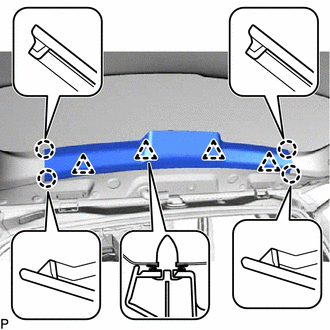
Engage the 4 clips and 4 claws, and install the back door upper trim panel assembly.
-