ROOF HEADLINING(for Sedan) REASSEMBLY
PROCEDURE
-
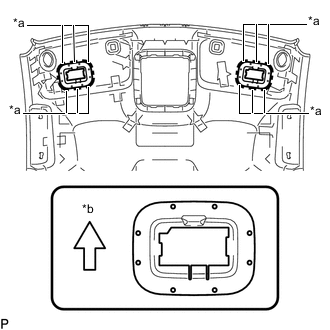
INSTALL NO. 1 HEADLINING LIGHT CASE
-

*a Marking *b Front Align the new No. 1 headlining light case with the marking on the roof headlining assembly and install it using hot-melt glue as shown in the illustration.
-
-
INSTALL NO. 2 HEADLINING LIGHT CASE (w/ Vanity Light)
-
*a Marking *b Front Align the 2 new No. 2 headlining light cases with the markings on the roof headlining assembly and install them using hot-melt glue as shown in the illustration.
-
-
INSTALL NO. 1 ROOF WIRE
-
Pass the No. 1 roof wire through the front tab of the roof headlining assembly.
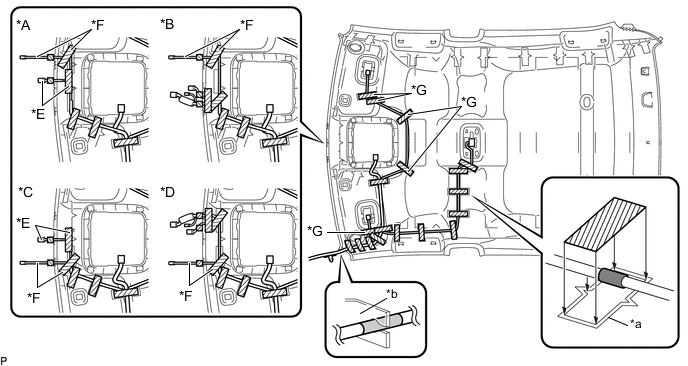
*A for LHD without Pre-crash Safety System *B for LHD with Pre-crash Safety System *C for RHD without Pre-crash Safety System *D for RHD with Pre-crash Safety System *E w/ EC Mirror *F w/ Rain Sensor *G w/ Vanity Light - - *a Marking *b Front Tab 
Positioning Tape (A) 
Positioning Tape (B) 
Adhesive Tape - - -
Align the positioning tape (A) on the front part of the No. 1 roof wire with the front tab of the roof headlining assembly.
-
Align the positioning tape (B) on the No. 1 roof wire with the markings on the roof headlining assembly.
-
Install the No. 1 roof wire to the roof headlining assembly with adhesive tape.
Note
-
Apply the tape securely in place.
-
Do not touch the adhesive surface when applying the tape to prevent adhesion failure.
-
-
-
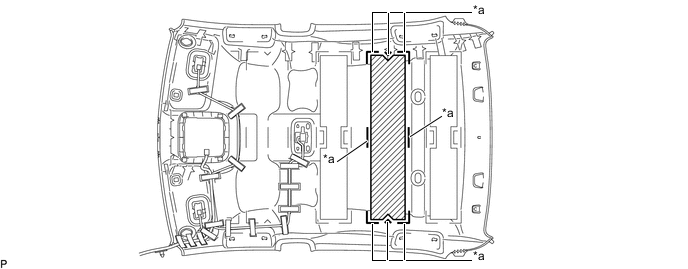
INSTALL NO. 2 ROOF SILENCER PAD
-
Align the 2 new No. 2 roof silencer pads with the markings on the roof headlining assembly and install them using hot-melt glue as shown in the illustration.
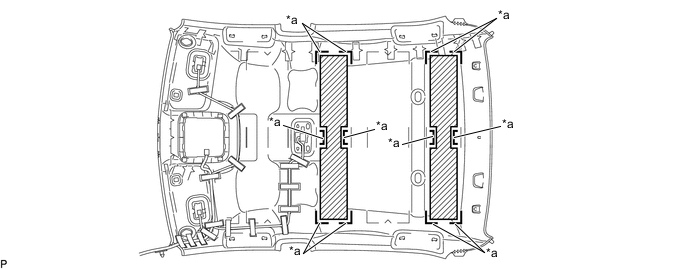
*a Marking - -
-
-
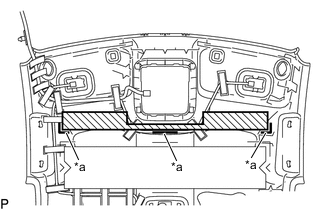
INSTALL NO. 1 ROOF SILENCER PAD (except Cold Area)
-
Align the 2 new No. 1 roof silencer pads with the markings on the roof headlining assembly and install them using hot-melt glue as shown in the illustration.
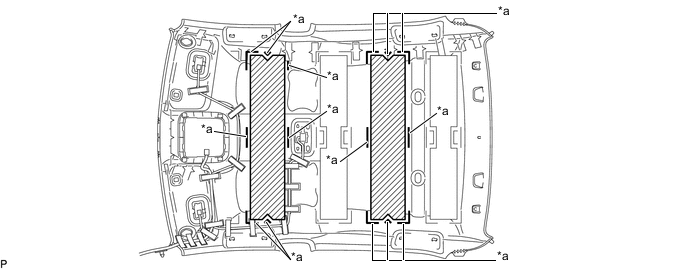
*a Marking - -
-
-
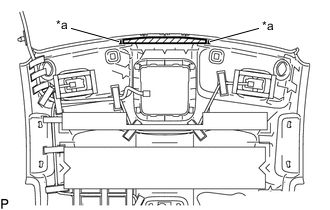
INSTALL NO. 1 ROOF SILENCER PAD (for Cold Area)
-
Align the new No. 1 roof silencer pad with the markings on the roof headlining assembly and install it using hot-melt glue as shown in the illustration.
*a Marking - -
-
-
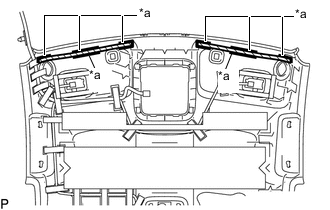
INSTALL FRONT ROOF SILENCER PAD (except Cold Area)
-
*a Marking Align the new front roof silencer pad with the markings on the roof headlining assembly and install it using hot-melt glue as shown in the illustration.
-
-
INSTALL ROOF SILENCER PAD (for Cold Area)
-
Remove the release paper from 2 new roof silencer pads.
Tech Tips
After removing the release paper, keep the exposed adhesive free from foreign matter.
-
*a Marking Align the 2 roof silencer pads with the markings on the roof headlining assembly and install them as shown in the illustration.
-
-
INSTALL NO. 4 ROOF SILENCER PAD (for Cold Area)
-
Remove the release paper from a new No. 4 roof silencer pad.
Tech Tips
After removing the release paper, keep the exposed adhesive free from foreign matter.
-
*a Marking Align the No. 4 roof silencer pad with the markings on the roof headlining assembly and install it as shown in the illustration.
-
-
INSTALL NO. 1 AMPLIFIER ANTENNA ASSEMBLY
-
INSTALL VANITY LIGHT ASSEMBLY (w/ Vanity Light)