FRONT CONSOLE BOX(for Sedan) DISASSEMBLY
PROCEDURE
-
REMOVE NO. 2 CONSOLE REAR END PANEL (for TMMT Made)
-
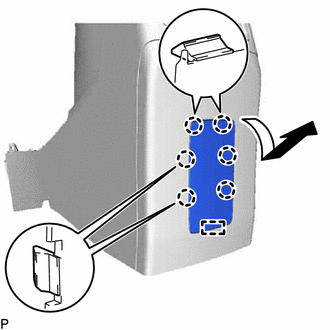
w/o Power Outlet Socket:
-
Disengage the 6 claws and guide to remove the No. 2 console rear end panel as shown in the illustration.
-
-
w/ Power Outlet Socket:
-
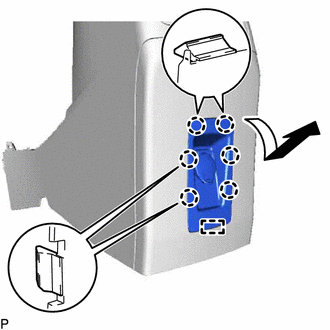
Disengage the 6 claws and guide as shown in the illustration.
-
-
-
REMOVE NO. 2 POWER OUTLET SOCKET ASSEMBLY (for TMMT Made)
w/ Power Outlet Socket: Click here
-
REMOVE NO. 2 POWER OUTLET SOCKET COVER (for TMMT Made)
w/ Power Outlet Socket: Click here
-
REMOVE CONSOLE REAR END PANEL
-
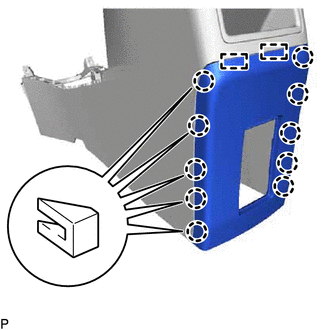
Disengage the 10 claws and 2 guides and remove the console rear end panel.
-
-
REMOVE CONSOLE COMPARTMENT BOX
-
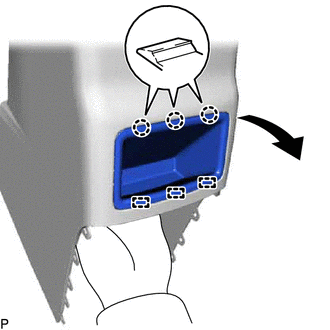
Disengage the 3 claws and 3 guides and remove the console compartment box as shown in the illustration.
-
-
REMOVE CONSOLE COMPARTMENT DOOR SUB-ASSEMBLY
-
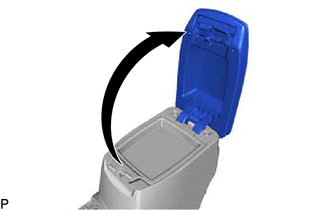
Open the console compartment door sub-assembly.
-
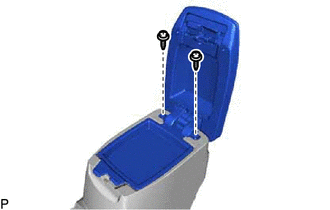
Remove the 2 screws and console compartment door sub-assembly.
-
-
REMOVE CONSOLE COMPARTMENT DOOR CUSHION
-
Fixed Console Door Type:
-
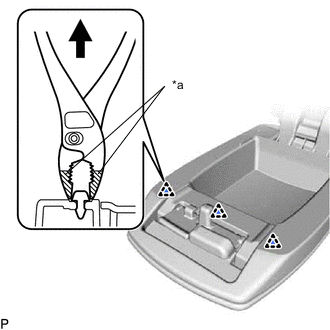
*a Protective Tape Using pliers, disengage the 3 clips to remove the 3 console compartment door cushions.
Tech Tips
Tape the tips of the pliers before use.
-
-
Slide Console Door Type:
-
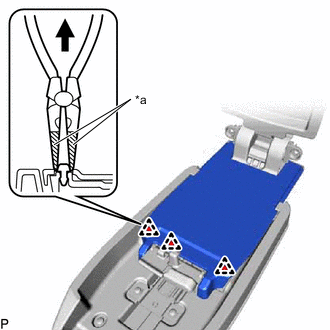
*a Protective Tape Using needle-nosed pliers, disengage the 3 clips to remove the 3 console compartment door cushions.
Tech Tips
Tape the tips of the needle-nosed pliers before use.
-
-