UPPER INSTRUMENT PANEL(for Hatchback, Wagon) INSTALLATION
PROCEDURE
-
INSTALL UPPER INSTRUMENT PANEL ASSEMBLY
-
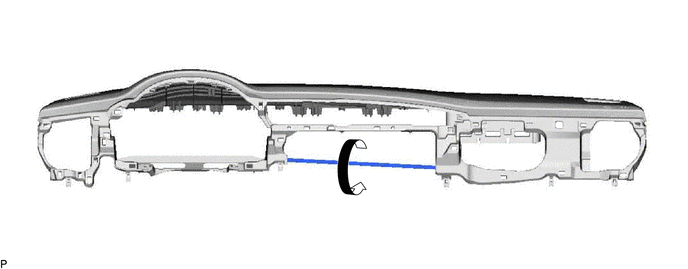
When using a new instrument panel sub-assembly:
-
Immediately before installing the upper instrument panel assembly, twist and cut off the portion shown in the illustration.
-
-
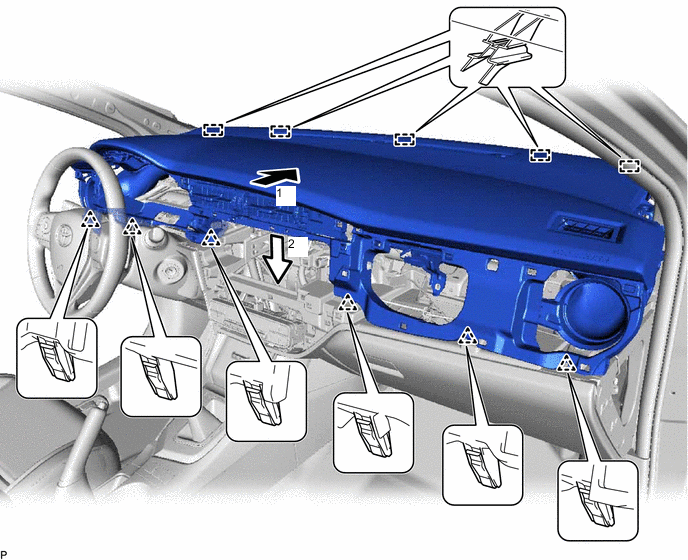
Push the upper instrument panel assembly in the direction indicated by the arrow (1) to engage the 5 guides.
-
Push the upper instrument panel assembly in the direction indicated by the arrow (2) to engage the 6 clips to install the upper instrument panel assembly.
-
Install the instrument panel passenger airbag assembly bolt <A>.
- Torque:
- 20 N*m { 204 kgf*cm, 15 ft.*lbf }
-
Install the 2 clips.
-
-
CONNECT NO. 2 INSTRUMENT PANEL WIRE
-
INSTALL CENTER INSTRUMENT CLUSTER FINISH PANEL
-

Engage the guide, 5 claws and 7 clips to install the center instrument cluster finish panel.
-
-
INSTALL INSTRUMENT PANEL FINISH PANEL SUB-ASSEMBLY
-
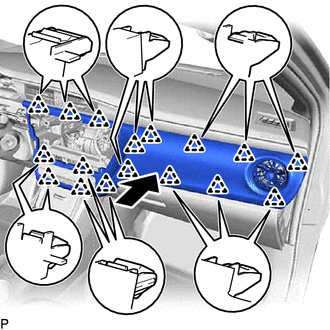
Engage the 17 clips to install the instrument panel finish panel sub-assembly as shown in the illustration.
-
-
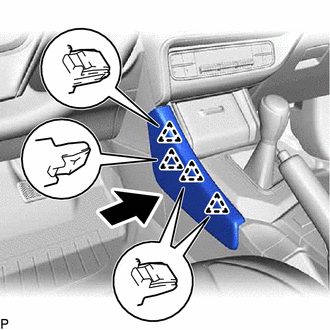
INSTALL INSTRUMENT SIDE PANEL RH
-
Push the instrument side panel RH in the direction indicated by the arrow (1) to engage the 2 guides and push it in the direction indicated by the arrow (2) to engage the 6 clips to install the instrument side panel RH.
-
-
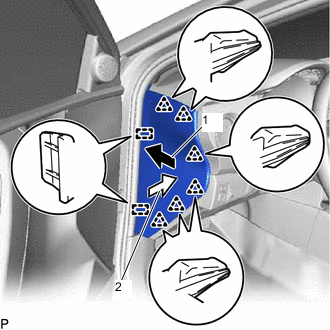
INSTALL FRONT PILLAR GARNISH RH
Tech Tips
Use the same procedure as for the LH side.
-
INSTALL FRONT DOOR OPENING TRIM WEATHERSTRIP RH
-
INSTALL UPPER INSTRUMENT CLUSTER FINISH PANEL SUB-ASSEMBLY
-
Engage the 4 clips to install the upper instrument cluster finish panel sub-assembly.
-
-
INSTALL INSTRUMENT SIDE PANEL LH
-
Push the instrument side panel LH in the direction indicated by the arrow (1) to engage the 2 guides and push it in the direction indicated by the arrow (2) to engage the 6 clips to install the instrument side panel LH.
-
-
INSTALL FRONT PILLAR GARNISH LH
-
INSTALL FRONT DOOR OPENING TRIM WEATHERSTRIP LH
-
INSTALL COMBINATION METER ASSEMBLY
-
INSTALL INSTRUMENT CLUSTER FINISH PANEL ASSEMBLY
-
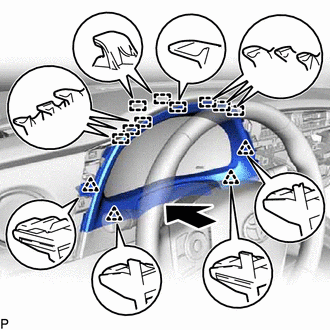
Engage the 9 guides and 4 clips to install the instrument cluster finish panel assembly as shown in the illustration.
-
-
INSTALL NO. 1 METER HOOD CLUSTER
-
Engage the 3 clips to install the No. 1 meter hood cluster.
-
-
INSTALL CENTER INSTRUMENT CLUSTER FINISH PANEL SUB-ASSEMBLY
-
Connect each connector.
-
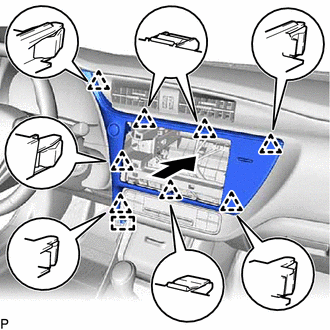
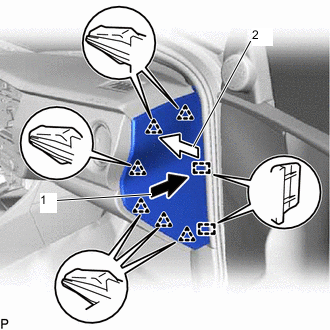
Engage the guide and 8 clips to install the center instrument cluster finish panel sub-assembly as shown in the illustration.
-
-
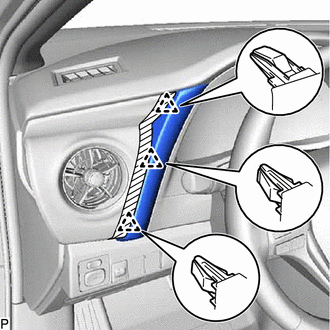
INSTALL LOWER NO. 2 INSTRUMENT PANEL FINISH PANEL
-
Engage the 4 clips to install the lower No. 2 instrument panel finish panel as shown in the illustration.
-
-
CONNECT CABLE TO NEGATIVE BATTERY TERMINAL
Note
When disconnecting the cable, some systems need to be initialized after the cable is reconnected.
-
INSPECT SRS WARNING LIGHT