POWER OUTLET SOCKET(for Sedan) REMOVAL
PROCEDURE
-
REMOVE LOWER NO. 2 INSTRUMENT PANEL FINISH PANEL
-
REMOVE SHIFT LEVER KNOB SUB-ASSEMBLY
-
REMOVE SHIFTING HOLE BEZEL
-
REMOVE POSITION INDICATOR HOUSING ASSEMBLY (for CVT)
-
REMOVE UPPER CONSOLE PANEL SUB-ASSEMBLY
-
REMOVE UPPER CONSOLE PANEL
-
REMOVE INSTRUMENT PANEL BOX ASSEMBLY
-
REMOVE SEAT HEATER SWITCH (w/ Seat Heater System)
-
REMOVE NO. 1 STEREO JACK ADAPTER ASSEMBLY (w/ Radio Receiver)
-
REMOVE NO. 1 POWER OUTLET SOCKET ASSEMBLY
-
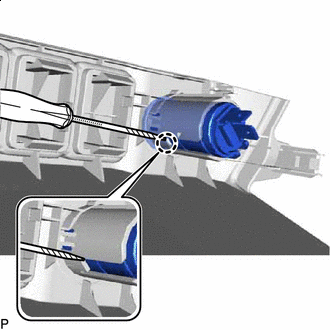

Protective Tape Using a screwdriver with its tip wrapped with protective tape, disengage the claw and remove the No. 1 power outlet socket assembly.
-
-
REMOVE NO. 1 POWER OUTLET SOCKET COVER
-
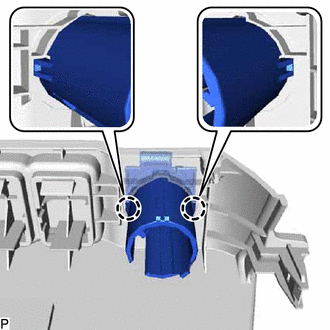
Disengage the 2 claws to remove the No. 1 power outlet socket cover.
-