REAR POWER OUTLET SOCKET(for Wagon) REMOVAL
PROCEDURE
-
REMOVE DECK BOARD SUB-ASSEMBLY (w/ Deck Board)
-
REMOVE DECK BOARD ASSEMBLY (w/ Deck Board)
-
REMOVE FRONT DECK FLOOR BOX (w/ Deck Board)
-
REMOVE REAR FLOOR MAT ASSEMBLY
-
REMOVE NO. 3 DECK BOARD SUB-ASSEMBLY (w/ Deck Board)
-
REMOVE DECK FLOOR BOX LH (w/o Woofer)
-
REMOVE TONNEAU COVER ASSEMBLY
-
REMOVE ROOM PARTITION NET ASSEMBLY (w/ Partition Net)
-
REMOVE REAR DECK TRIM COVER
-
REMOVE REAR SEAT ASSEMBLY
-
REMOVE REAR DOOR SCUFF PLATE LH
-
REMOVE REAR DOOR OPENING TRIM WEATHERSTRIP LH
-
REMOVE REAR SEATBACK HINGE SUB-ASSEMBLY LH
-
REMOVE REAR SEAT SIDE GARNISH LH
-
REMOVE NO. 2 DECK SIDE TRIM HOOK (for LH Side)
-
REMOVE RECLINING REMOTE CONTROL BEZEL LH
-
REMOVE DECK TRIM SIDE PANEL ASSEMBLY LH
-
REMOVE NO. 1 REAR POWER OUTLET SOCKET ASSEMBLY
-
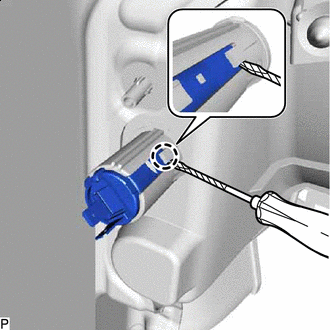

Protective Tape Using a screwdriver with its tip wrapped with protective tape, disengage the claw and remove the No. 1 rear power outlet socket assembly.
-
-
REMOVE REAR POWER OUTLET SOCKET COVER
-
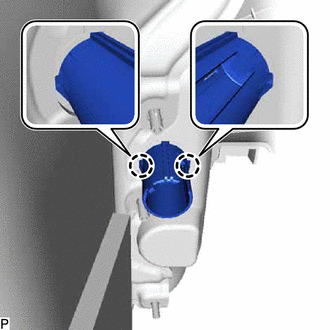
Disengage the 2 claws to remove the rear power outlet socket cover.
-