REAR SEAT ASSEMBLY(for Hatchback) REASSEMBLY
PROCEDURE
-
INSTALL BENCH TYPE REAR SEAT CUSHION COVER
-
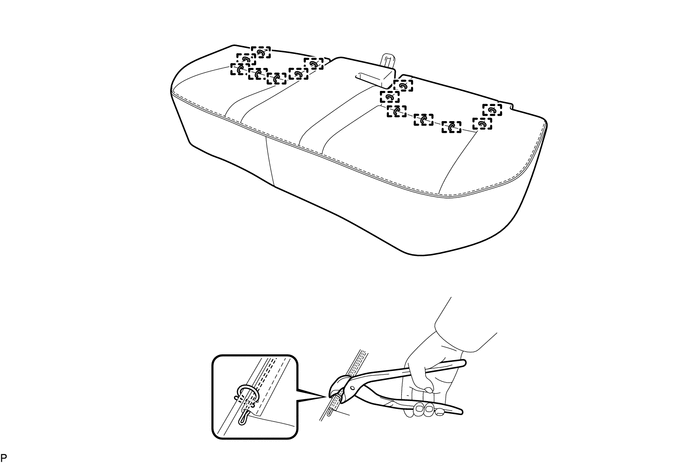
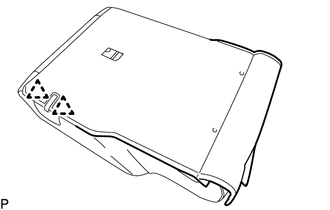
Temporarily install the bench type rear seat cushion cover to the bench type rear seat cushion pad.
-
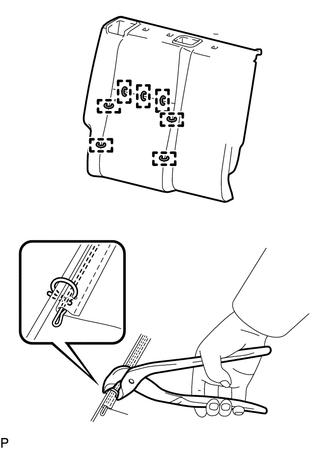
Using hog ring pliers, install 14 new hog rings.
Note
-
Be careful not to damage the bench type rear seat cushion cover.
-
Be sure to securely install the hog rings as shown in the illustration while preventing wrinkles from forming on the bench type rear seat cushion cover.
-
-
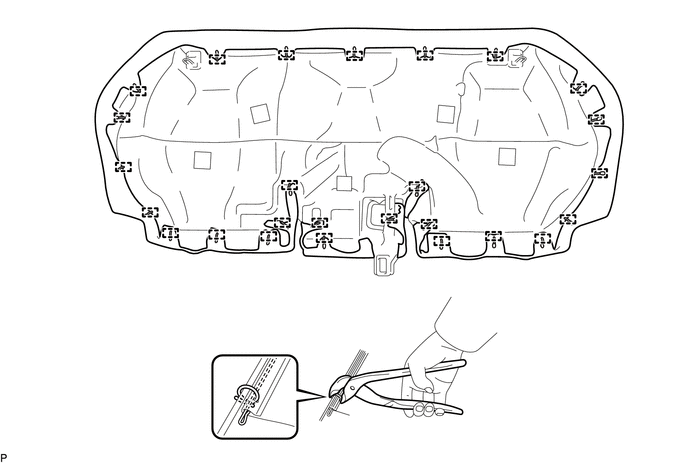
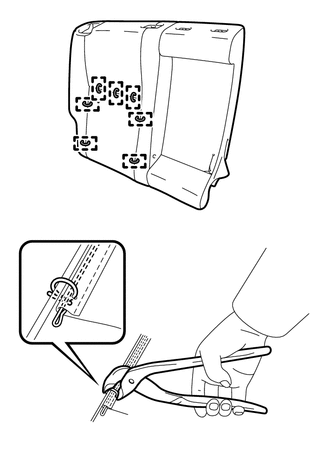
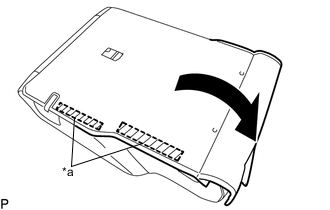
Using hog ring pliers, install 26 new hog rings.
Note
-
Be careful not to damage the bench type rear seat cushion cover.
-
Be sure to securely install the hog rings as shown in the illustration while preventing wrinkles from forming on the bench type rear seat cushion cover.
-
-
-
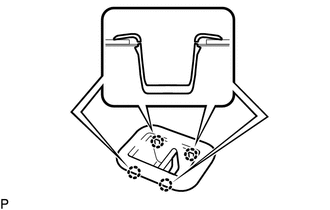
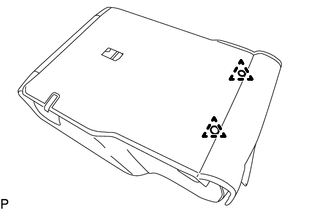
INSTALL REAR SEAT LOCK CONTROL LEVER SUB-ASSEMBLY RH (for RH Side)
-
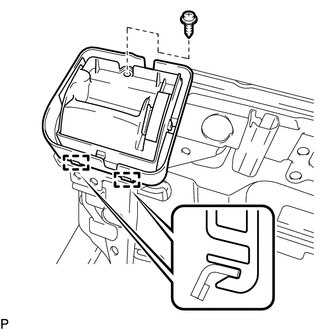
Engage the 2 guides.
-
Install the rear seat lock control lever sub-assembly RH with the screw.
- Torque:
- 2.0 N*m { 20 kgf*cm, 18 in.*lbf }
-
-
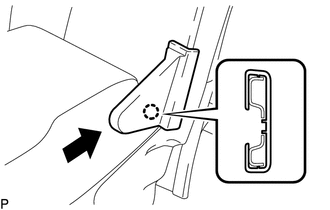
INSTALL REAR SEATBACK LOCK ASSEMBLY RH (for RH Side)
-
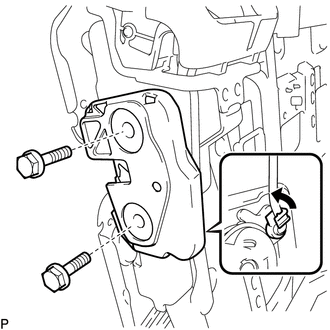
Engage the lock clip as shown in the illustration.
-
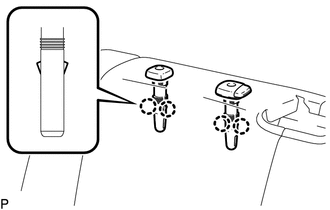
Install the rear seatback lock sub-assembly RH with the 2 bolts.
- Torque:
- 24 N*m { 245 kgf*cm, 18 ft.*lbf }
-
-
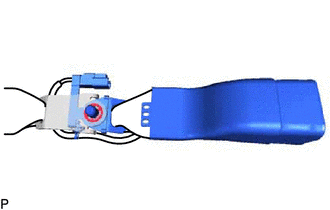
INSTALL REAR CENTER SEAT OUTER BELT ASSEMBLY (for RH Side)
-
INSTALL SEPARATE TYPE REAR SEATBACK COVER RH (for RH Side)
-
Temporarily install the separate type rear seatback cover RH to the separate type rear seatback pad RH.
-
w/o Center Armrest:
-
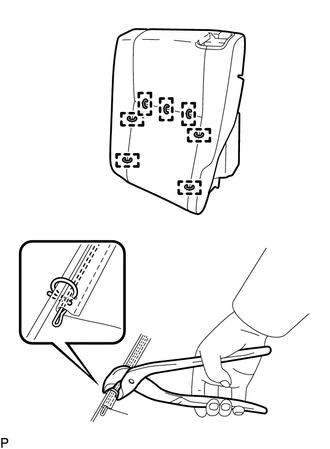
Using hog ring pliers, install the separate type rear seatback cover RH to the separate type rear seatback pad RH with 7 new hog rings.
Note
-
Be careful not to damage the separate type rear seatback cover RH.
-
Be sure to securely install the hog rings as shown in the illustration while preventing wrinkles from forming on the separate type rear seatback cover RH.
-
-
-
w/ Center Armrest:
-
Using hog ring pliers, install the separate type rear seatback cover RH to the separate type rear seatback pad RH with 7 new hog rings.
Note
-
Be careful not to damage the separate type rear seatback cover RH.
-
Be sure to securely install the hog rings as shown in the illustration while preventing wrinkles from forming on the separate type rear seatback cover RH.
-
-
-
-
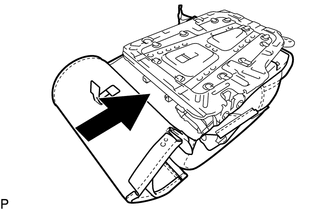
INSTALL SEATBACK COVER WITH PAD (for RH Side)
-
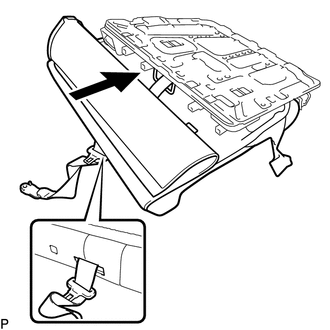
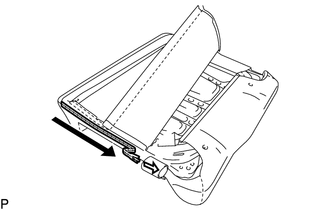
Pass the rear center seat outer belt assembly through the seatback cover with pad as shown in the illustration.
-
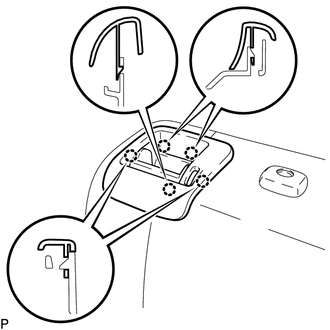
Engage the 2 guides and 2 claws to install the rear seat shoulder belt cover.
-
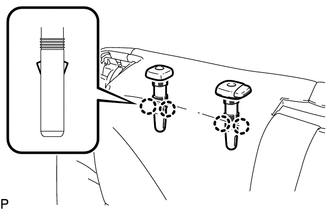
Engage the 4 claws to install the 2 rear seat headrest supports.
-
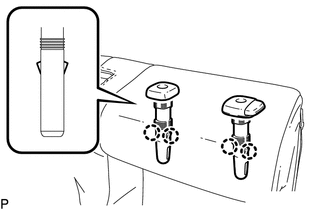
w/ Center Headrest:
-
Engage the 4 claws to install the 2 rear seat headrest supports.
-
-
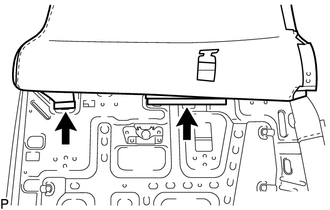
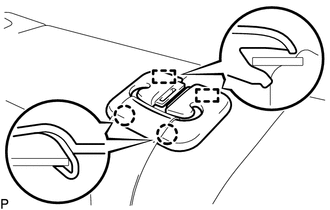
Engage the 2 hooks.
-
Engage the 3 hooks.
-
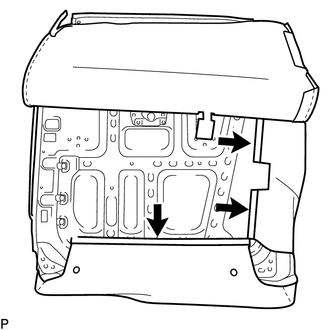
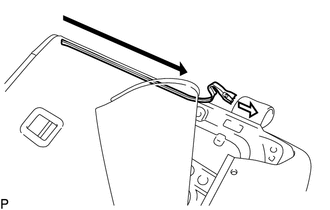
Close the fastener as shown in the illustration.
-

Engage the 2 clips.
-
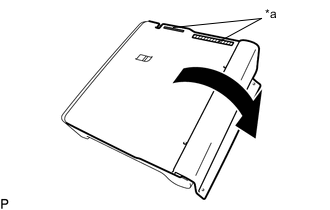
*a Fastener Engage the 2 fasteners as shown in the illustration.
-
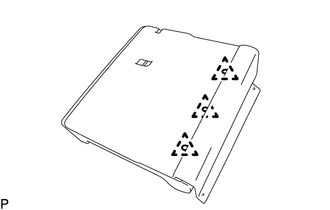
Install the 3 clips.
-
-
INSTALL REAR SEATBACK LOCK BEZEL (for RH Side)
-
Engage the 5 claws to install a new rear seatback lock control bezel RH.
-
-
INSTALL SEAT BELT ANCHOR COVER CAP (for RH Side)
-
Engage the 2 claws to install the seat belt anchor cover cap.
-
-
INSTALL REAR SEAT CENTER ARMREST ASSEMBLY (w/ Center Armrest)
-
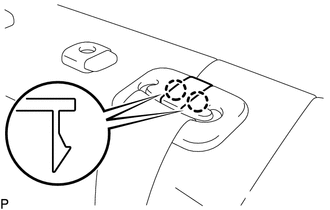
Install the bush as shown in the illustration.
-
Engage the pin as indicated by the arrows, in the order shown in the illustration.
-
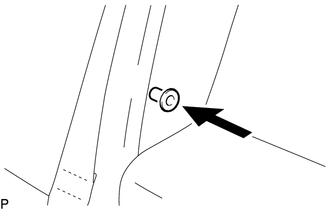
Install the rear seat center armrest assembly with the bolt and bush.
- Torque:
- 6.0 N*m { 61 kgf*cm, 53 in.*lbf }
-
-
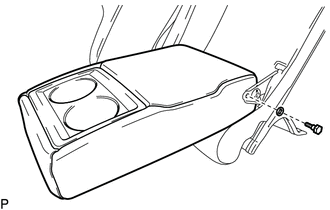
INSTALL CENTER ARMREST HINGE COVER (w/ Center Armrest)
-
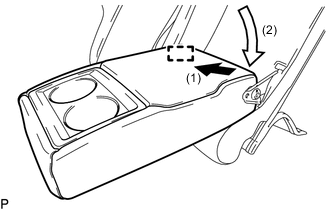
Engage the claw to install the center armrest hinge cover as shown in the illustration.
-
-
INSTALL REAR SEATBACK COVER (for RH Side)
-
Engage the 4 claws to install the rear seatback cover.
-
-
INSTALL REAR SEAT INNER WITH CENTER BELT ASSEMBLY RH (for RH Side)
-
Install the washer to connect the rear seat inner with center belt assembly RH to the rear center seat outer belt assembly.
-
-
INSTALL REAR SEAT LOCK CONTROL LEVER SUB-ASSEMBLY LH (for LH Side)
Tech Tips
Use the same procedure as for the RH side.
-
INSTALL REAR SEATBACK LOCK ASSEMBLY LH (for LH Side)
Tech Tips
Use the same procedure as for the RH side.
-
INSTALL SEPARATE TYPE REAR SEATBACK COVER LH (for LH Side)
-
Temporarily install the separate type rear seatback cover LH to the separate type rear seatback pad LH.
-
Using hog ring pliers, install the separate type rear seatback cover LH to the separate type rear seatback pad LH with 7 new hog rings.
Note
-
Be careful not to damage the separate type rear seatback cover LH.
-
Be sure to securely install the hog rings as shown in the illustration while preventing wrinkles from forming on the separate type rear seatback cover LH.
-
-
-
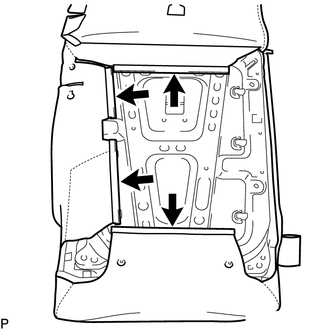
INSTALL SEATBACK COVER WITH PAD (for LH Side)
-
Temporarily install the seatback cover with pad to the rear seatback frame sub-assembly as shown in the illustration.
-
Engage the 4 claws to install the 2 rear seat headrest supports.
-
Engage the 4 hooks.
-
Close the fastener as shown in the illustration.
-
Engage the 2 clips.
-
*a Fastener Engage the 2 fasteners as shown in the illustration.
-
Install the 2 clips.
-
-
INSTALL REAR SEATBACK LOCK BEZEL LH (for LH Side)
Tech Tips
Use the same procedure as for the RH side.
-
INSTALL REAR SEATBACK COVER (for LH Side)
Tech Tips
Use the same procedure as for the RH side.