NOISE FILTER(for Sedan) REMOVAL
PROCEDURE
-
REMOVE REAR SEATBACK ASSEMBLY LH
-
REMOVE REAR DOOR SCUFF PLATE LH
-
DISCONNECT REAR DOOR OPENING TRIM WEATHERSTRIP LH
-
REMOVE REAR SEATBACK HINGE SUB-ASSEMBLY
-
REMOVE REAR SEAT SIDE GARNISH LH
-
REMOVE ROOF SIDE INNER GARNISH ASSEMBLY LH
-
REMOVE RADIO SETTING CONDENSER
Note
When the terminal covers are removed, the radio setting condenser must be replaced because the terminal covers and condenser are supplied as a set.
-
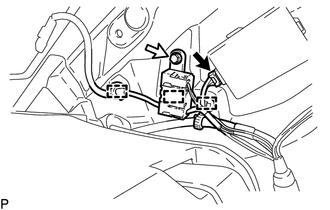
Disconnect the connector.
-
Remove the bolt.
-
Disengage the 3 clamps and disconnect the radio setting condenser with wire harness from the vehicle body.
-
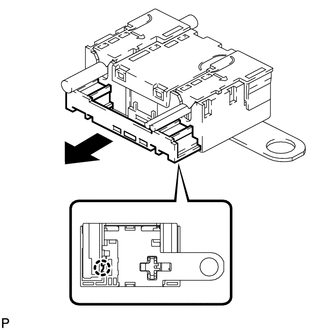
Disengage the claw and pull out the cover as shown in the illustration.
-
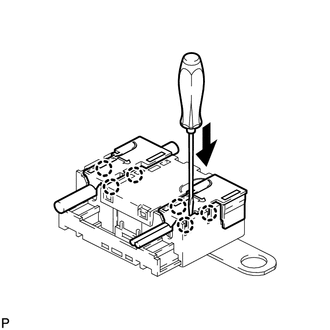
Using a screwdriver, disengage the 6 claws and remove the 2 terminal covers with wire harness from the condenser.
-
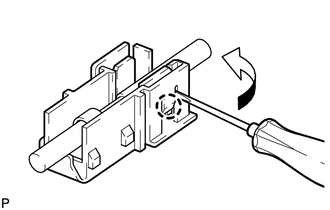
Using a screwdriver, bend back and break off the claw as shown in the illustration.
-
Remove the terminal cover from the wire harness.
Note
-
Make sure to hold the crimping side of the terminal when disconnecting the wire harness from the terminal cover.
-
Make sure not to bend the exposed wire when disconnecting the wire harness from the terminal cover.
-
Check for deformation of the terminal after the wire harness has been removed from the terminal cover.
-
-