BRAKE BOOSTER(for RHD) REMOVAL
CAUTION / NOTICE / HINT
Note
Make sure to release vacuum from the brake booster assembly before removing the brake master cylinder sub-assembly from the brake booster assembly.
PROCEDURE
-
REMOVE BRAKE MASTER CYLINDER SUB-ASSEMBLY
-
REMOVE NO. 1 INSTRUMENT PANEL UNDER COVER SUB-ASSEMBLY (w/ Instrument Panel Under Cover)
for Sedan: Click here
for Hatchback, Wagon: Click here
-
REMOVE SECURITY HORN ASSEMBLY (w/ Security Horn)
-
REMOVE CLUTCH MASTER CYLINDER ASSEMBLY (for Manual Transaxle)
-
REMOVE BRAKE PEDAL RETURN SPRING
-
LOOSEN LOCK NUT
-
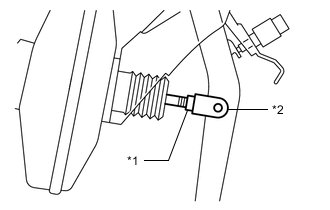
*1 Lock Nut *2 Brake Master Cylinder Push Rod Clevis Loosen the lock nut of the brake master cylinder push rod clevis.
-
-
REMOVE PUSH ROD PIN
-
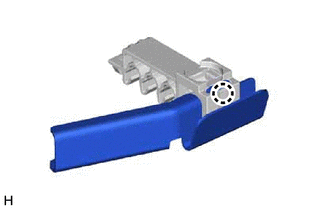
DISCONNECT CHECK VALVE TO CONNECTOR TUBE HOSE
-
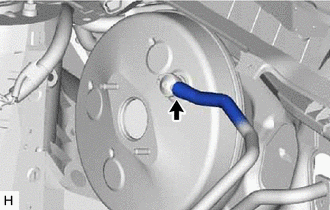
Slide the clip and disconnect the check valve to connector tube hose from the brake booster assembly.
-
-
REMOVE NO. 2 BRAKE TUBE CLAMP (for 1NR-FE)
-
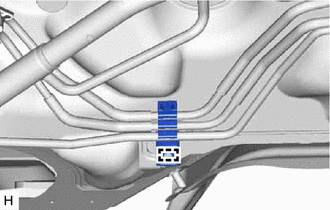
Disengage the clamp to remove the No. 2 brake tube clamp.
-
-
REMOVE NO. 2 BRAKE TUBE CLAMP (for 1ZR-FAE)
-
Disengage the clamp to remove the No. 2 brake tube.
-
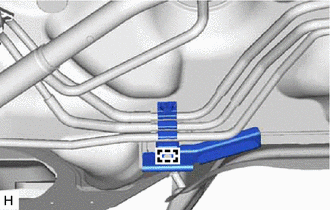
Disengage the claw to remove the brake tube heat insulator from the No. 2 brake tube clamp.
-
-
REMOVE NO. 2 BRAKE TUBE CLAMP (for 1ND-TV)
-
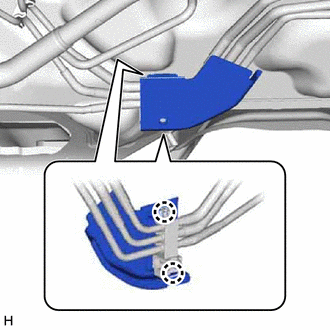
Disengage the 2 claws to remove the brake tube heat insulator from the No. 2 brake tube clamp.
-
Disengage the clamp to remove the No. 2 brake tube clamp.
-
-
REMOVE BRAKE BOOSTER ASSEMBLY
-
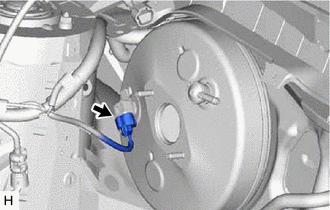
w/ Stop and Start System:
Disconnect the connector from the vacuum sensor assembly.
-
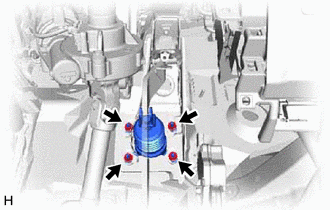
Remove the 4 nuts and push the brake booster assembly toward the engine compartment.
Note
Do not apply excessive force to the brake lines.
-
Remove the brake master cylinder push rod clevis and lock nut from the brake booster assembly.
-
Remove the brake booster assembly from the vehicle body.
Note
Do not apply excessive force to the brake lines or refrigerant lines.
-
-
REMOVE BRAKE BOOSTER GASKET